Daihatsu Copen Engine Overhaul
First, I drained the coolant, engine oil, and transmission oil, removed the bolts from under the sway bar and strut, shook the angle of the hub to pull out the drive shaft, and pried the drive shaft off the transmission side with a crowbar.
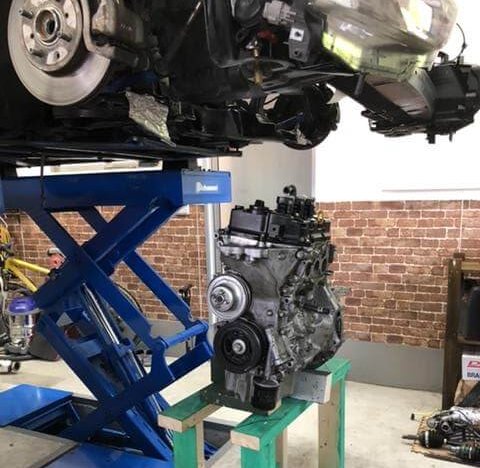
I removed the front side of the muffler, disconnected the battery, disconnected the water hoses, disconnected the harness couplers, removed the intercooler, intake hoses, intake manifold, removed the turbine with the exhaust manifold (leaving the oil lines attached to the turbine), removed the lower center engine mount, put the engine on a dolly and removed the left and right engine mounts. The engine was then placed on a dolly, the mounts were removed from both sides, and the vehicle was lifted up and the engine and transmission were lowered.
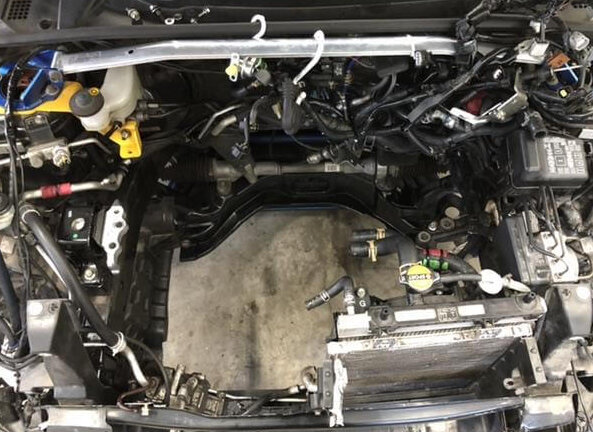
I left the compressor, condenser, radiator, etc. in the car. I removed the alternator because it hits the member when I unload it.
I couldn’t lift it, so I slid the dolly and workbench up to the same height.

The head cover is open. There is nothing wrong with it.
Removing the oil pan, I came face to face with the crank. No damage was found. There is no steel plate on the oil pan side either.
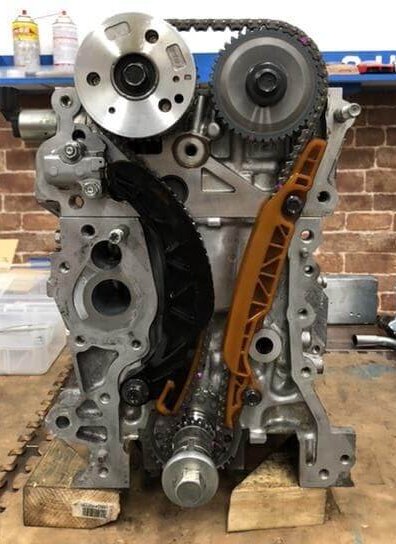
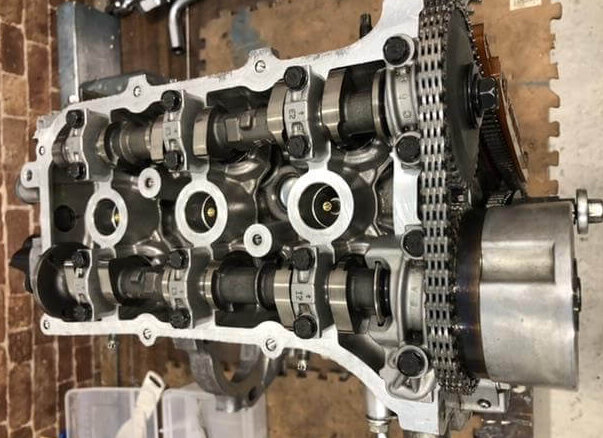
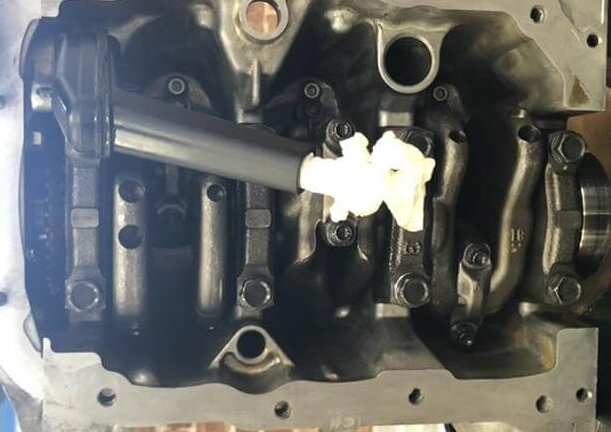
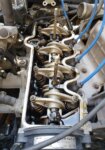
Remove the front cover and the water pump. This area is also fine. Remove the chain by pushing the chain plunger all the way in and loosening it, then remove the cam while referring to the maintenance manual.
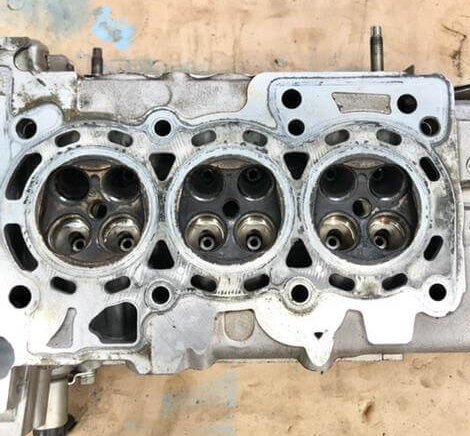
Removed the head cylinder and checked the combustion chamber. There was a lot of carbon sludge in the chamber.
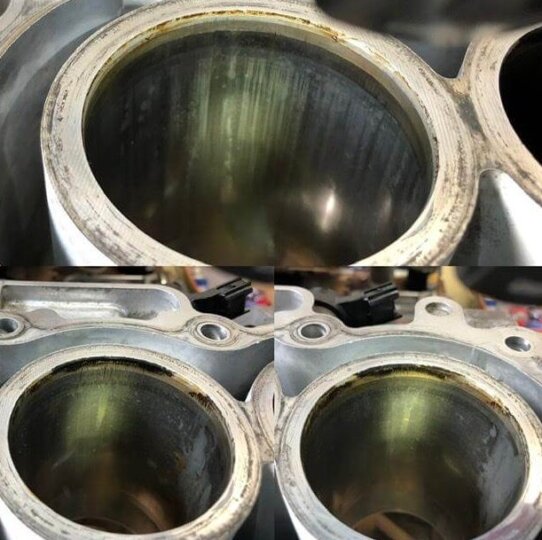
Removed the 2 x 3 bolts securing the crankshaft and connecting rod, pushed the piston upward and pulled it out, and checked the inside wall of the cylinder. There is a slight scratch on the first cylinder, but I guess it is acceptable.
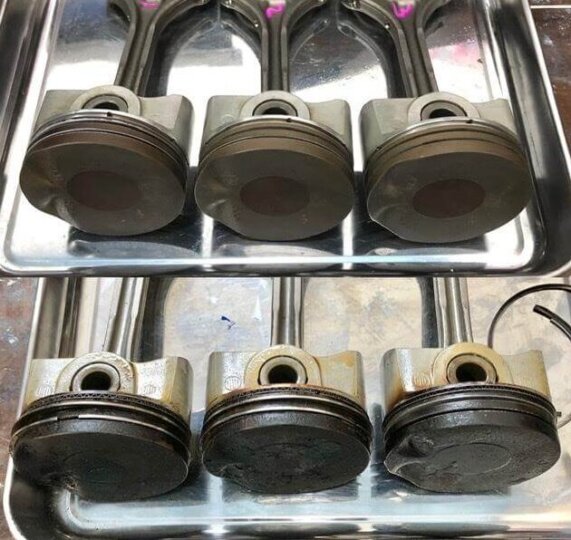
When I removed the pistons, I found that the piston rings in cylinder #1 were cracked! This would cause the oil to rise. The coating on the piston was also peeling off, so I replaced the piston, connecting rod, and metal set for #1 only, and also replaced the piston rings for all cylinders. I also replaced the piston rings in all cylinders. I cleaned the dirt with engine conditioner.
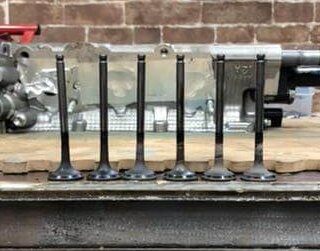
One of the valves on the exhaust side was also bent, so that was also replaced. This would have caused a compression leak.
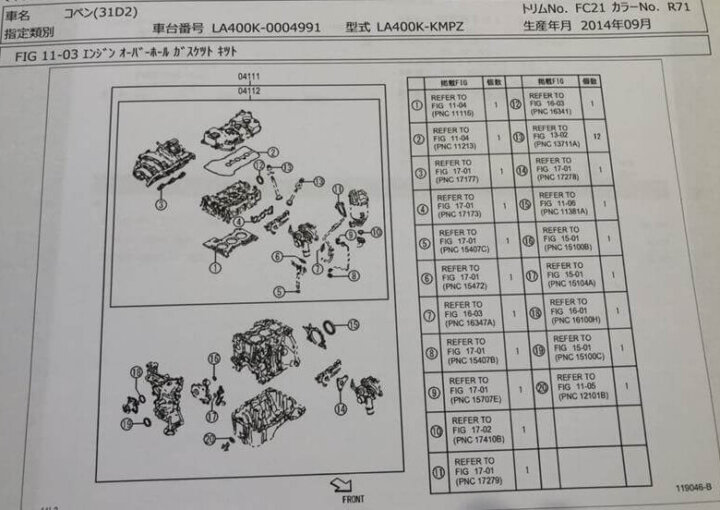
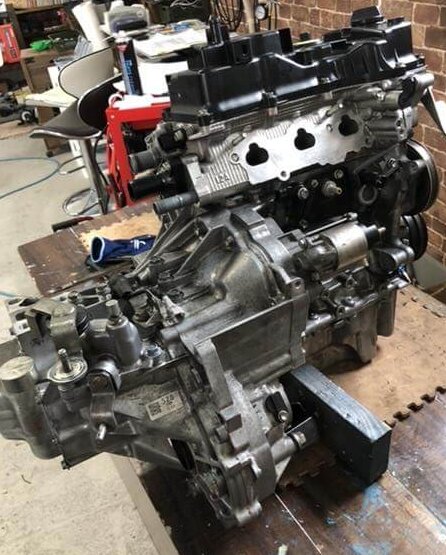
The rest seemed to be OK, so I used the overhaul kit to replace the gaskets and reassemble. New plugs were also installed. The total cost of parts was about $600. I also had to buy some tools, so I spent another $300 or so. The engine blew and it took less than a thousand dollars to fix it, so I guess it was cheap.
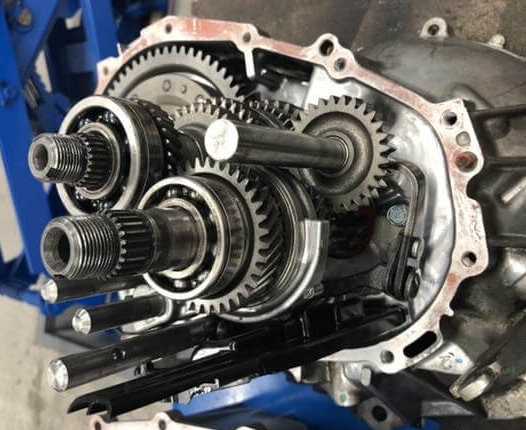
I also took the transmission apart and checked it. There wasn’t much wear on the synchros and shift fork, so I didn’t do anything and restored it.
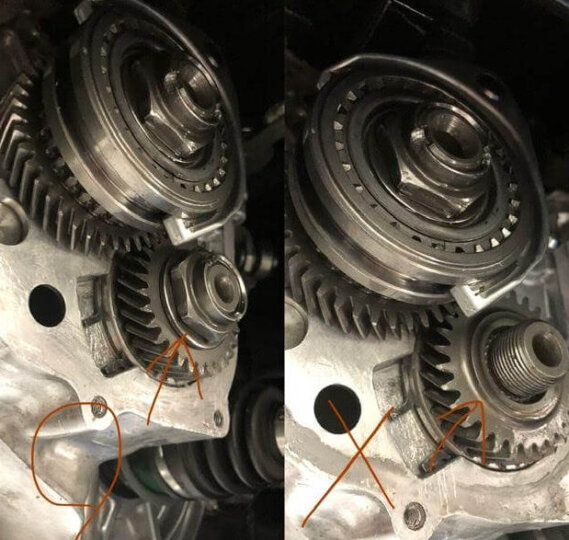
The gears on the 5th gear countershaft side can be assembled in reverse, so I made a mistake once and when I tried to move it, it made a rattling noise.

Another trap. If the shift selector spring is not hooked in the position shown in the picture, it will not go into reverse; it is a stopper mechanism that prevents the car from going into reverse from 5th gear, but if the spring is not assembled correctly, it will not go into reverse once it is in 5th gear.
It’s done!
- Previous Posts
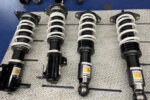
Does it need to break-in the suspension? How should I break-in? 2021.10.06
- Next Post
Nissan Figaro How to Adjust Valve Clearance 2022.01.23