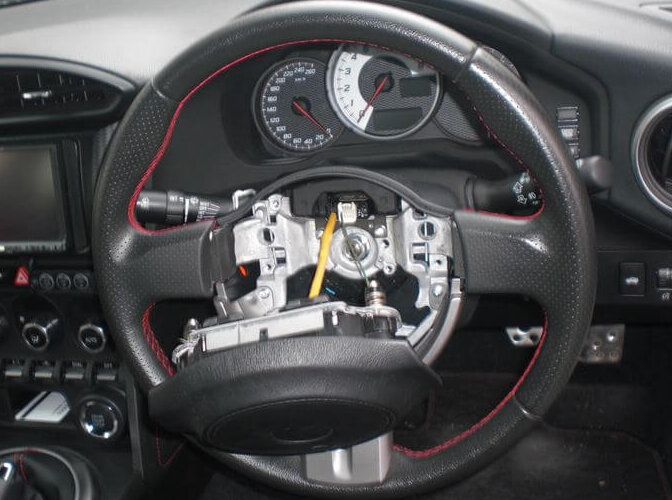
Before disconnecting the steering wheel, first disconnect the negative terminal of the battery. Next, if you look at the red circle in the photo from the side, there is a hole. Insert a flat-blade screwdriver there to unlock the airbag. (3 places) Yes, the airbag has come off. It’s easy. Use a flat-blade screwdriver to pry the airbag terminal slightly to remove it. Now, let’s remove the steering wheel. Loosen the center bolt and pull it while pushing and pulling it back and forth and left and right with the bolt slightly applied. The bolt is pretty stiff. The steering has come off. Install the airbag canceller and horn terminals. Attach the steering boss and insert the wiring inside. Make sure that the triangle mark on the boss is on top. Connect the wiring of the horn and attach the steering to complete. After that, connect the battery and check if the navigation starts and if the airbag warning light goes out.
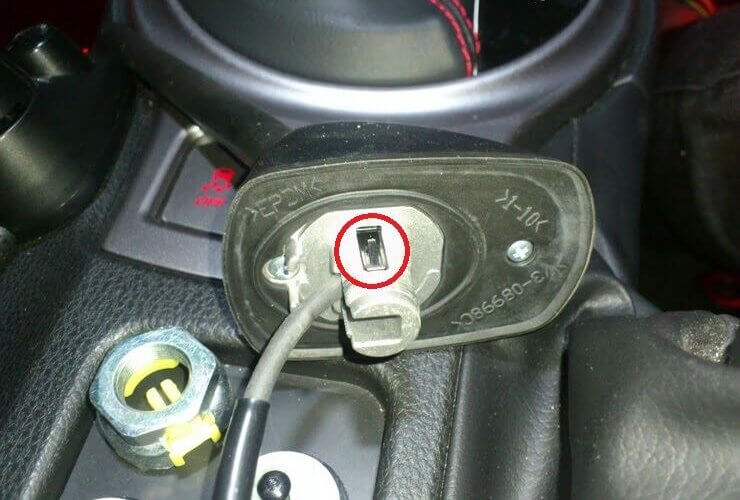
It’s not a big deal, but it’s a work memo. I removed the roof antenna to do something a little this time. If you know how to remove it, you can remove it in 5 minutes. It took me 15 minutes by trial and error. First, remove the three push-type clips that are fixed to the top of the rear glass. If you remove these three clips, you can flip the interior a little and insert your hand through the gap to remove the antenna. There is no need to remove the interior of the C-pillar. This time, I had a hard time removing this push-type clip. If you know the structure, it’s easy to remove. Insert something like a flat-blade screwdriver into the gap between the white and black parts and pry it to unlock it. Remove the hexagon nut-shaped special screw with a monkey wrench or the like. After that, you can remove the antenna by pushing the plastic tab of the red circle and pulling it out from the outside. The work is completed.
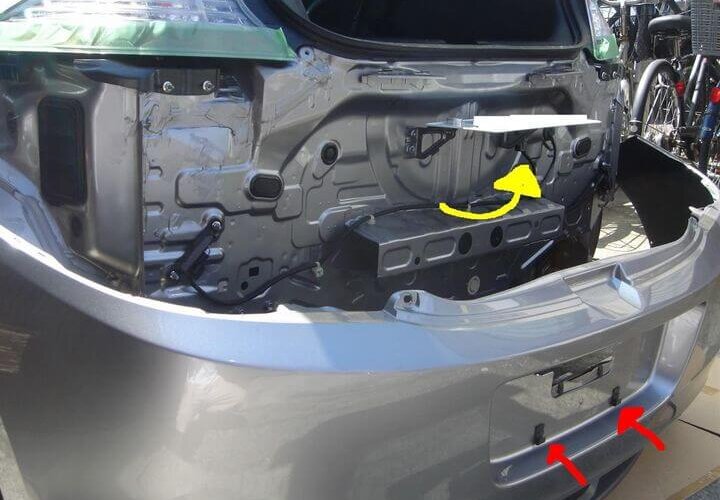
First, put a protective covering on the body. Remove the two screws from the tire house. There are a total of 4 on the left and right. Remove the hexagonal screw where the hatch was opened. There are a total of 2 on the left and right. Remove the screw underneath and remove the clip that stays on the body. There are a total of 2 screws on the left and right, and 4 clips. Now that there is nothing to hold the bumper in, pull it out. However, the license plate was caught and could not be removed. The license plate pops up when you remove the hook (red arrow) that holds the bottom side. Then, dodge the gap in the bumper and remove it. And don’t forget to remove the coupler of the license plate light. The removal is completed successfully.
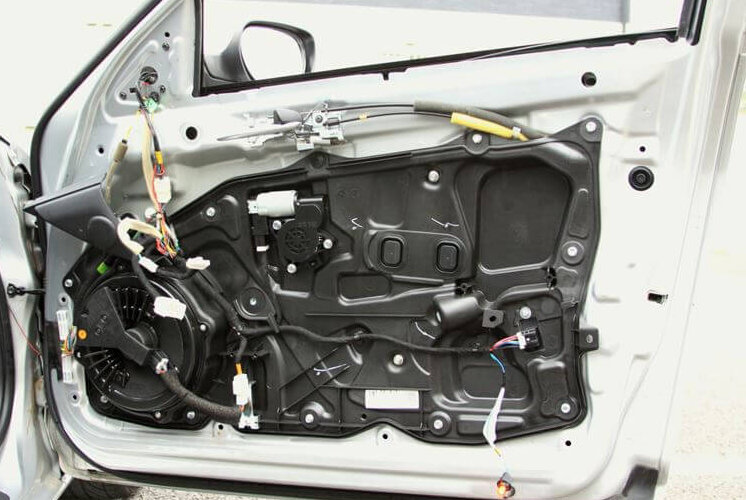
First, open the window before removing it. The image is after removing it. Next, remove the triangular part at the base of the door mirror. Since it is only fastened with the claws and clips, pull the arrow part toward you with your hand and remove it with a snap. Remove the screw on the door handle and remove the cover while standing the door handle. Since the panel of the power window is only fixed with a claw, remove the red arrow part by a interior remover or using a small flat-blade screwdriver, etc. (upper image). Remove the screws surrounded by orange and remove the two couplers with red circles (lower image). The larger coupler is very difficult to pull out. Remove the screw in the door pocket. All that remains is the clip, so lift it from the bottom of the interior with a small flat-blade screwdriver and remove it. On the way, carefully remove the courtesy lamp (upper image) and the power window panel lighting coupler (lower image). Finally, lift off the top of the interior, which is hooked on the window and fixed, and you’re done. On the passenger side, the procedure is the same, except […]
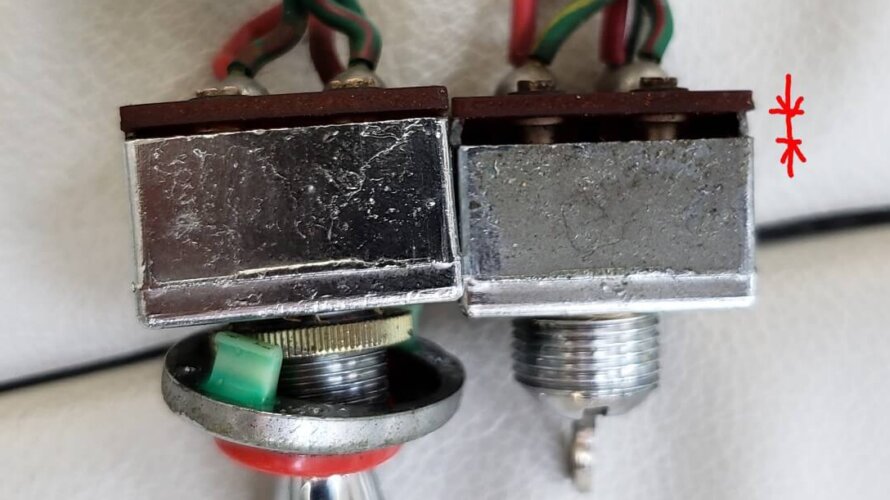
Have you ever experienced that when you cross a step with Figaro or Pao, hazards and blinkers turn on even though you are not operating it? My Figaro is so. Therefore, I am worried that the blinker will turn on every time I cross a step. First of all, pull out the lever of the switch. Next, insert a flat-blade screwdriver from below to remove the decorative panel in the foreground. Yes. After that, remove the ring, remove the connector and pull out the switch from the back to complete the removal. I removed the speedometer to ensure workability. The switch on the right is the switch that was removed, and the switch on the left is the switch that was purchased as a spare. As you can see, there is a gap between the base and the main body at the red line. If there is an impact due to this gap, the contacts will turn on without any operation, and the hazards and blinkers will be on. Seen from the side, it looks like this. The repair method is simple, crush the red circle with a vise. Crush it with a vise like this. There are four corners, […]
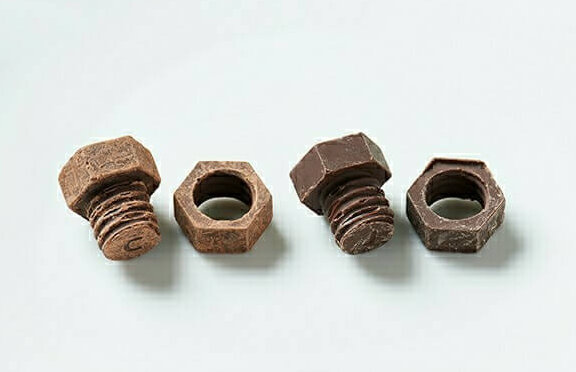
The natural enemy of cars, especially old cars, is “rust”, isn’t it? If you want to ride for decades to come, you have to protect the body from rust. I often see that the license plate bolts are replaced with stainless steel so that they do not rust, but it is half correct and half incorrect. Every bolt has a nut. The combination of stainless steel bolts and iron nuts causes dissimilar metal contact and attempts to promote the oxidation (rust) of the iron nuts. This is completely meaningless, so if you want to replace it with stainless steel, you have to use a bolt and nut set. For example, in the case of Nissan Figaro, the nut side (stay on the back) of the license plate is made of iron and the nut is welded and cannot be replaced, so it is better to make the bolt made of iron. Bare iron bolts will rust quickly, so use plated bolts. The introduction has become longer, but I will explain how to protect the body. Apply the dissimilar metal contact described earlier to mount the sacrificial electrode. Simply put, a metal that rusts more easily than iron is attached, and […]
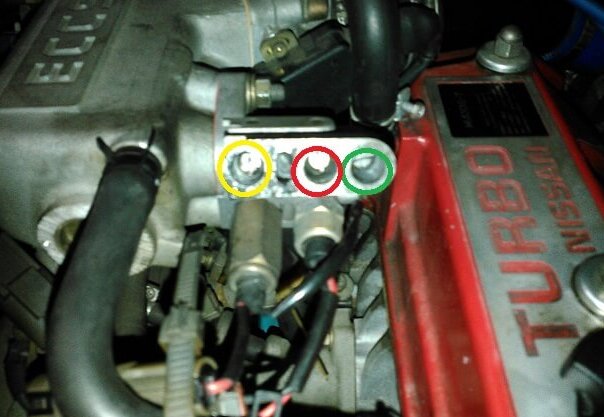
I have overhauled the IAA unit several times, but when the electrical load increases, the idle up becomes unsuccessful. I got a valve at an online auction and came today, so I replaced it immediately. By the way, the IAA unit is an abbreviation for idle auto adjust unit and is an automatic idling adjustment device. Today’s cars do various things with one AAC valve, but Figaro has a configuration that makes you feel the transition period of the era of shifting from carburetors with three adjustment devices to injection. Immediately after starting, the air regulator is also involved, so it is a problem that there are many parts and many parts are fragile. For the time being, incorporate and adjust. The green circle is the basic idling adjustment screw. The red is the air flow rate adjustment screw of the idle-up solenoid valve corresponding to the electric load changed this time. Yellow is the air flow rate adjustment screw for the FICD (First Idle Control Device) solenoid valve that supports air conditioner loads. By the way, the method is to close the red and yellow circle screws with the lights and other electrical equipment off and the air conditioner […]