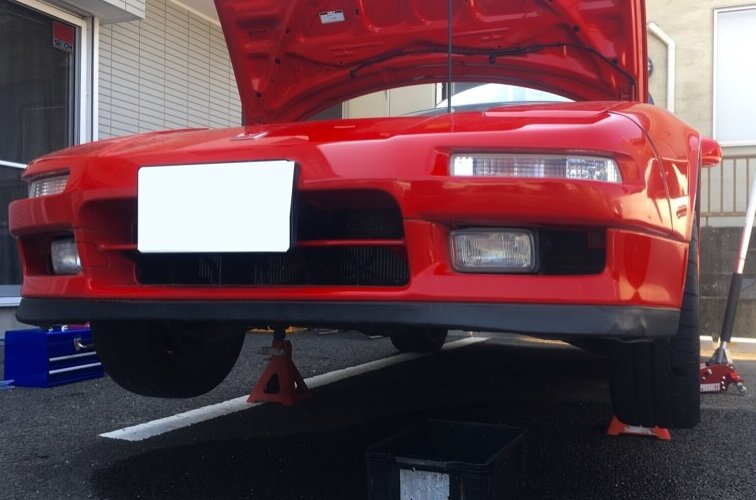
Considering the model year, I replaced the genuine radiator, which can burst at any time, with an external product. By the way, all the coolant is replaced. First, open the drain cock at the bottom of the radiator and drain the coolant. Jack up left and right, and hang the rigid rack only on the rear side so that the front side goes down. While removing the coolant, remove the bracket on the top of the radiator and the relay-related connector of the electric fan. When the coolant is almost drained, remove the upper hose and lower hose, and pull out the radiator directly above. Completed removal of genuine radiator. The radiator to be installed this time is TYPE-F made by KOYO. The capacity is increased to 48 mm compared to the genuine thickness of 32 mm. Dry weight is about 4.25 kg. It ’s all aluminum, so it ’s very light. The weight of the genuine radiator is about 4.02kg, so it is a little heavier. I’m moving the electric fan to a new radiator, but the fan shroud and the hose attachment part interfere a little, so I cut out that amount. After assembling the electric fan, install […]
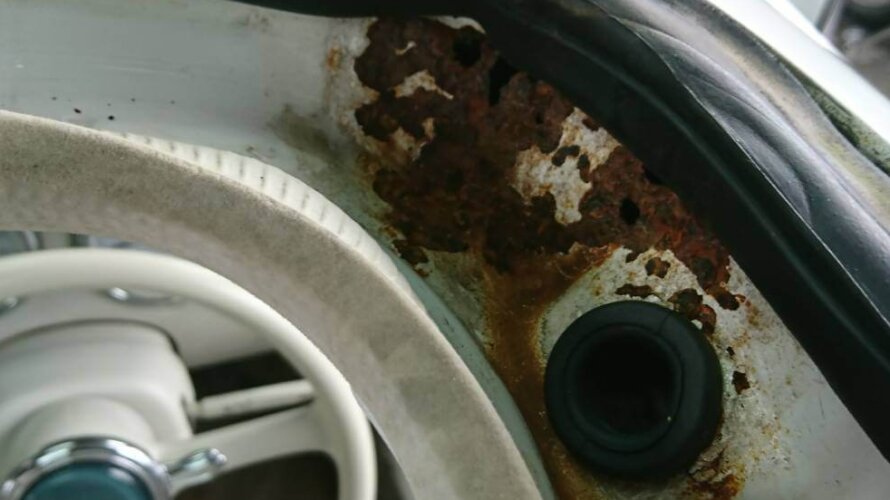
Rust and corrosion of the body You can see the paint floating on the car body. It is due to rust and corrosion. After all there was a hole. That is also left and right. It is recommended to cut the rusted part and work with an iron plate, putty finish & paint, rather than just putty finish & paint. Rust and corrosion on the rear window panel This is a common event in Figaro. Watch out for Figaro, whose rear window panel looks like the image. When it was detached, it was rusted by 30 cm and was tattered and unreproducible. I knew in advance that it couldn’t be repaired, but I didn’t think it was 30 cm. The genuine product is made of iron and no parts are supplied. So I bought a window panel made of resin at the Figaro shop in England. I also bought a hood for replacement. There is also new rust and corrosion on the vehicle body side. There was a hole when I rolled up the rust. I will repair it here as well. The replacement and repair of the rear window and hood has been completed.
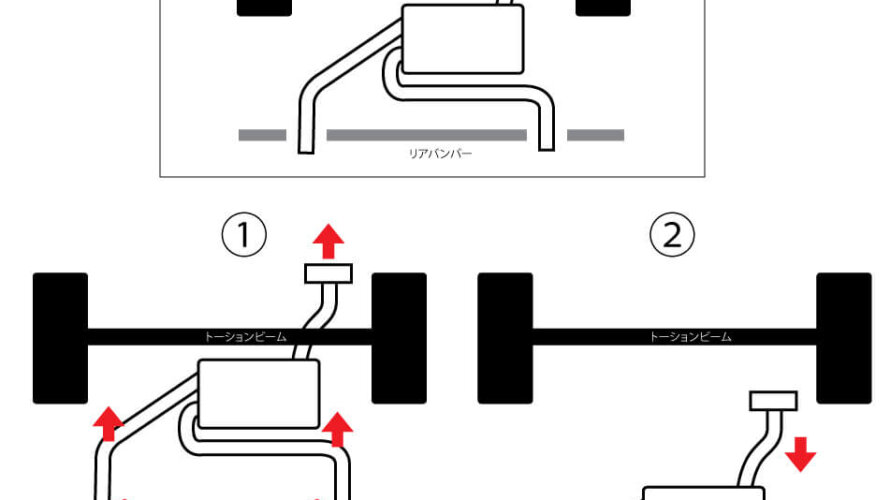
The dealer told me that we couldn’t replace the muffler, so I did it myself. I will explain in a little more detail how to remove the rear piece for DIYers in the world. Chock the front and jack up the rear with a floor jack to hang a rigid rack firmly. Obviously, if you do it with just a pantajack, you’ll probably die. I will explain in advance with the muffler after removing it. In addition to the exhaust flange, there are four fixed points. It is number ②③④ of the image. These four are rubber floating. First, remove the muffler cutter from ① in the image. Use a 10mm wrench. Lay a cardboard and dive to remove the nut on the exhaust flange. You don’t have to be afraid because it will not fall as soon as you remove it. Next, remove the rubber mount. It’s a very soft rubber, so you can remove it interestingly just by spraying it with an oil spray. Be careful not to get the oil spray in your eyes. Remove it steadily. Two rubbers are close to each other around the back right side, which makes it a little difficult. It is […]
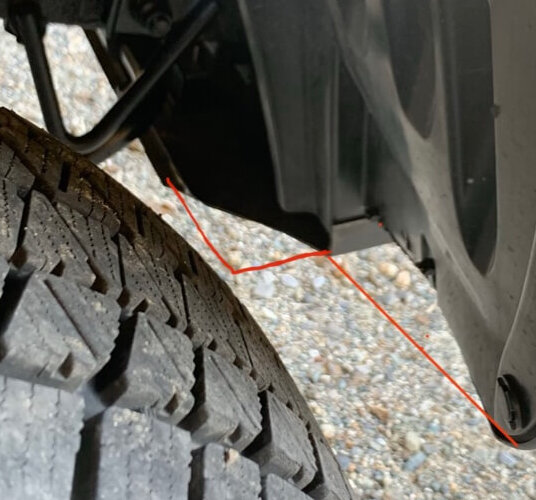
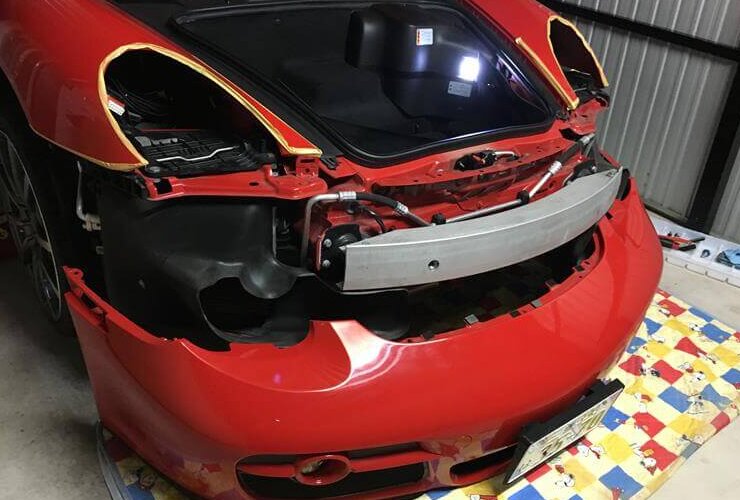
We will cut the front bumper to install this tire. It’s 2 inches up, but with this size it will definitely come in contact with the bumper due to bumps during off-road driving. I’m looking forward to it. Today is a holiday and the weather is nice, so it’s a good day for bumper cuts. Immediately, a rubber windshield? Mudguard? Is in the way. Since it is fixed with 2 rivets and 1 screw, destroy the rivet with a drill and remove it. Also remove the surrounding resin clip. Suddenly, it is a completed photo. This is the position where the former bumper was located up to the red line. I cut the lower part of the bumper over 5 cm with my electric saw, cut the corners diagonally, and then made two holes in the lower part of the bumper. Furthermore, while pushing the inner liner toward the front side of the vehicle, fix the rivet hole, clip hole and lower part of the bumper of the inner liner with a binding band. I didn’t cut the inner liner. And it’s okay because you can’t see it unless you look from below. Unpainted resin is easy to process, isn’t […]
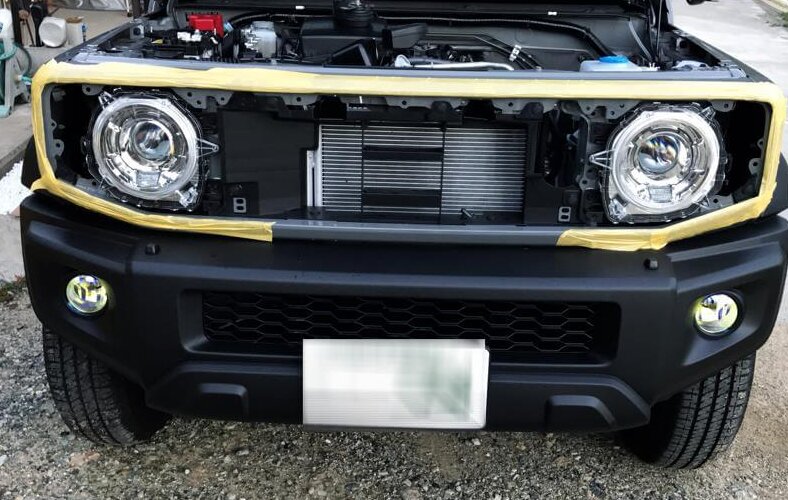
I was interested in the installation of the horn and the structure around the headlights, so I will remove the grill. First of all, protect the body with curing tape so that it will not be scratched. Remove the clips (red circles) on the left and right of the bonnet catch. The upper side of the photo is the front. There are clips like Phillips screws under both ends of the five slot grill, so turn it 90 degrees with a Phillips screwdriver. It doesn’t matter which direction you turn it. The claws in the back will come off, and you will be able to remove the grill. Then pull the grill little by little to remove the clip. There are many clips on the top of the grill, so be careful not to break the grill and remove it little by little. When removing the grill completely, the blinker will remain on the grill side, so disconnect the connector. This completes the removal of the front grill.
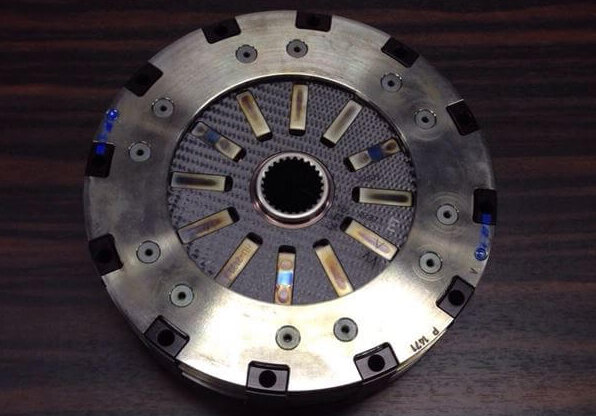
Carrera GT clutch looks like this. The carbon triple makes it look like a racing car clutch. This vehicle will be replaced at about 15,000km. You can see the carbon plate from above. The clutch kit alone can easily exceed $ 10,000. This is a release module. The structure is such that the cylinder moves hydraulically to disengage the clutch. This also costs about $ 5,000. The rear section is already disjointed. The maintainability is not good for flattery, but it may be the fate of such a special model. Also remove the engine. The V10 engine is truly for racing and is extremely compact. You may be able to buy a 1DK apartment in a prime location with just this.
First, remove the headlight with the attached tool. How to remove is written in the instruction manual. After removing the headlights, also remove the connectors that connect the fog lights and the small lamps. Taking a picture of each will help you when you put them back. Remove the 7 Torx screws under the bumper. Remove the side marker. Also remove the lens. Remove the Torx screw on the inner fender. Jacking up creates space and makes it easier to work. The most difficult part this time. Slide the inner fender and remove the Torx screw that is stopped upward on the side marker. (Yellow arrow part) Remove two places on the left and right of the clip. Remove the three Torx screws that are fastened from the top of the trunk. Pull the bumper forward. Put masking tape on the parts that are likely to be scratched. Porsche Cayman bumper removal is complete.
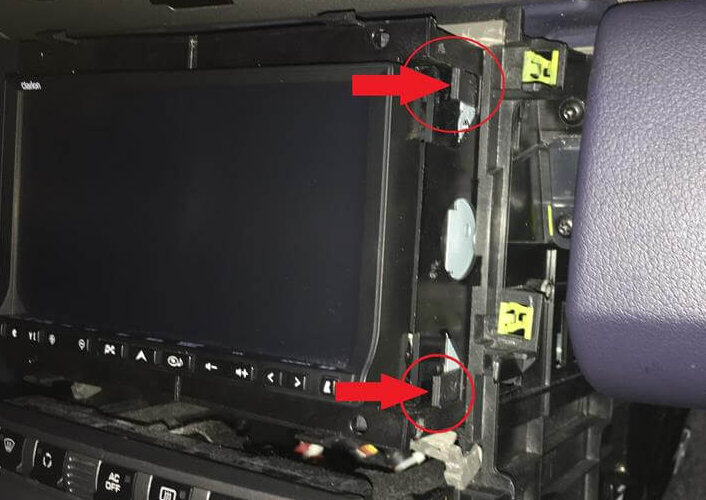
Remove one Torx screw on the center console. Remove the two Torx screws on the knee pad. Remove the other side in the same way. If it is hard, open the glove box and use the remover. If you don’t want to scratch it even a little, apply masking tape. I’m impatient, so I almost disassembled it without applying it. Remove the front panel. It came off easily. The panel has claws like this. It is the removal of the main body. It took me a while here. I searched online to find out how to remove it, but I couldn’t figure it out and finally removed it after 3 days of trial and error. I pressed the arrow part from the outside in 4 places and pulled it out. It was easy, but I was a little worried, so I feel a sense of accomplishment.
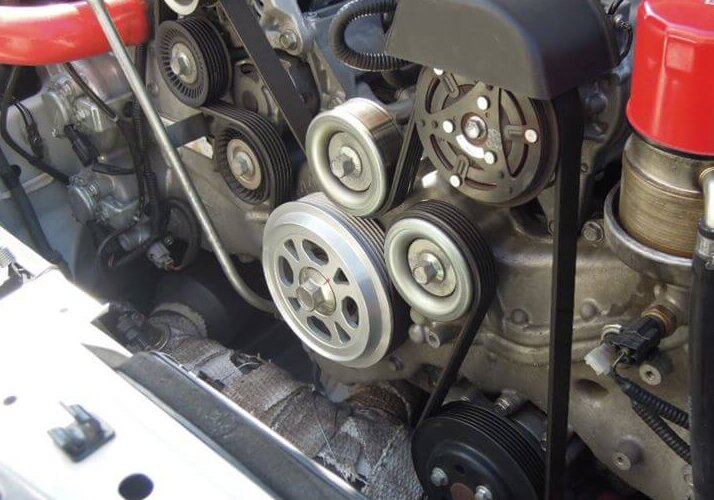
It was a part that I hesitated so far, but I attached it because it was available at a low price. It is a crank pulley made by ZERO / SPORT. Remove the battery terminal and remove the area around the air cleaner to secure space. Originally, a special tool is required, but it can be done without it. You can lock the crank by putting the gear in 6th gear (5th gear) and applying the side brake. (MT car) As an aside, if it’s an FF car, it’s okay if someone steps on the brakes. Extend the ratchet handle with a pipe (700mm) and apply force to loosen the pulley bolts. Since the drive system is twisted, it is difficult to apply torque for a moment, but it loosened after several attempts. If you want to use a breaker bar, you need 600mm or more. If you can do it so far, it seems that the work is almost finished. Hook a tool on the tensioner bolt and apply force to turn it clockwise to loosen the belt, so remove it as it is. Remove the genuine pulley. Replace the O-ring with a new one. Bolt the lightweight pulley. […]
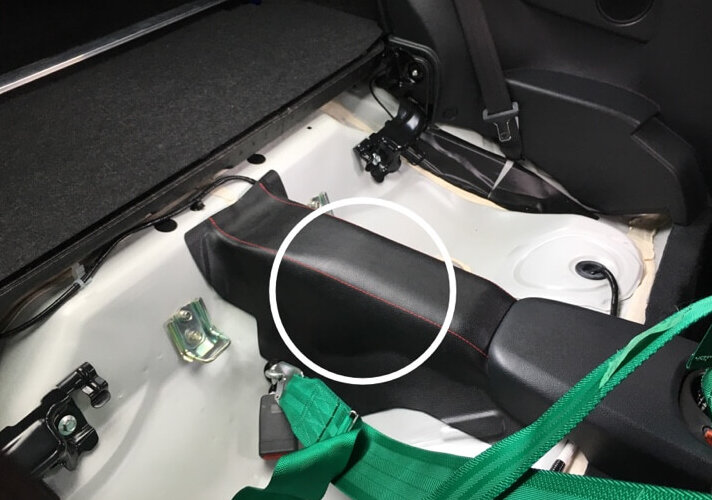
The rear seats will be removed to reduce weight when driving on the circuit. Putting myself in my car and riding three people is only a few times, so there is no particular problem. As for the noise, I always knocked down the rear seat to make it look like a 2-seater, so the sound does not change so much even if the road noise becomes a little louder. I hope the fuel economy will also improve. First of all, how to remove the seat. Remove the white circle bolt with a 10 mm socket wrench. (Tightening torque 13N • m) Next, lift the white circle and push the arrow down. Then it will come off. Next is the backrest. First, tilt the backrest and remove the trunk board. Since there is a clip in the part of the picture, you can pull it out, or you can leave the clip on the car side and remove it from the seat as shown in the picture. There are 3 clips in the white circle. Remove the clip and turn it over to see the bolt. Remove it with a 12 mm socket. The photo is on the right side, but […]