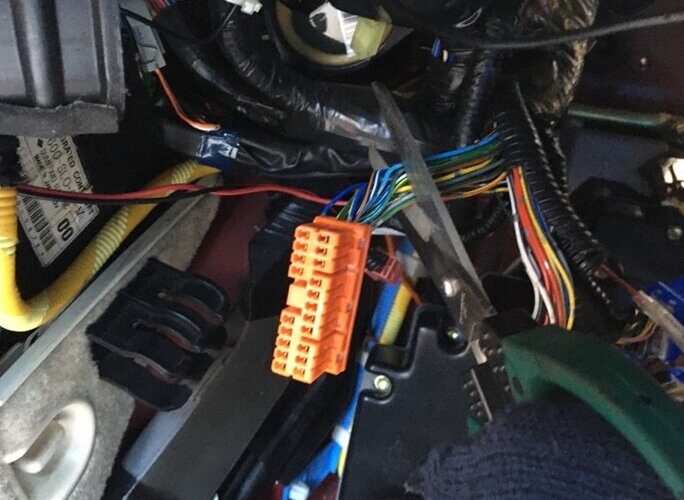
This article is a continuation of the article on replacing ABS Part 1 (Unit Edition). For this ABS replacement, the modulators of other models were diverted. Harness kits are sold by various shops if it is a modulator for the latter model of NSX, and I think that there is almost no trouble with coupler on, but of course this can not be used as it is because the wiring is different. Harness kits are also quite expensive, and considering the time and effort of using them to replace wiring, I decided to make all of them. Therefore, one point is that when you buy a second-hand modulator of another model, you should buy not only the main body but also the one with the wiring cut in the middle as shown in this image. If it is only the main body, it will be necessary to obtain a coupler separately, and the hurdle will rise at once. If it’s just the main body, it’s rolling at a price like free. Access the ALB control unit by removing the glove box, air conditioning duct, and floor panel on the passenger side. I will remove this because it is no longer […]
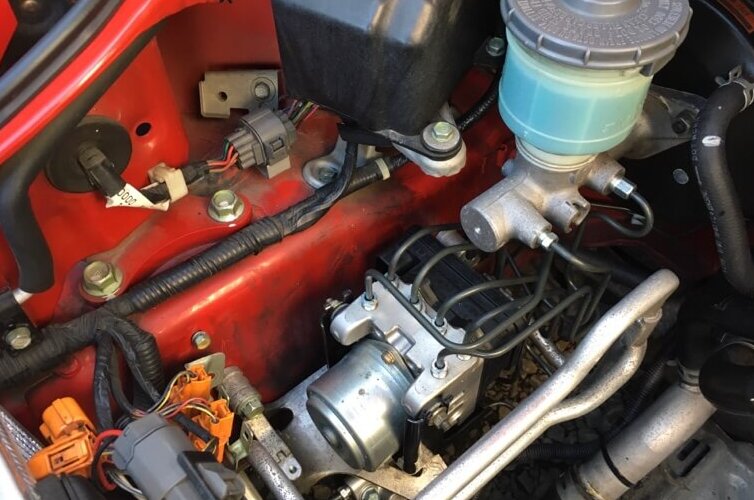
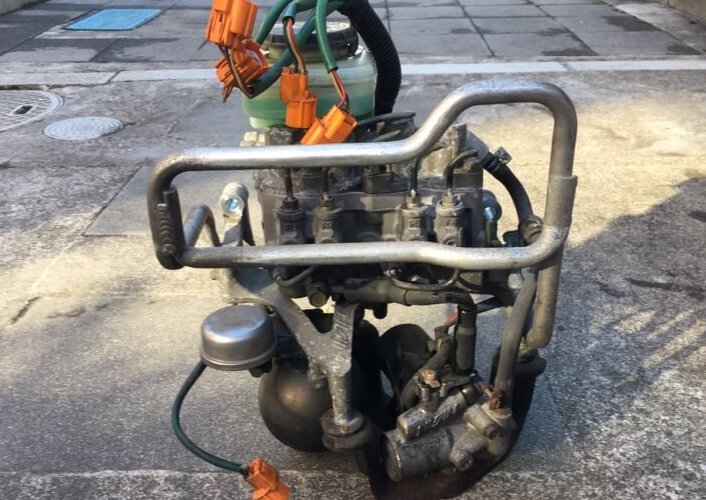
This article is a continuation of the article on removing ALB (Anti-Lock Brake). We have prepared in advance the genuine parts required for ABS replacement. Other than those that can be diverted from ALB, mainly brake piping, modulator brackets, proportioning valves, bolts, etc. First of all, I assembled around the modulator using the bracket etc. removed from ALB. I polished the things to be reused and got rid of a little dull, but it’s more difficult. It’s finally plumbing. This is a photo of the front right, but I will insert new piping from here. I could hardly see the tip of the pipe under the master back, and there was a pipe that was quite squeaky, so it was difficult to decide in what direction to put it in, so I had a hard time. After trial and error, it was settled. It seems that the pipe for the left front will never be attached as it is in terms of layout, so bend the part that enters the tire house, pass it through, and then return it to the original angle. After that, install two rear pipes and bolt them in two places with the original fixing brackets. […]
ALB(Anti-Lock Brake) is an old-fashioned ABS installed in the early model NSX. This work is based on the assumption that it will be replaced with a late model ABS. The infamous ALB had been working fine until now, fortunately or unfortunately. However, from about two months ago, the compressor rang frequently, probably because the pressure could not be accumulated well, and the ALB suddenly stopped working during the previous circuit run, so the new tires became useless in an instant. Finally, I lifted my heavy waist and decided to replace it with ABS and prepared the parts, but for some reason it seems to be working normally these days. It was as if ALB was begging for “Don’t replace”. First, remove the spare tire bracket to remove the blower fan. After that, shift the duct for taking in outside air and remove the couplers in three places. Then remove the upper two bolts and the lower two bolts, and shake the blower fan toward you to remove it. Then remove the battery. Now you are ready to remove the old pipe. I don’t use the old pipe anymore, so I will cut it with a clipper without hesitation. An incident […]
Considering the model year, I replaced the genuine radiator, which can burst at any time, with an external product. By the way, all the coolant is replaced. First, open the drain cock at the bottom of the radiator and drain the coolant. Jack up left and right, and hang the rigid rack only on the rear side so that the front side goes down. While removing the coolant, remove the bracket on the top of the radiator and the relay-related connector of the electric fan. When the coolant is almost drained, remove the upper hose and lower hose, and pull out the radiator directly above. Completed removal of genuine radiator. The radiator to be installed this time is TYPE-F made by KOYO. The capacity is increased to 48 mm compared to the genuine thickness of 32 mm. Dry weight is about 4.25 kg. It ’s all aluminum, so it ’s very light. The weight of the genuine radiator is about 4.02kg, so it is a little heavier. I’m moving the electric fan to a new radiator, but the fan shroud and the hose attachment part interfere a little, so I cut out that amount. After assembling the electric fan, install […]
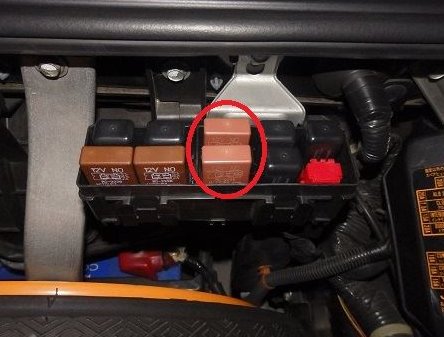
Since the beginning of this year, the air conditioner has become unwell, so I repaired it. First, replace the air conditioner control unit. I ordered one genuine part, “37735-PR7-A01”. The photo is an old one after replacement. The installation location is a black box next to the main relay on the rear of the driver’s seat. It is fastened with two 10mm screws and is a coupler on, so it can be easily replaced. However, although the screw below is not shown in the photo, the gap is so narrow that it is difficult to detach it without removing the interior. It’s easy to get with tools. After replacing this, the air conditioner compressor started to work well and the cool breeze came out. Just in case, I also exchanged these two relays. There are two “39794-SL0-J01” I replaced the two inside the red circle in the innermost case in the bonnet. One in the front is an AC relay, the other in the back is a condenser fan relay. It has claws, so it’s difficult to remove, but when inserting it is easy because you only push it in. It is done!