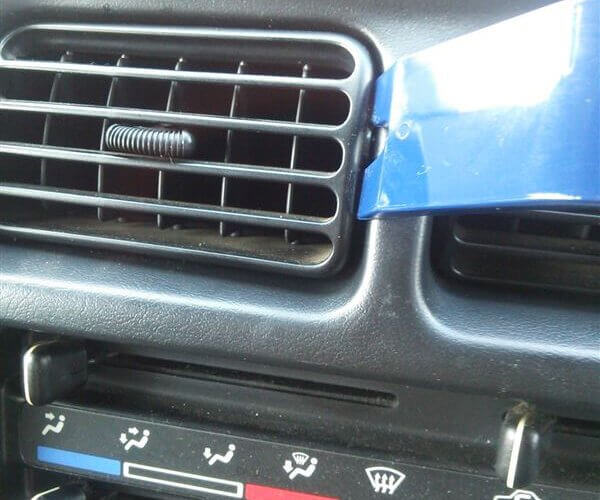
In the summer, JB23 Jimny’s air conditioner louver becomes loose and turns upward, but I adjusted it. Since the plastic is hardened, insert the interior peeler on the right side of each louver and carefully remove it. There is a small part on the left side of the louver, which seems to adjust the looseness. A tension is applied by putting an M2.6 washer in the hole where the small part was fitted. The washer fits snugly. Fit the notch of the small part on the front side. Carefully fit the louver from the left side and you’re done. It looks like it was completed without any discomfort.
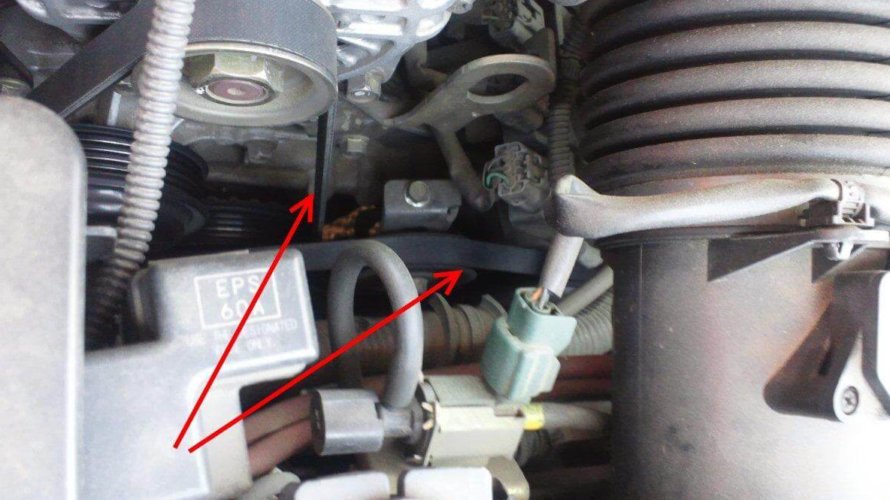
The belt on the right is the belt for the air conditioner. It’s that easy. Loosen the bolt. First loosen No. 1 and then loosen No. 2. It is 17 mm. A long box wrench straight is recommended as it will use loosen the deep part. It’s okay if you loosen it enough to turn it by hand. The air conditioner tension bolt is 10 mm. It’s really easy to have a long extension and a quick spinner. As you loosen this bolt, the belt will loosen. It is convenient to have a quick spinner because it loosens quite a bit. To install it, remove the belt, attach a new one, tighten No. 2, lock No. 1, start the engine, turn on the air conditioner, run in to some extent, and check the tension again. Since it is a V ribbed belt, it is a point to check if it is firmly in the groove of the pulley. Please note that it will be difficult to start the engine in a misaligned state. The tools used are the upper extension, 10mm box, middle long box wrench 17, 19/3/8 ratchet and quick spinner.
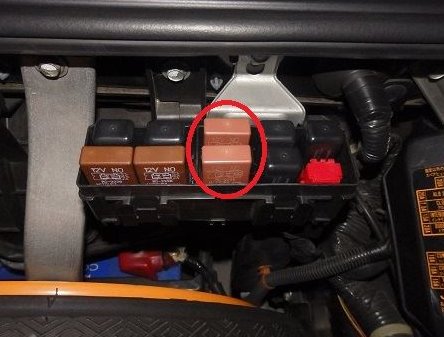
Since the beginning of this year, the air conditioner has become unwell, so I repaired it. First, replace the air conditioner control unit. I ordered one genuine part, “37735-PR7-A01”. The photo is an old one after replacement. The installation location is a black box next to the main relay on the rear of the driver’s seat. It is fastened with two 10mm screws and is a coupler on, so it can be easily replaced. However, although the screw below is not shown in the photo, the gap is so narrow that it is difficult to detach it without removing the interior. It’s easy to get with tools. After replacing this, the air conditioner compressor started to work well and the cool breeze came out. Just in case, I also exchanged these two relays. There are two “39794-SL0-J01” I replaced the two inside the red circle in the innermost case in the bonnet. One in the front is an AC relay, the other in the back is a condenser fan relay. It has claws, so it’s difficult to remove, but when inserting it is easy because you only push it in. It is done!