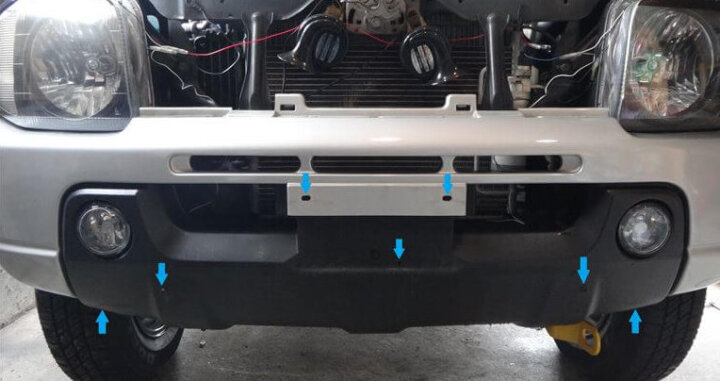
The red arrow in the photo is the clip position, and the blue arrow is the bolt position. First, open the hood and remove the front grill. There are only three black clips at the arrow on the photo, so pull it out and remove the grill. The photo is already after removing the grill. When you remove the grill, there are three black clips on the upper part of the bumper below it (the part indicated by the arrow below), so remove it. Remove the number and under garnish attached with the bolt or bolt nut at the position of the blue arrow. For the under garnish, if you do not remove it, you will not be able to see the bolt that holds the bumper at the bottom, so you will not be able to turn the bolt. I don’t think this work is necessary unless the car is equipped with an under garnish. The photo is after removing the number and under garnish. Remove the 3 bolts on the underside of the bumper and the 2 black clips on the outside. Remove the three black clips that secure the fender liner (black resin plate on the circumference […]
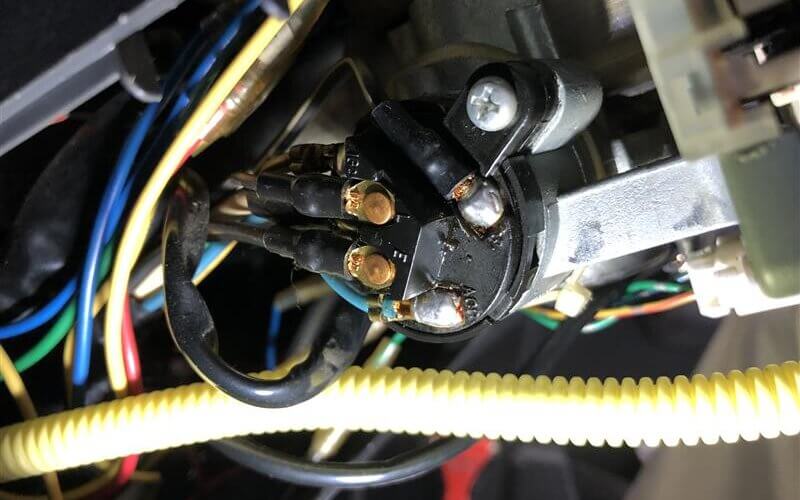
After starting the engine, the following phenomena have come to occur. (1) The power window switch makes a strange noise and does not move.(2) Rear defogger does not work.(3) The blower fan does not work. I checked the wiring and fuses, but the conclusion was that the key position did not return exactly from the start to the ON position. After starting the engine, I returned it a few millimeters and all the functions worked in the normal position. Replace the ignition switch. It is fastened with one screw. Remove the coupler near the steering shaft. Unlike the late model, it cannot be separated. Assembling with a key cylinder costs about $ 150. Disassembling is also troublesome. Cut the wiring that connects to the key cylinder. Replace from 270,000 km of type 1 to 90,000 km of type 2. Reconnect with a bullet terminal. I installed it in the reverse procedure and the problem was solved. For reference, the late model comes with a coupler so it can be easily replaced. Vehicles over 200,000 kilometers need to be replaced. This switch is also separated by a coupler, but for some reason we do not sell switch-only parts, and unnecessary harnesses […]
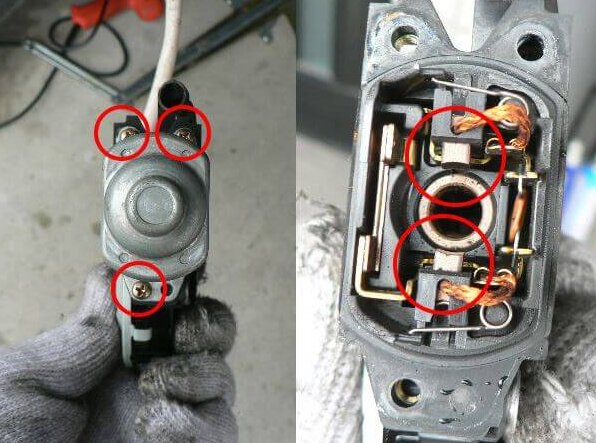
Recently, the power window of JB23 Jimny is not working well. It vibrates jerky at the start and stop. Motor life? I will disassemble it for the time being. As a preparation, tape the door handle. Remove the parts marked with a circle. When I remove the panel, I pull out the coupler of the switch, but I can’t pull it out even if I push it with my finger. Push it with a flat-blade screwdriver and it will come off quickly. The driver’s side was pushed with a finger and slipped out. After removing the panel, switch it on again and lower the glass. Remove the bolt indicated by the circle that holds the glass, and raise the glass to the top. Tape the glass and push the switch down to lower the frame. The yellow circle is the switch. Remove the blue circle coupler to the motor, but you can push it by hand. The X frame will not come out unless you remove the clip from the sheet metal after pulling it out. Remove the four red circle bolts on the right, and remove the two red circle bolts on the left while supporting with your hand. […]
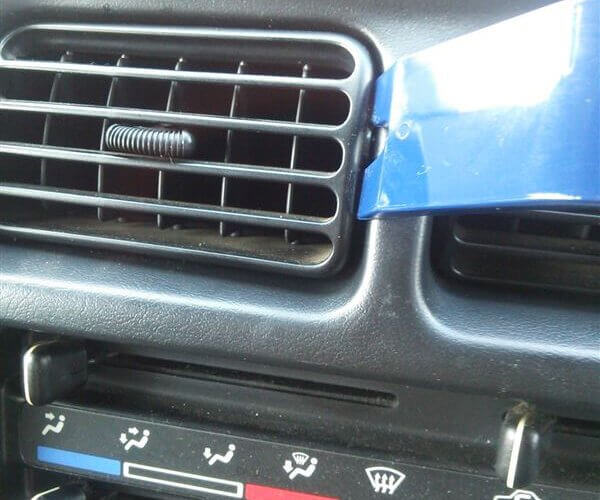
In the summer, JB23 Jimny’s air conditioner louver becomes loose and turns upward, but I adjusted it. Since the plastic is hardened, insert the interior peeler on the right side of each louver and carefully remove it. There is a small part on the left side of the louver, which seems to adjust the looseness. A tension is applied by putting an M2.6 washer in the hole where the small part was fitted. The washer fits snugly. Fit the notch of the small part on the front side. Carefully fit the louver from the left side and you’re done. It looks like it was completed without any discomfort.
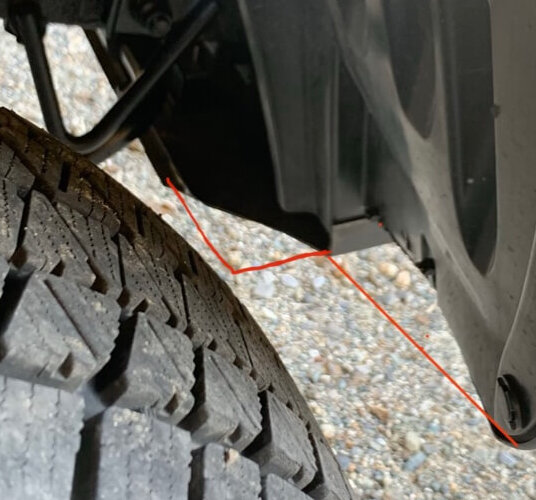
We will cut the front bumper to install this tire. It’s 2 inches up, but with this size it will definitely come in contact with the bumper due to bumps during off-road driving. I’m looking forward to it. Today is a holiday and the weather is nice, so it’s a good day for bumper cuts. Immediately, a rubber windshield? Mudguard? Is in the way. Since it is fixed with 2 rivets and 1 screw, destroy the rivet with a drill and remove it. Also remove the surrounding resin clip. Suddenly, it is a completed photo. This is the position where the former bumper was located up to the red line. I cut the lower part of the bumper over 5 cm with my electric saw, cut the corners diagonally, and then made two holes in the lower part of the bumper. Furthermore, while pushing the inner liner toward the front side of the vehicle, fix the rivet hole, clip hole and lower part of the bumper of the inner liner with a binding band. I didn’t cut the inner liner. And it’s okay because you can’t see it unless you look from below. Unpainted resin is easy to process, isn’t […]
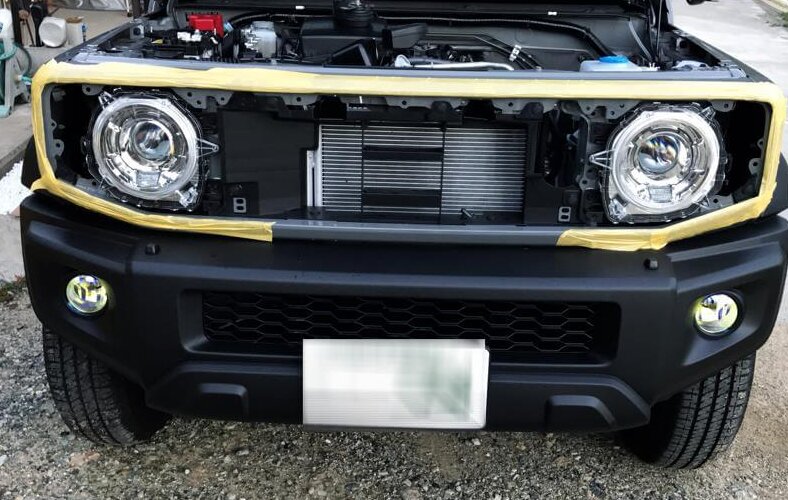
I was interested in the installation of the horn and the structure around the headlights, so I will remove the grill. First of all, protect the body with curing tape so that it will not be scratched. Remove the clips (red circles) on the left and right of the bonnet catch. The upper side of the photo is the front. There are clips like Phillips screws under both ends of the five slot grill, so turn it 90 degrees with a Phillips screwdriver. It doesn’t matter which direction you turn it. The claws in the back will come off, and you will be able to remove the grill. Then pull the grill little by little to remove the clip. There are many clips on the top of the grill, so be careful not to break the grill and remove it little by little. When removing the grill completely, the blinker will remain on the grill side, so disconnect the connector. This completes the removal of the front grill.