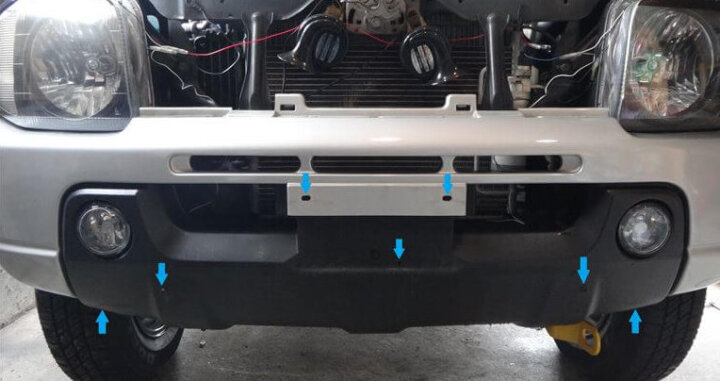
The red arrow in the photo is the clip position, and the blue arrow is the bolt position. First, open the hood and remove the front grill. There are only three black clips at the arrow on the photo, so pull it out and remove the grill. The photo is already after removing the grill. When you remove the grill, there are three black clips on the upper part of the bumper below it (the part indicated by the arrow below), so remove it. Remove the number and under garnish attached with the bolt or bolt nut at the position of the blue arrow. For the under garnish, if you do not remove it, you will not be able to see the bolt that holds the bumper at the bottom, so you will not be able to turn the bolt. I don’t think this work is necessary unless the car is equipped with an under garnish. The photo is after removing the number and under garnish. Remove the 3 bolts on the underside of the bumper and the 2 black clips on the outside. Remove the three black clips that secure the fender liner (black resin plate on the circumference […]
ALB(Anti-Lock Brake) is an old-fashioned ABS installed in the early model NSX. This work is based on the assumption that it will be replaced with a late model ABS. The infamous ALB had been working fine until now, fortunately or unfortunately. However, from about two months ago, the compressor rang frequently, probably because the pressure could not be accumulated well, and the ALB suddenly stopped working during the previous circuit run, so the new tires became useless in an instant. Finally, I lifted my heavy waist and decided to replace it with ABS and prepared the parts, but for some reason it seems to be working normally these days. It was as if ALB was begging for “Don’t replace”. First, remove the spare tire bracket to remove the blower fan. After that, shift the duct for taking in outside air and remove the couplers in three places. Then remove the upper two bolts and the lower two bolts, and shake the blower fan toward you to remove it. Then remove the battery. Now you are ready to remove the old pipe. I don’t use the old pipe anymore, so I will cut it with a clipper without hesitation. An incident […]
The dealer told me that we couldn’t replace the muffler, so I did it myself. I will explain in a little more detail how to remove the rear piece for DIYers in the world. Chock the front and jack up the rear with a floor jack to hang a rigid rack firmly. Obviously, if you do it with just a pantajack, you’ll probably die. I will explain in advance with the muffler after removing it. In addition to the exhaust flange, there are four fixed points. It is number ②③④ of the image. These four are rubber floating. First, remove the muffler cutter from ① in the image. Use a 10mm wrench. Lay a cardboard and dive to remove the nut on the exhaust flange. You don’t have to be afraid because it will not fall as soon as you remove it. Next, remove the rubber mount. It’s a very soft rubber, so you can remove it interestingly just by spraying it with an oil spray. Be careful not to get the oil spray in your eyes. Remove it steadily. Two rubbers are close to each other around the back right side, which makes it a little difficult. It is […]
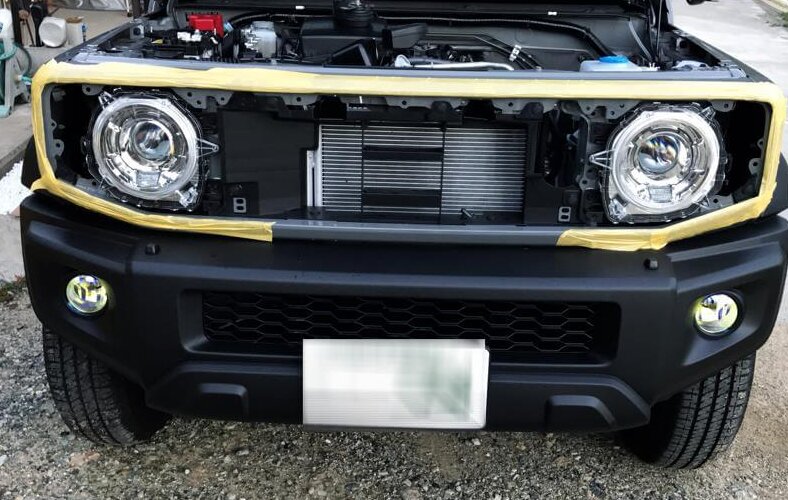
I was interested in the installation of the horn and the structure around the headlights, so I will remove the grill. First of all, protect the body with curing tape so that it will not be scratched. Remove the clips (red circles) on the left and right of the bonnet catch. The upper side of the photo is the front. There are clips like Phillips screws under both ends of the five slot grill, so turn it 90 degrees with a Phillips screwdriver. It doesn’t matter which direction you turn it. The claws in the back will come off, and you will be able to remove the grill. Then pull the grill little by little to remove the clip. There are many clips on the top of the grill, so be careful not to break the grill and remove it little by little. When removing the grill completely, the blinker will remain on the grill side, so disconnect the connector. This completes the removal of the front grill.
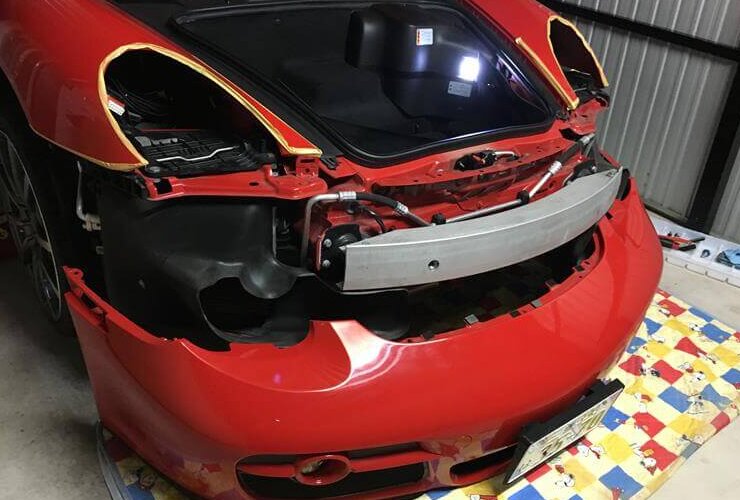
First, remove the headlight with the attached tool. How to remove is written in the instruction manual. After removing the headlights, also remove the connectors that connect the fog lights and the small lamps. Taking a picture of each will help you when you put them back. Remove the 7 Torx screws under the bumper. Remove the side marker. Also remove the lens. Remove the Torx screw on the inner fender. Jacking up creates space and makes it easier to work. The most difficult part this time. Slide the inner fender and remove the Torx screw that is stopped upward on the side marker. (Yellow arrow part) Remove two places on the left and right of the clip. Remove the three Torx screws that are fastened from the top of the trunk. Pull the bumper forward. Put masking tape on the parts that are likely to be scratched. Porsche Cayman bumper removal is complete.
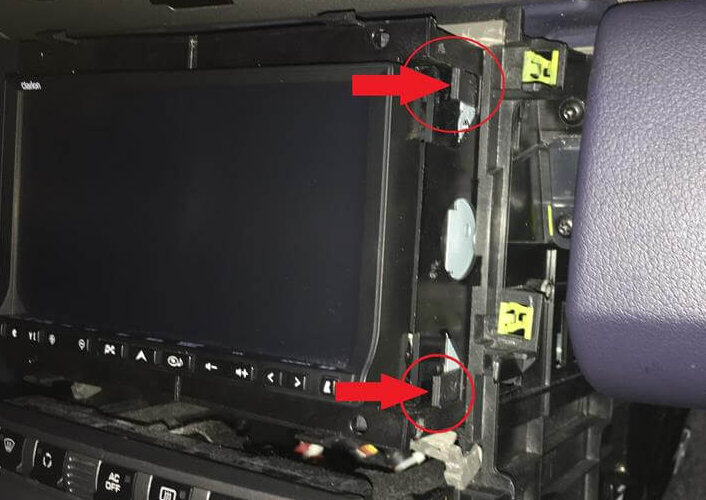
Remove one Torx screw on the center console. Remove the two Torx screws on the knee pad. Remove the other side in the same way. If it is hard, open the glove box and use the remover. If you don’t want to scratch it even a little, apply masking tape. I’m impatient, so I almost disassembled it without applying it. Remove the front panel. It came off easily. The panel has claws like this. It is the removal of the main body. It took me a while here. I searched online to find out how to remove it, but I couldn’t figure it out and finally removed it after 3 days of trial and error. I pressed the arrow part from the outside in 4 places and pulled it out. It was easy, but I was a little worried, so I feel a sense of accomplishment.
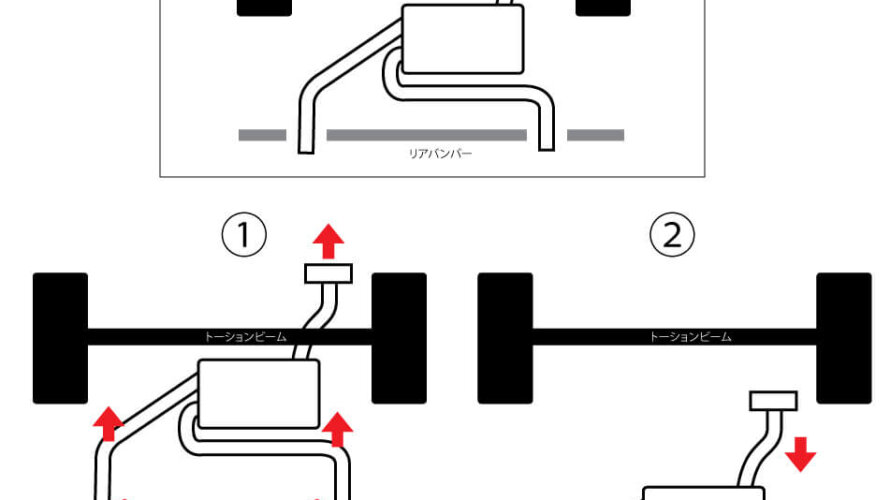
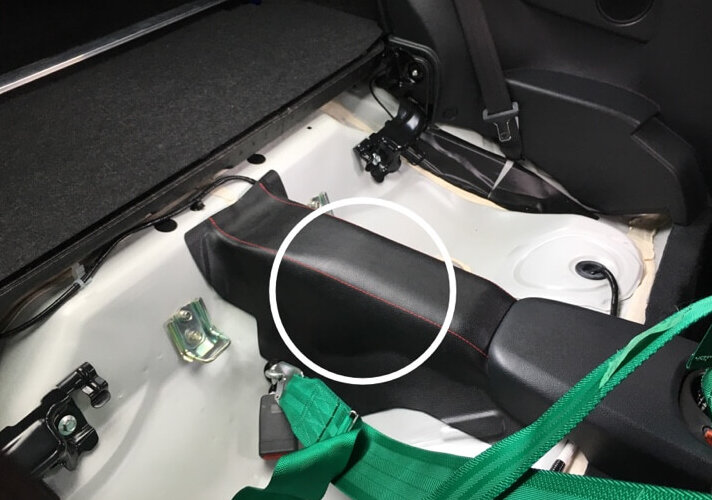
The rear seats will be removed to reduce weight when driving on the circuit. Putting myself in my car and riding three people is only a few times, so there is no particular problem. As for the noise, I always knocked down the rear seat to make it look like a 2-seater, so the sound does not change so much even if the road noise becomes a little louder. I hope the fuel economy will also improve. First of all, how to remove the seat. Remove the white circle bolt with a 10 mm socket wrench. (Tightening torque 13N • m) Next, lift the white circle and push the arrow down. Then it will come off. Next is the backrest. First, tilt the backrest and remove the trunk board. Since there is a clip in the part of the picture, you can pull it out, or you can leave the clip on the car side and remove it from the seat as shown in the picture. There are 3 clips in the white circle. Remove the clip and turn it over to see the bolt. Remove it with a 12 mm socket. The photo is on the right side, but […]
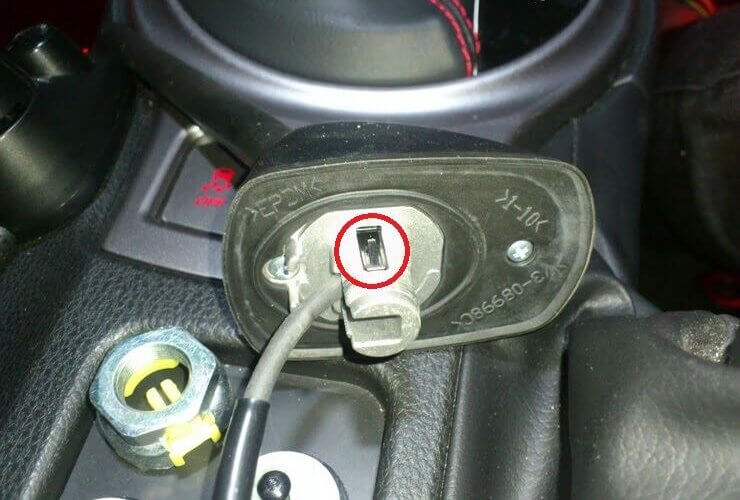
It’s not a big deal, but it’s a work memo. I removed the roof antenna to do something a little this time. If you know how to remove it, you can remove it in 5 minutes. It took me 15 minutes by trial and error. First, remove the three push-type clips that are fixed to the top of the rear glass. If you remove these three clips, you can flip the interior a little and insert your hand through the gap to remove the antenna. There is no need to remove the interior of the C-pillar. This time, I had a hard time removing this push-type clip. If you know the structure, it’s easy to remove. Insert something like a flat-blade screwdriver into the gap between the white and black parts and pry it to unlock it. Remove the hexagon nut-shaped special screw with a monkey wrench or the like. After that, you can remove the antenna by pushing the plastic tab of the red circle and pulling it out from the outside. The work is completed.
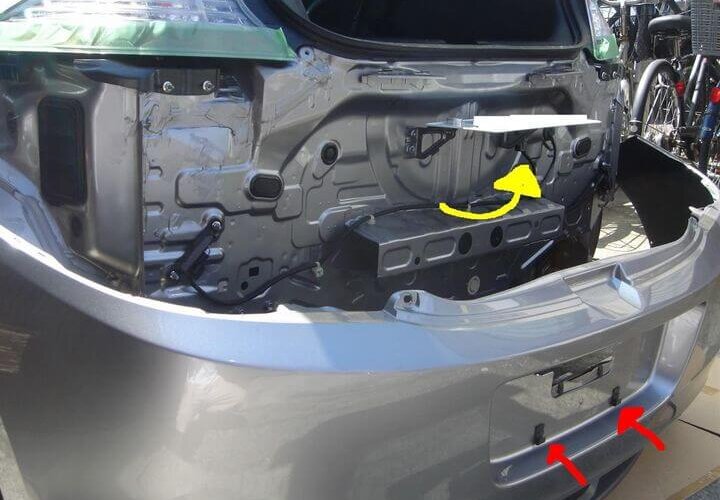
First, put a protective covering on the body. Remove the two screws from the tire house. There are a total of 4 on the left and right. Remove the hexagonal screw where the hatch was opened. There are a total of 2 on the left and right. Remove the screw underneath and remove the clip that stays on the body. There are a total of 2 screws on the left and right, and 4 clips. Now that there is nothing to hold the bumper in, pull it out. However, the license plate was caught and could not be removed. The license plate pops up when you remove the hook (red arrow) that holds the bottom side. Then, dodge the gap in the bumper and remove it. And don’t forget to remove the coupler of the license plate light. The removal is completed successfully.
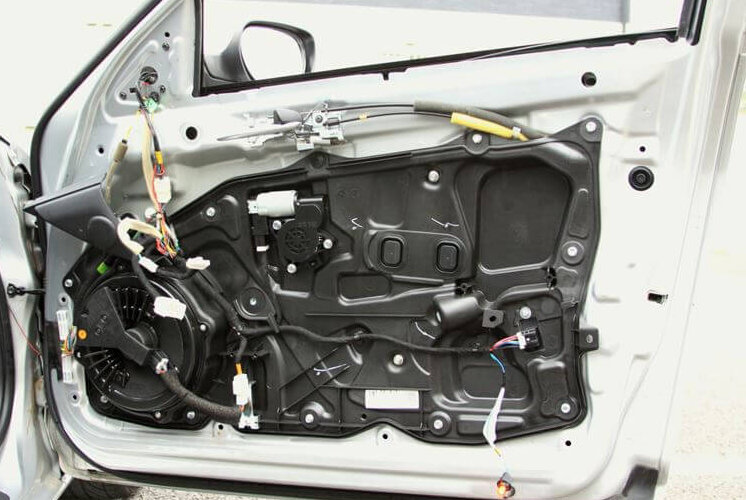
First, open the window before removing it. The image is after removing it. Next, remove the triangular part at the base of the door mirror. Since it is only fastened with the claws and clips, pull the arrow part toward you with your hand and remove it with a snap. Remove the screw on the door handle and remove the cover while standing the door handle. Since the panel of the power window is only fixed with a claw, remove the red arrow part by a interior remover or using a small flat-blade screwdriver, etc. (upper image). Remove the screws surrounded by orange and remove the two couplers with red circles (lower image). The larger coupler is very difficult to pull out. Remove the screw in the door pocket. All that remains is the clip, so lift it from the bottom of the interior with a small flat-blade screwdriver and remove it. On the way, carefully remove the courtesy lamp (upper image) and the power window panel lighting coupler (lower image). Finally, lift off the top of the interior, which is hooked on the window and fixed, and you’re done. On the passenger side, the procedure is the same, except […]