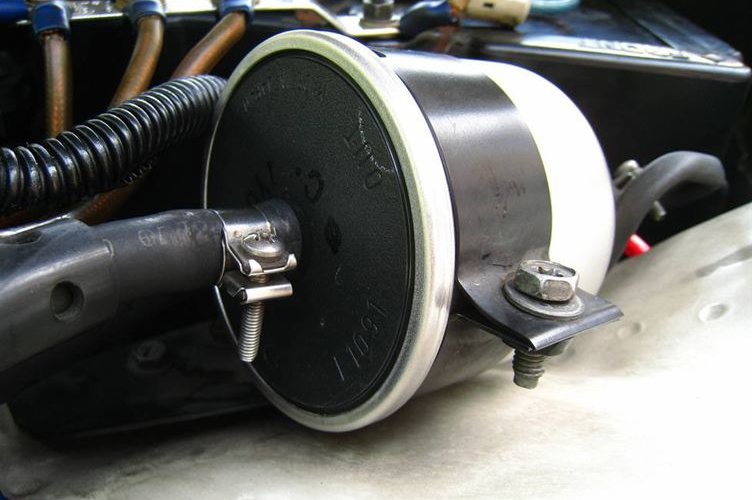
Replace 300ZX fuel filter to improve idling malfunction. Since it’s work on the fuel line, of course fire is strictly prohibited. This is the genuine fuel filter we were preparing. I also wanted to replace the hoses, but I couldn’t make it in time. First, work to reduce fuel pressure. Check the position of “FUEL PUMP” in the fuse box. Start the engine and remove the “FUEL PUMP” fuse that you just checked. It should stall after a while, if for some reason it didn’t stall, you must stop the engine. Remove the fuel cap. Then crank it several times. OK if the engine does not start. Remove the negative of the battery. Prepare a towel and aluminum vat and remove the filter. Fortunately, there was no struggle such as the hose not being pulled out as heard in the rumor, and it was not tough. The fuel was a little spilled, but it was okay. By the way, the fuel that came out of the filter. I could not disassemble the filter because there were no tools, but it may have been quite dirty. Installation complete. The material on the out side was different from the one that was […]
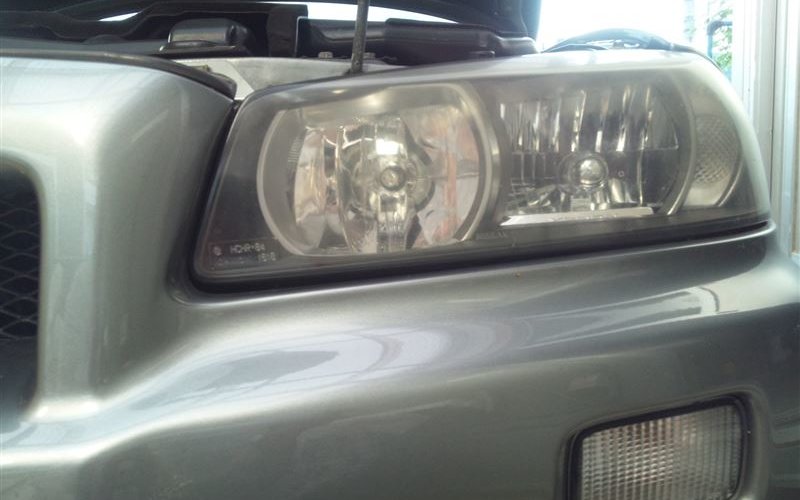
I’ve always been concerned the gap of front bumper. So I decided to fix it cheaply. There is quite a gap between the headlight and the bumper. This bothers me. This is the parts I will use here. – bolt(M6×120㎜)– high nut(M6×30㎜)Both are made of iron. You can get them for about $5 at home improvement center. Then carrying out. Attach the previous one to the bolt at the red circle. It comes out from the car body side and is fixed with a nut. First of all, take the stay fixing the bumper. You cannot install the bolt without removing this. Let’s install the bolt. I don’t think there is a problem without it, but it would be good to have a spring washer to prevent it from loosening. I think there are various ways to adjust it, but I adjusted it while lifting the bumper. I think that there is no problem if you adjust with your own method. Adjustment is complete. The gap of the bumper has disappeared successfully. As a precaution, keep in mind that if you raise it too much, the hood will not close. By the way, this time I dropped the bonnet from […]
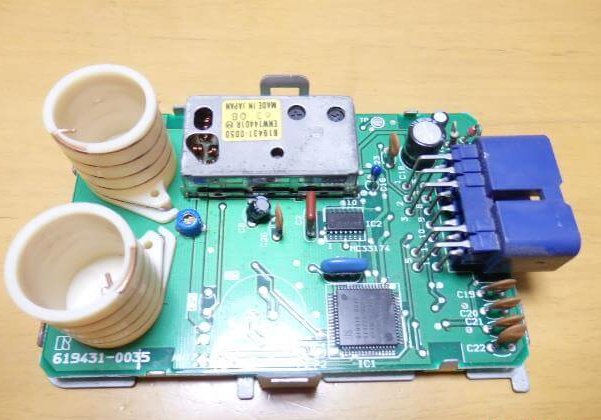
The time when Toyota Supra JZA80 made its debut was just the time to shift from the infrared type keyless entry system to the radio type. The infrared type directs the infrared wave by directing the key to the door key cylinder. Sensitivity is poor and will not respond unless it is very close. A typical example is Subaru Legacy BG5 and so on. Toyota cars around 1992 have mostly adopted the radio wave type. The keyless receiver, which is a dealer-installed option, is equipped as such a box under the driver’s seat. Open the tabs of the receiver little by little using a flat head screwdriver. Lift the other side of the connector and remove the black case cover, avoiding the blue connector. The circuit board comes out. While you’re at it, it might be good to check for electrolyte leaks. The operation time is short, so I think it’s OK. Below the big coil, there is a part where “ANT” is printed on the circuit board. Solder appropriate wiring here. The length should be about 1 to 1.5 meters. Even if you turn this variable resistor, it will change, but it will change just a little, so you […]
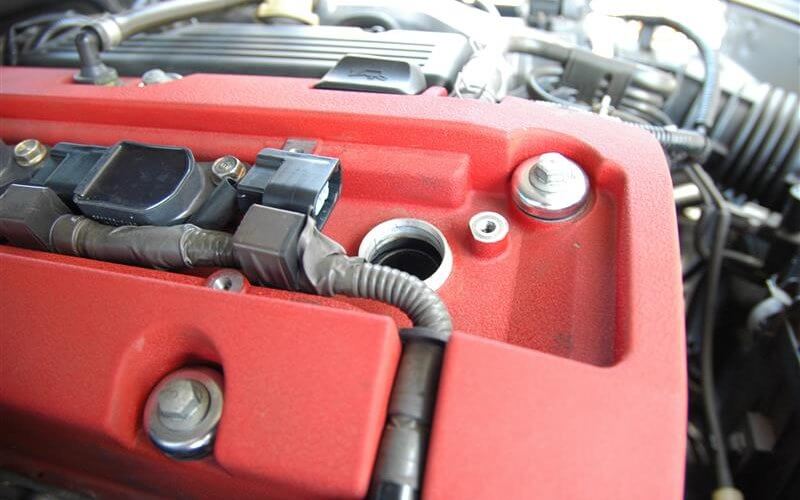
Recently, the check engine lamp flashed several times while driving S2000. The auto dealer’s mechanic confirmed that the engine was misfiring. The cause of the misfire has not been identified, but decided to replace the spark plug and ignition coil to eliminate the possible causes. First, remove the plug cover and remove the ignition coil and plug in this order. Check the removed spark plug. The condition of the plug is better than I expected. However, the gap was about 1.3mm compared to the new 1.1mm. It was almost limit value. Comparison of old and new plugs. An old one is the NGK Iridium MAX. It is a long-life plug, but it seems that it has reached the end of life at 30,000 km. A new one is DENSO iridium power. The new plug is not a long-life type, so I think that I have to replace it within 10,000 km. This is a new ignition coil. The genuine product is expensive, so I choose compatible product. Made by HITACHI. For F20C, you should choice “U14H01-COIL”. Comparison of old and new ignition coils. The genuine ignition coil is made by Denso. The plug entry is brown and dirty. Install the […]
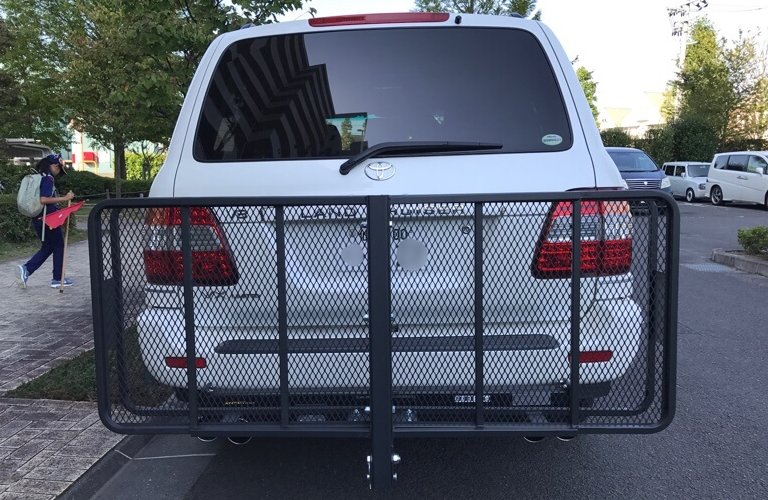
Assemble and Install CURT 18153 Basket-Style Cargo Carrier to TOYOTA Land Cruiser J100. Attached hitch member is SUNTREX Tag Master Standard, 5.0cm for receiver. The hitch cargo’s adapter is for US standard 2inch / 5.08cm, so it seemed that it needs to be scraped a little, but it was installed without any processing. A little tight but everything is OK. Let’s assemble. You should prepare 17/19/24mm wrench and monkey wrench. There is a little gap in the joint. If it wobbles, you’ll need a spacer. When installing, it is better to fold the hitch cargo like this so that it can be inserted smoothly into the hitch member. Installation is complete. The reflector is a little poor. External reflector may be good. You can fold it when you’re not using it, but it’s longer because of the clearance. But it’s convenient because you can open the back door even when folded. However, since you can’t see it side mirror or rear-view mirror at all, be careful not to hit it when parking. So recommend using rear-view camera. Have fun!
Down Suspension for Lowering Let’s make TOYOTA CAMRY AXVH70 lowering. Install RSR Ti2000 down suspension. Before and After Comparison of front clearance. Lowered 23mm measured value. Rear clearance. Lowered 27mm measured value. Side view. You can see the difference. Going through the slope. Oops!
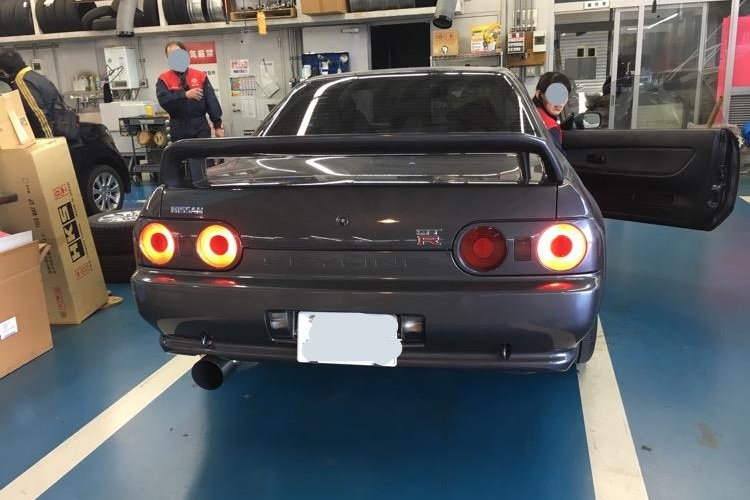
The light bulb went out As you can see the tail light bulb went out on the right side of Nissan Skyline R32 GT-R. Prepared a new one, PIAA ASTRAL WHITE4800K. Installation First you have to open this cover in the trunk. The back of trunk room. Then tail light unit appears. And pull both ends to detach. The bulb can be easily removed by pushing and twisting. Install the new one in the same way. it’s done!