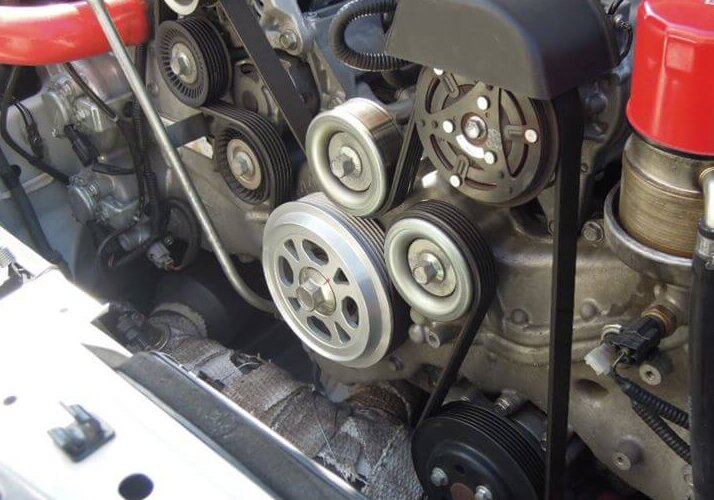
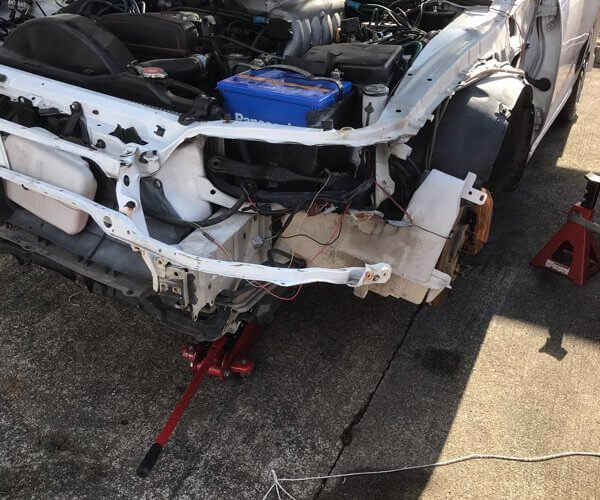
It was a part that I hesitated so far, but I attached it because it was available at a low price. It is a crank pulley made by ZERO / SPORT. Remove the battery terminal and remove the area around the air cleaner to secure space. Originally, a special tool is required, but it can be done without it. You can lock the crank by putting the gear in 6th gear (5th gear) and applying the side brake. (MT car) As an aside, if it’s an FF car, it’s okay if someone steps on the brakes. Extend the ratchet handle with a pipe (700mm) and apply force to loosen the pulley bolts. Since the drive system is twisted, it is difficult to apply torque for a moment, but it loosened after several attempts. If you want to use a breaker bar, you need 600mm or more. If you can do it so far, it seems that the work is almost finished. Hook a tool on the tensioner bolt and apply force to turn it clockwise to loosen the belt, so remove it as it is. Remove the genuine pulley. Replace the O-ring with a new one. Bolt the lightweight pulley. […]
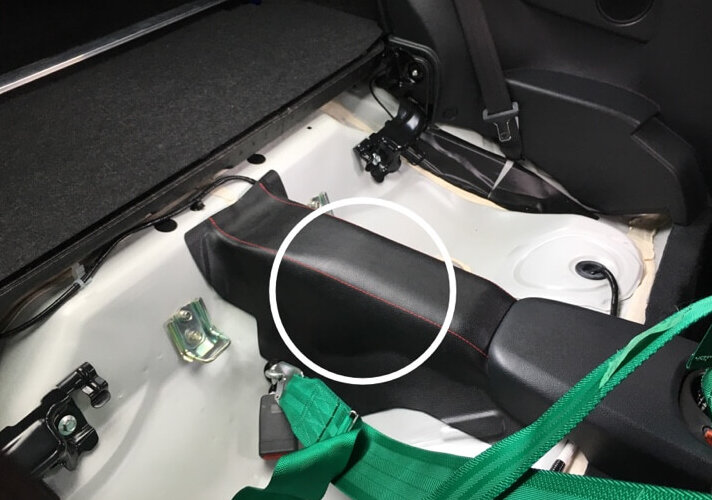
The rear seats will be removed to reduce weight when driving on the circuit. Putting myself in my car and riding three people is only a few times, so there is no particular problem. As for the noise, I always knocked down the rear seat to make it look like a 2-seater, so the sound does not change so much even if the road noise becomes a little louder. I hope the fuel economy will also improve. First of all, how to remove the seat. Remove the white circle bolt with a 10 mm socket wrench. (Tightening torque 13N • m) Next, lift the white circle and push the arrow down. Then it will come off. Next is the backrest. First, tilt the backrest and remove the trunk board. Since there is a clip in the part of the picture, you can pull it out, or you can leave the clip on the car side and remove it from the seat as shown in the picture. There are 3 clips in the white circle. Remove the clip and turn it over to see the bolt. Remove it with a 12 mm socket. The photo is on the right side, but […]
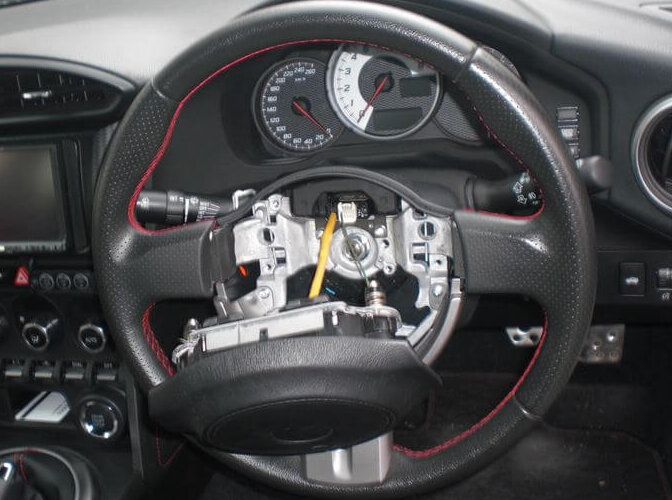
Before disconnecting the steering wheel, first disconnect the negative terminal of the battery. Next, if you look at the red circle in the photo from the side, there is a hole. Insert a flat-blade screwdriver there to unlock the airbag. (3 places) Yes, the airbag has come off. It’s easy. Use a flat-blade screwdriver to pry the airbag terminal slightly to remove it. Now, let’s remove the steering wheel. Loosen the center bolt and pull it while pushing and pulling it back and forth and left and right with the bolt slightly applied. The bolt is pretty stiff. The steering has come off. Install the airbag canceller and horn terminals. Attach the steering boss and insert the wiring inside. Make sure that the triangle mark on the boss is on top. Connect the wiring of the horn and attach the steering to complete. After that, connect the battery and check if the navigation starts and if the airbag warning light goes out.
It’s not a big deal, but it’s a work memo. I removed the roof antenna to do something a little this time. If you know how to remove it, you can remove it in 5 minutes. It took me 15 minutes by trial and error. First, remove the three push-type clips that are fixed to the top of the rear glass. If you remove these three clips, you can flip the interior a little and insert your hand through the gap to remove the antenna. There is no need to remove the interior of the C-pillar. This time, I had a hard time removing this push-type clip. If you know the structure, it’s easy to remove. Insert something like a flat-blade screwdriver into the gap between the white and black parts and pry it to unlock it. Remove the hexagon nut-shaped special screw with a monkey wrench or the like. After that, you can remove the antenna by pushing the plastic tab of the red circle and pulling it out from the outside. The work is completed.
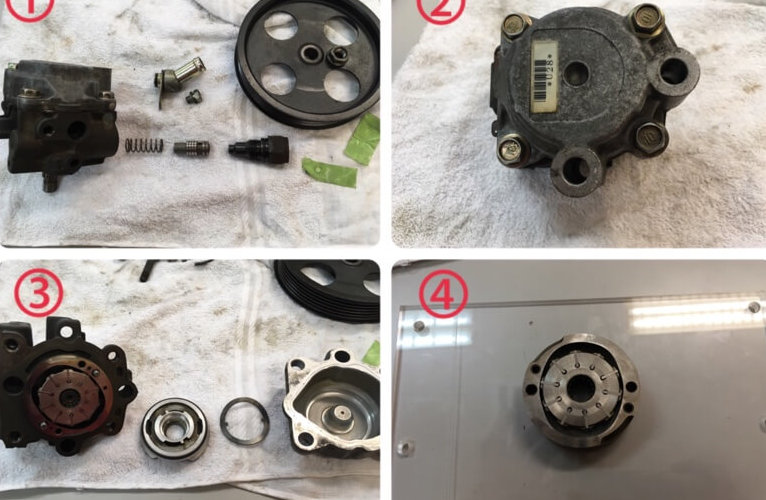
It is an overhaul of the power steering pump (vane pump). First, remove the battery, piping near the throttle, auto tensioner damper, and belt. The pump is fixed with three bolts marked with orange circles. In addition, remove the hose that connects to the power steering fluid reserve and the hose that connects to the rack. Those who connect to the rack were removed with 22 mm and 24 mm spanners. It’s hard to see in the picture, but the pump is further fixed to the base bracket with two 14mm bolts. I used an impact wrench to remove the pulley. It’s 17mm. If you think it’s power steering fluid, but it’s bearing grease. It’s popping out. ① Remove the pulley and remove the bolt that connects to the 24mm rack and the bolt that connects to the 12mm reserve.② Remove four 12 mm on the back side.③ Introducing the vane pump. From the right, the back cover, wave washer, vane pump lid, body.④ Gently remove the vane pump so that it does not fall apart. I didn’t move it until I put it on an acrylic board and assembled it. This is a replacement part.Above is the vane pump […]
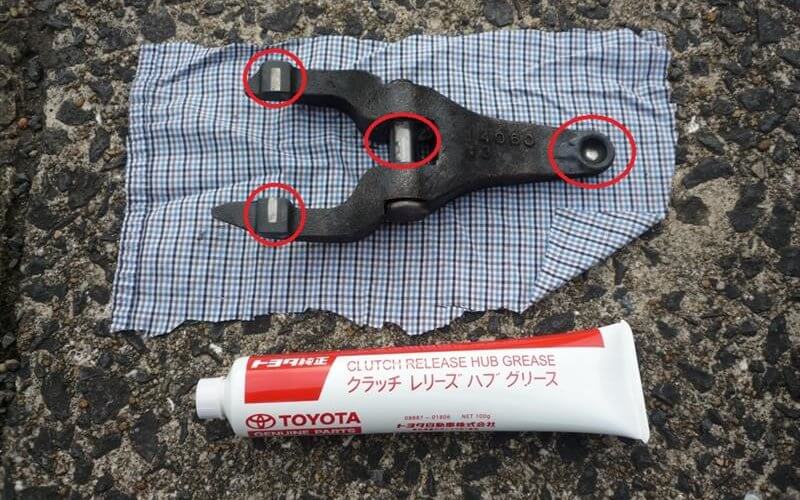
When you operate the clutch slowly, you will hear a strange noise from the bottom of the car body, so grease it up to the release fork. First, jack up the car so that you can access the area around the clutch release cylinder at the bottom of the passenger seat side. Next, remove the clutch housing cover attached to the side of the clutch part of the mission and open the service hole of the clutch housing. Two red circle bolts. Remove the clutch release cylinder fixed to the side of the mission to free the clutch release cylinder. Two bolts indicated by red circles. Slide the clutch release cylinder in the direction of the arrow to release the tension on the clutch release fork. Care must be taken not to overload the pipe connected to the release cylinder. Pull out the clutch release fork toward you to remove it. Since the release fork is fixed with a hook-like part and a spring, it can be pulled out from the service hole by pulling it toward you when the release cylinder is not under tension. Apply clutch release hub grease (genuine Toyota) to the red circle part of the […]
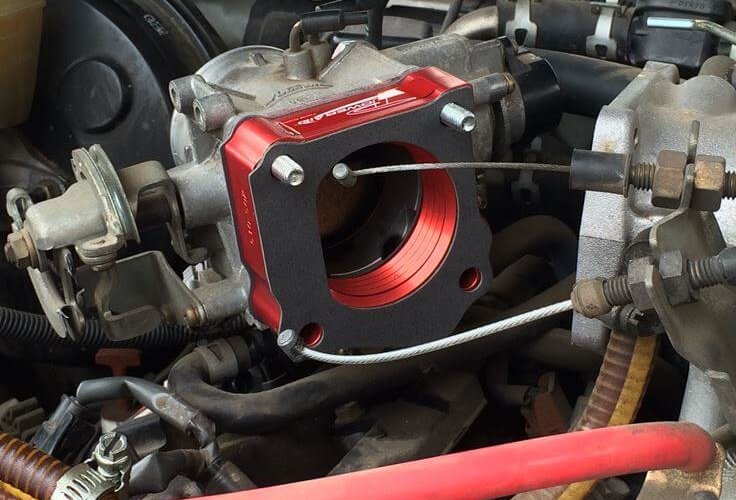
Since the throttle spacer for 5VZ-FE is not sold in Japan, I personally imported the one made by AIRAID from overseas. The contents are as follows.・Spacer body・2 gaskets・Mounting bolts・Promotional stickers・Instructions (not shown in the photo) The work is easy. Remove the throttle from the engine side. Of course, the throttle cannot be removed unless the air intake is removed. Don’t forget the various wires. Install the throttle spacer on the removed throttle side. Don’t forget to install the attached gasket at this time. Then put it back. Since the wire will be pulled by the amount of the spacer, actually step on the accelerator to adjust the play. I think this is all right. Completed by restoring the removed air intake. When I ran after installing it, the response improved dramatically! Since the amount of depression of the accelerator has decreased, fuel efficiency has also improved. I think that it is a part that can be installed without any loss.
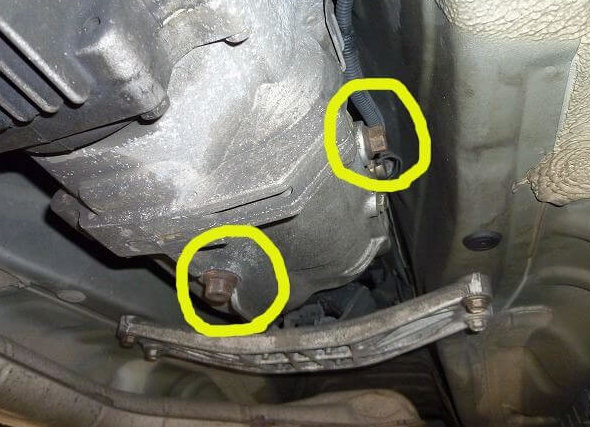
Preparing for work Here’s a summary of what you need to change Supra’s mission oil. Mission oil 2L 17mm socket or combination wrench (It requires a lot of torque, so it should be as long as possible) Spinner handle, ratchet wrench, etc Stainless steel pipe with an inner diameter of around 10 mm (Use with a combination wrench) Liquid gasket Oil suction equipment such as suction gun Creeper (Convenient if you have) Waste oil processing box Paper waste Disposable vinyl gloves Work gloves Brake cleaner Hydraulic jack and rigid rack Lowdown slope How to change the transmission oil The yellow circle on the right side of the photo is the oil inlet, and the yellow circle on the bottom is the oil drain. Since the standard amount of mission oil for Supra is 1.8L, you can work by preparing 2L of mission oil. At least the front must be jacked up when changing. After jacking up, be sure to use a rigid rack as a safety measure. (The 5MT W58 mission uses 2.6L of oil, and the 6MT V160 or V161 mission uses 1.8L of oil.) Now, I will explain the flow of mission oil change. First, run your Supra […]
First, jack up and fix it on the stand. At the same time, it is easier to work if you remove the front left wheel. It is even better to remove the front bumper if possible. If you have a lift, you don’t have to this. Remove the Supra starter motor from below. All you have to do is remove the two bolts that secure the starter motor. However, it is very narrow and difficult to work with. This may be true not only for 2JZ but also for 1JZ. By the way, the bolt diameter is 14mm. Remove it by making full use of the 14 mm socket and the long extension and universal joint. If you loosen it with a torque wrench first, you can remove it easily. Be careful not to drop the bolts as they are long! It is safer to wear protective equipment. If it comes off so far, remove it while being careful not to drop it. Comparison of a detached starter motor and a new starter motor. Above is new one. The product number above is …T Product number 28100-46200D Product number 228000-5970 Below is …T Product number 28100-46140D Product number 228000-1960 Even […]
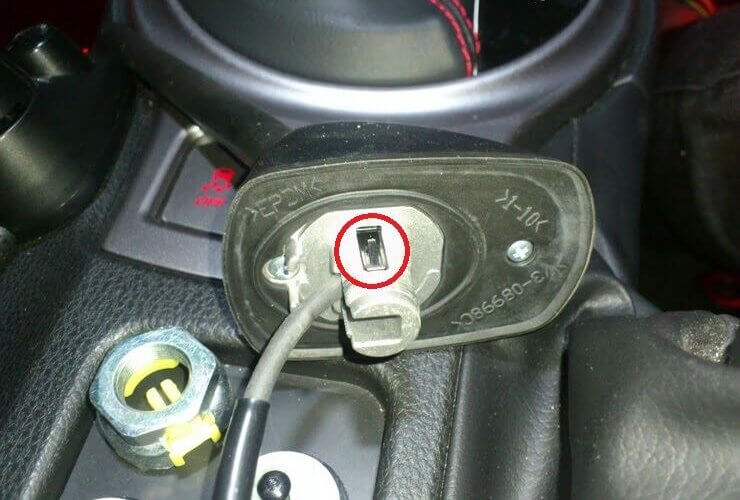
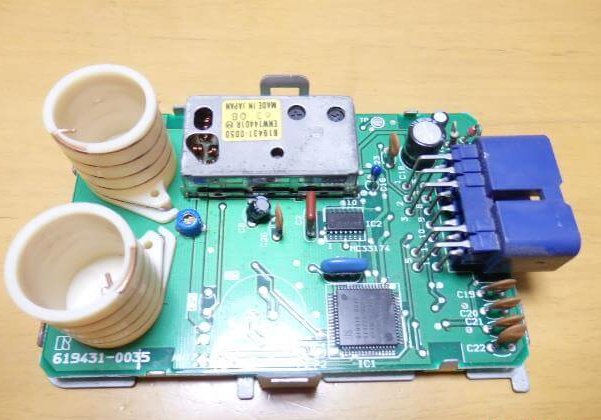
The time when Toyota Supra JZA80 made its debut was just the time to shift from the infrared type keyless entry system to the radio type. The infrared type directs the infrared wave by directing the key to the door key cylinder. Sensitivity is poor and will not respond unless it is very close. A typical example is Subaru Legacy BG5 and so on. Toyota cars around 1992 have mostly adopted the radio wave type. The keyless receiver, which is a dealer-installed option, is equipped as such a box under the driver’s seat. Open the tabs of the receiver little by little using a flat head screwdriver. Lift the other side of the connector and remove the black case cover, avoiding the blue connector. The circuit board comes out. While you’re at it, it might be good to check for electrolyte leaks. The operation time is short, so I think it’s OK. Below the big coil, there is a part where “ANT” is printed on the circuit board. Solder appropriate wiring here. The length should be about 1 to 1.5 meters. Even if you turn this variable resistor, it will change, but it will change just a little, so you […]