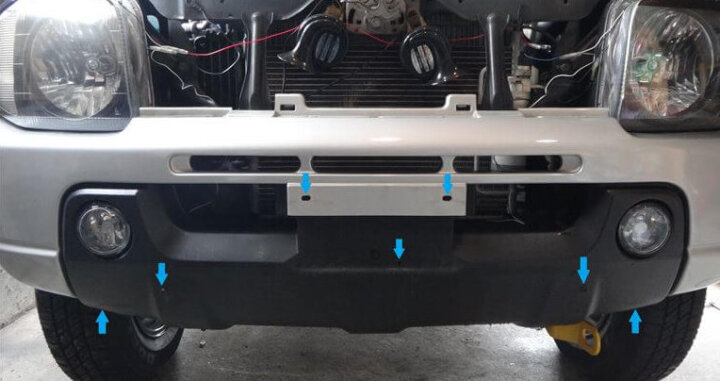
The red arrow in the photo is the clip position, and the blue arrow is the bolt position. First, open the hood and remove the front grill. There are only three black clips at the arrow on the photo, so pull it out and remove the grill. The photo is already after removing the grill. When you remove the grill, there are three black clips on the upper part of the bumper below it (the part indicated by the arrow below), so remove it. Remove the number and under garnish attached with the bolt or bolt nut at the position of the blue arrow. For the under garnish, if you do not remove it, you will not be able to see the bolt that holds the bumper at the bottom, so you will not be able to turn the bolt. I don’t think this work is necessary unless the car is equipped with an under garnish. The photo is after removing the number and under garnish. Remove the 3 bolts on the underside of the bumper and the 2 black clips on the outside. Remove the three black clips that secure the fender liner (black resin plate on the circumference […]
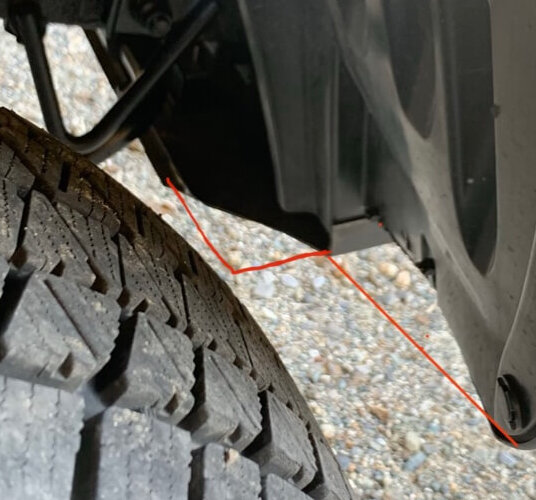
We will cut the front bumper to install this tire. It’s 2 inches up, but with this size it will definitely come in contact with the bumper due to bumps during off-road driving. I’m looking forward to it. Today is a holiday and the weather is nice, so it’s a good day for bumper cuts. Immediately, a rubber windshield? Mudguard? Is in the way. Since it is fixed with 2 rivets and 1 screw, destroy the rivet with a drill and remove it. Also remove the surrounding resin clip. Suddenly, it is a completed photo. This is the position where the former bumper was located up to the red line. I cut the lower part of the bumper over 5 cm with my electric saw, cut the corners diagonally, and then made two holes in the lower part of the bumper. Furthermore, while pushing the inner liner toward the front side of the vehicle, fix the rivet hole, clip hole and lower part of the bumper of the inner liner with a binding band. I didn’t cut the inner liner. And it’s okay because you can’t see it unless you look from below. Unpainted resin is easy to process, isn’t […]
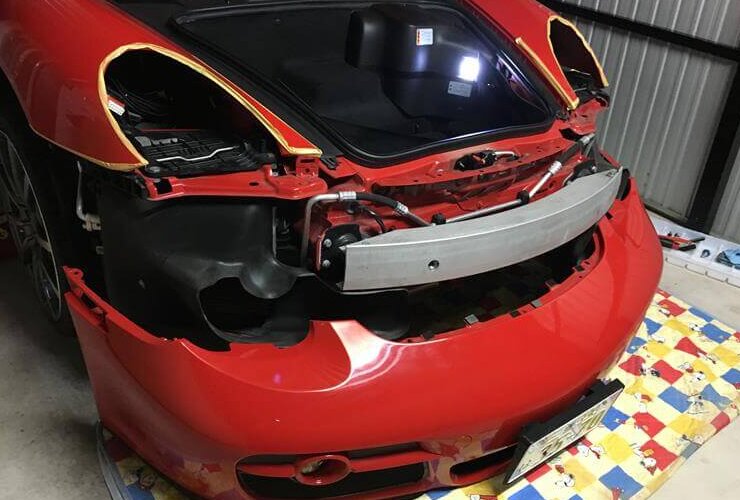
First, remove the headlight with the attached tool. How to remove is written in the instruction manual. After removing the headlights, also remove the connectors that connect the fog lights and the small lamps. Taking a picture of each will help you when you put them back. Remove the 7 Torx screws under the bumper. Remove the side marker. Also remove the lens. Remove the Torx screw on the inner fender. Jacking up creates space and makes it easier to work. The most difficult part this time. Slide the inner fender and remove the Torx screw that is stopped upward on the side marker. (Yellow arrow part) Remove two places on the left and right of the clip. Remove the three Torx screws that are fastened from the top of the trunk. Pull the bumper forward. Put masking tape on the parts that are likely to be scratched. Porsche Cayman bumper removal is complete.
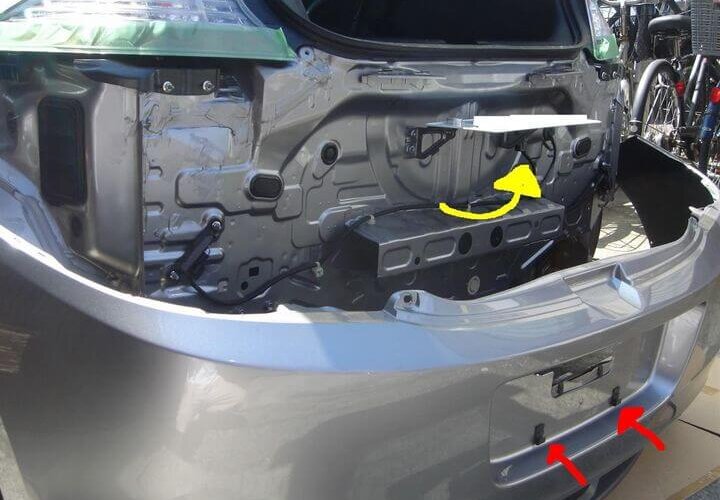
First, put a protective covering on the body. Remove the two screws from the tire house. There are a total of 4 on the left and right. Remove the hexagonal screw where the hatch was opened. There are a total of 2 on the left and right. Remove the screw underneath and remove the clip that stays on the body. There are a total of 2 screws on the left and right, and 4 clips. Now that there is nothing to hold the bumper in, pull it out. However, the license plate was caught and could not be removed. The license plate pops up when you remove the hook (red arrow) that holds the bottom side. Then, dodge the gap in the bumper and remove it. And don’t forget to remove the coupler of the license plate light. The removal is completed successfully.
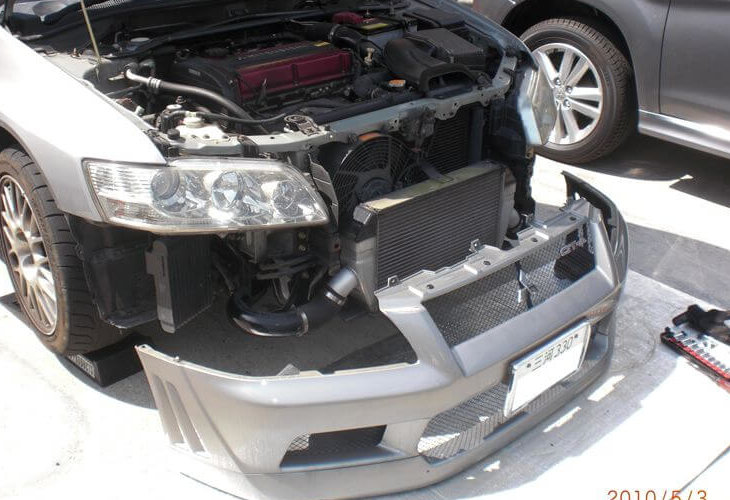
This is an explanation of how to remove the front bumper of Mitsubishi Lancer Evolution VII. It’s pretty easy if you can separate the undercover. The procedure is from the state where the clip of the undercover is removed. The reason why the license plate is removed in the photo is because the photo processing is troublesome. You can remove it with the license plate attached. Remove the 10mm bolt in the corner of the intercooler duct. There are two symmetrically opposite sides, so a total of two. Remove the clip and 10mm bolt on the top of the bumper. This is also symmetrical with 2 clips and 2 bolts. Remove the clip with a small flat-blade screwdriver. Remove one 10mm bolt and two clips at the bottom inside the wheel hood. The same applies to the inside of the wheel hood on the opposite side. Before removing it, if you turn the steering wheel and let the tires escape before removing it, you can secure space and work faster. Since there is a part that is inserted in the fender, pull it down a little and separate it. After that, pull it straight out to complete the removal of […]
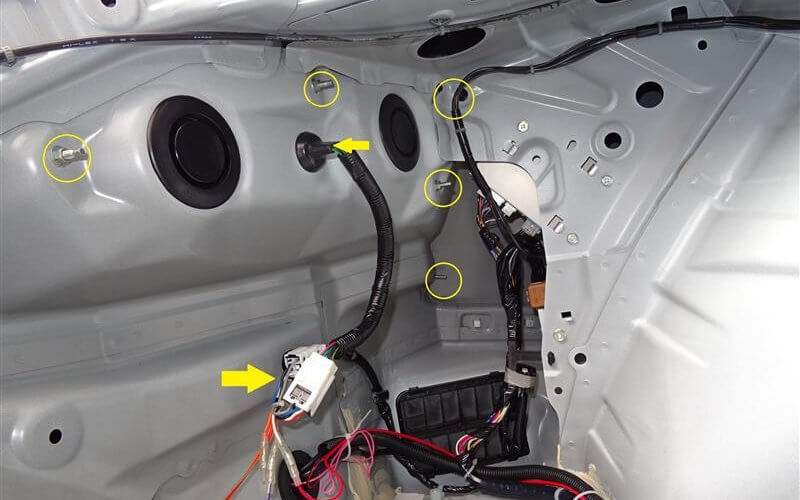
First of all, don’t forget to protect the mating place with curing tape. And recommend working with two people. Remove the 5 clips (all are not shown) indicated by the yellow circles and remove the panel. Remove the clip indicated by the yellow circle and remove the interior of the trunk. Do this for both sides. Also remove the floor mat. It is not fixed. Remove the nut indicated by the yellow circle. Remove the coupler indicated by the right arrow. Push the grommet indicated by the left arrow to the outside (bumper side). Do this for both sides. Remove the clip indicated by the circle on the rear tire house. Do this for both sides. Remove the cover of the tire house,and remove the nut that secures the rear under and bumper. The bolt fits into the hole in the rear under, so remove it. Do this for both sides. Remove the clips and nuts indicated by the circles on the left and right, and remove the diffusers on the both side. Although it is not shown in the photo, remove the clip that holds the center diffuser and rear under, and remove the rear under. The side can […]
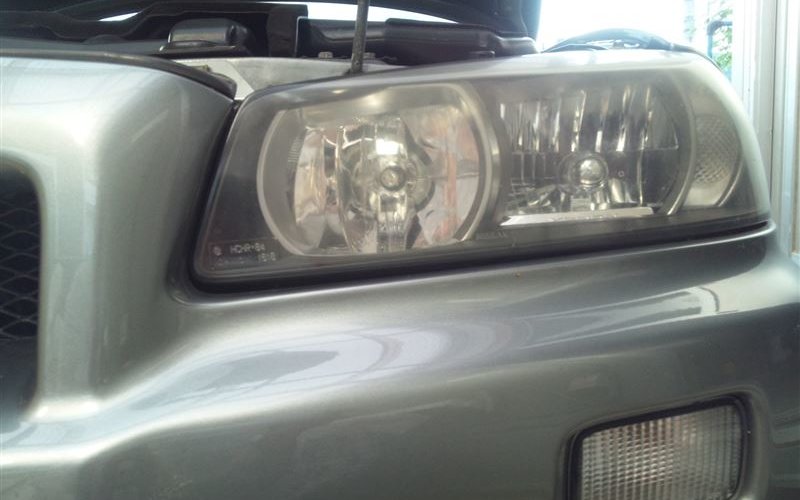
I’ve always been concerned the gap of front bumper. So I decided to fix it cheaply. There is quite a gap between the headlight and the bumper. This bothers me. This is the parts I will use here. – bolt(M6×120㎜)– high nut(M6×30㎜)Both are made of iron. You can get them for about $5 at home improvement center. Then carrying out. Attach the previous one to the bolt at the red circle. It comes out from the car body side and is fixed with a nut. First of all, take the stay fixing the bumper. You cannot install the bolt without removing this. Let’s install the bolt. I don’t think there is a problem without it, but it would be good to have a spring washer to prevent it from loosening. I think there are various ways to adjust it, but I adjusted it while lifting the bumper. I think that there is no problem if you adjust with your own method. Adjustment is complete. The gap of the bumper has disappeared successfully. As a precaution, keep in mind that if you raise it too much, the hood will not close. By the way, this time I dropped the bonnet from […]