R35 GT-R How To Remove Rear Bumper
First of all, don’t forget to protect the mating place with curing tape. And recommend working with two people.
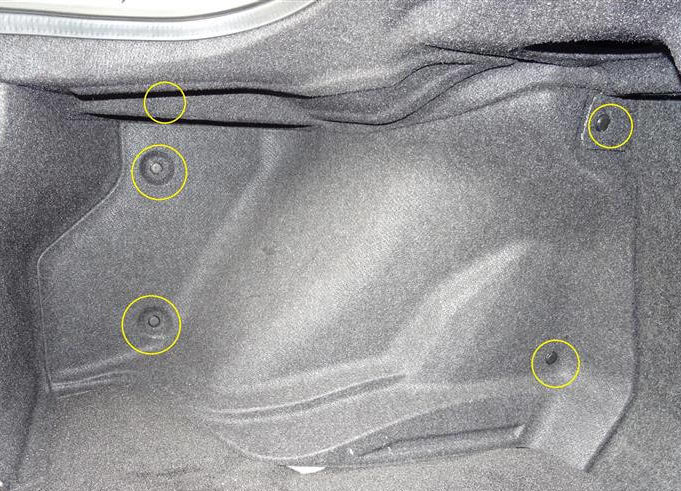
Remove the 5 clips (all are not shown) indicated by the yellow circles and remove the panel.
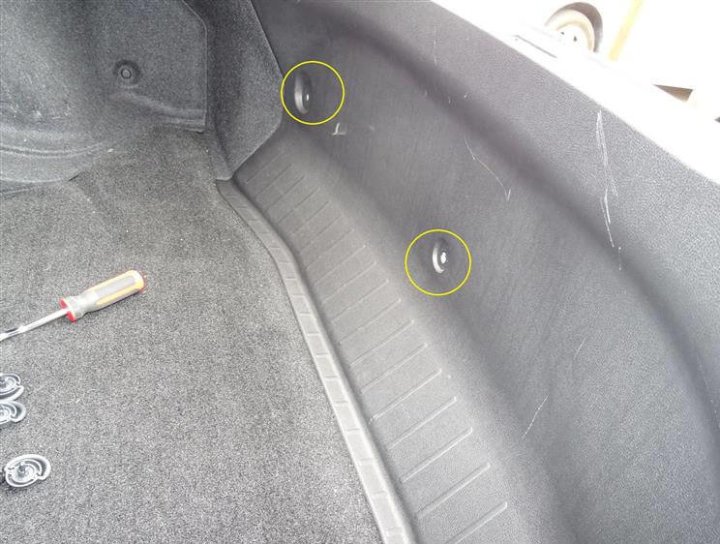
Remove the clip indicated by the yellow circle and remove the interior of the trunk. Do this for both sides. Also remove the floor mat. It is not fixed.
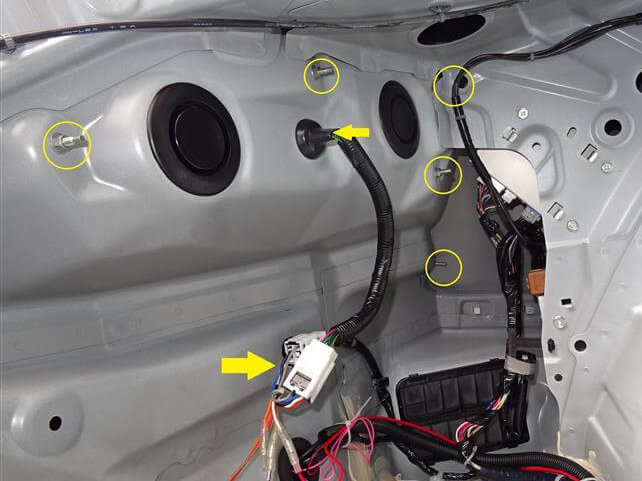
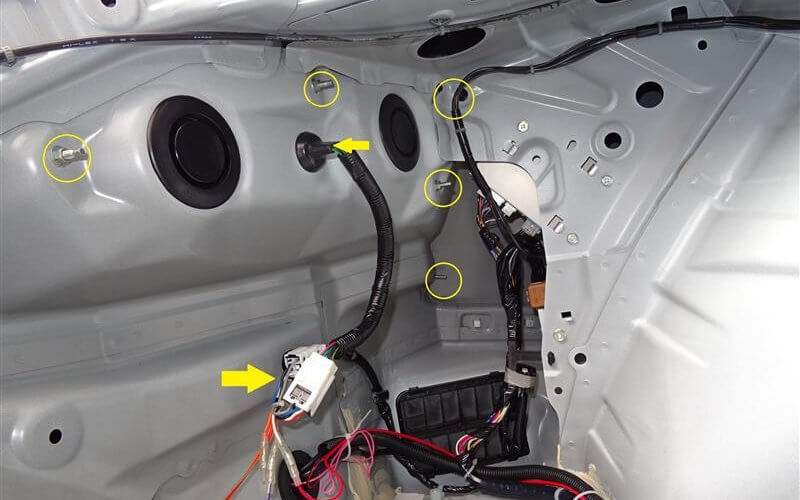
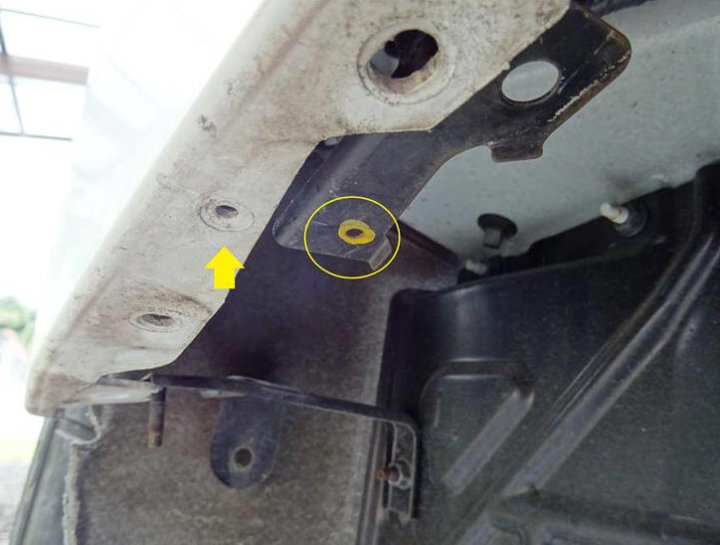
Remove the nut indicated by the yellow circle. Remove the coupler indicated by the right arrow. Push the grommet indicated by the left arrow to the outside (bumper side). Do this for both sides.
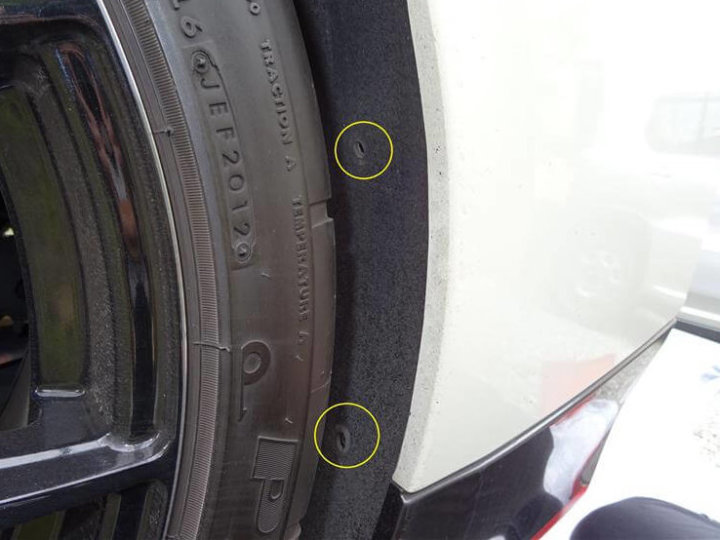
Remove the clip indicated by the circle on the rear tire house. Do this for both sides.
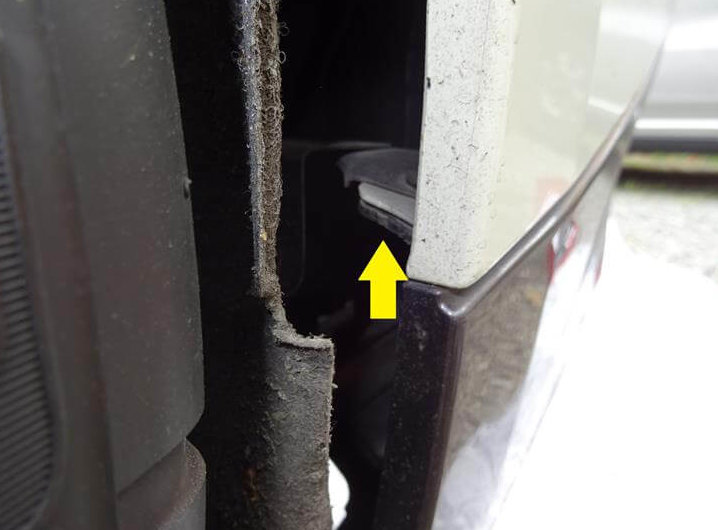
Remove the cover of the tire house,
and remove the nut that secures the rear under and bumper. The bolt fits into the hole in the rear under, so remove it. Do this for both sides.
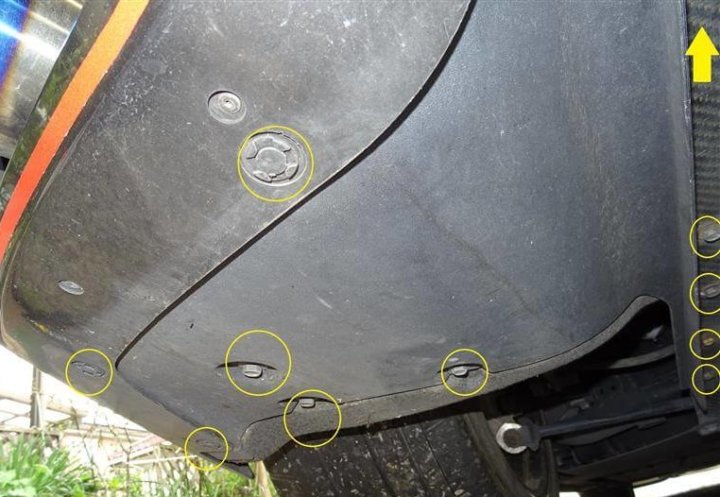
Remove the clips and nuts indicated by the circles on the left and right, and remove the diffusers on the both side. Although it is not shown in the photo, remove the clip that holds the center diffuser and rear under, and remove the rear under. The side can be easily removed, but the back side is fitted so detach it.
From opening of tire house cover,
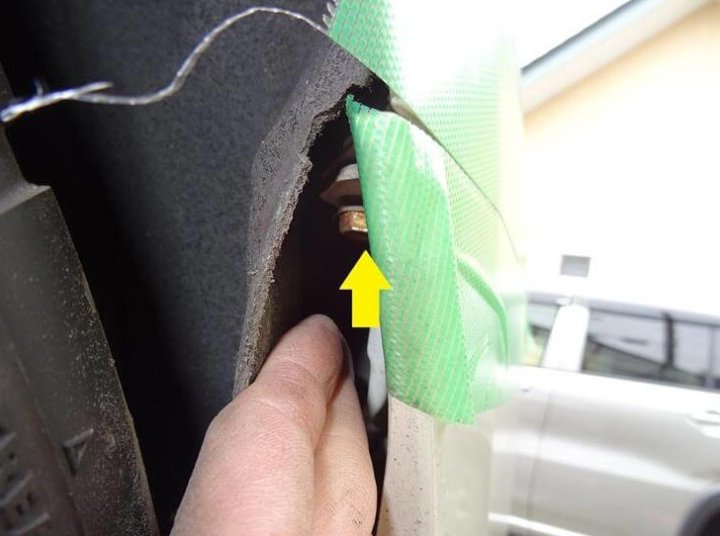
Remove the bolts that secure the bumper and rear panel. Do this for both sides.
At the place where the rear under is removed, there is a white clip that fixes the hanger suspending the rear bumper, so remove it. Do this for both sides. You can flip up by lifting the license plate from the bottom to the top.
Now you can remove the rear bumper. The rear bumper comes off when you remove the fit from the left and right parts and remove the fit from the center. Before taking it down, pull out the tail lamp wiring and remove the wiring coupler of the number lamp, and it will be free.
- Previous Posts

R35 GT-R Checkpoints For Purchasing Used Cars | Malfunction Summary 2020.07.08
- Next Post
R35 GT-R How To Change Transmission Oil 2020.07.19