Impreza WRX GD Power Steering Pump Replacement
- 2020.10.11
- Fiddling
- GD, Impreza, Power steering pump, Replacement, Subaru, WRX

When it became cold and I started the engine, the roaring noise became terrible for a while, and I was riding in a deception by changing the power steering oil, but since the power steering tank was full of bubbles, I decided to replace the pump for the time being. I think the cause of cavitation is that it has sucked in air, but I don’t know where it came from, and apparently there is no oil leakage. In any case, Subaru’s hydraulic pumps of this age seem to have troubles over the years, including the Legacy, so I’m thinking of replacing them with rebuilt pumps to see the improvement in symptoms.
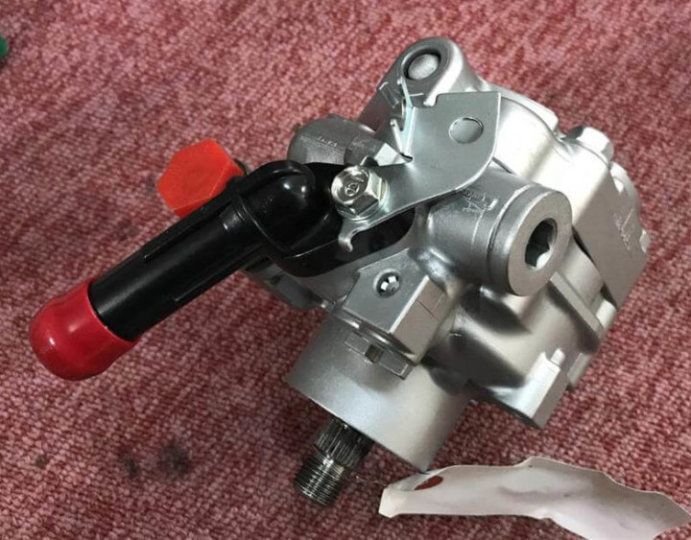
First of all, I got a rebuilt pump, but my GDA power steering pump is a model called 34430FE041, which seems to be out of stock in the rebuilt market. I had a little trouble buying it online (34430FE041 seems to be common with 040, 070 and 071). At the same time, I ordered two hoses connected to the power steering tank that could be easily replaced and a metal gasket on the high pressure side that connects to the pump and prepared them.
Return hose 34611FE050
Suction hose 34611FE130
Gasket 34621AC022
The procedure is to drain as much oil as possible from the tank. Next, remove the hose connected to the pump, but of course the oil remaining in the hose will spill, so proceed while dealing with it. Finally, I removed the tank, cleaned the tank lightly, and replaced the two connected hoses with new ones.
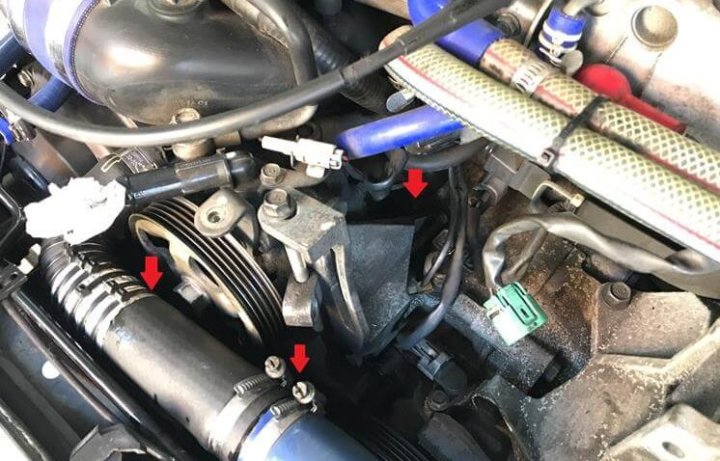
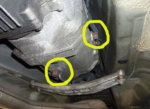
Next, remove the pump together with the mounting frame. Remove the two fan belts and remove the alternator for easier work. The pump is fixed with three bolts (around the bottom of the red arrow in the photo), but the bolt at the back is difficult to loosen, but it is difficult for tools to enter, but it can be removed somehow. The problem was on the left side in front of the photo, and because I was replacing the radiator for an aftermarket product, the gap was narrow and no tools could be inserted.
After struggling, I finally gave up and removed the upper hose of the radiator and removed the bolt. I had to drain a certain amount of coolant, which increased the man-hours considerably.
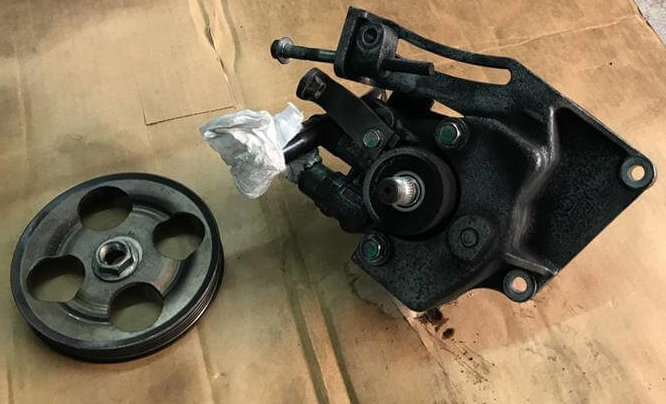
I tried to loosen the pulley nut before removing the pump, but I couldn’t loosen it and gave up. After removing the pump, I wondered how to remove the pulley. The removed pump itself must be returned to the rebuilder as a recycled core in a normal state, and damage is strictly prohibited. As a result, I put a fan belt on the pulley, stepped on the belt with my foot, loosened the nut with an impact wrench, and it could be removed in an instant.
After that, proceed with the new pump in the reverse process of removing it, and the installation is completed. Return the coolant and radiator hose, attach the belt, attach the power steering tank and hose, and fill the PS oil up to the upper limit of the tank level gauge.
After that, without starting the engine, jack up the front according to the procedure and turn the steering wheel about 20 times with lock to lock to bleed air. After that, start the engine and turn the steering wheel to remove the remaining air, but this is difficult. Turn the steering wheel after warming it sufficiently, but if there is a little air left, it will rattle and vibrate on the way. Turn off the engine each time and lock to lock several times. Repeating it 6 or 7 times, it finally settled and the air bleeding was completed. Perhaps I didn’t know the knack of how to do it, I thought about the air bleeding work easily, but I thought that it was a work that could damage the gearbox if I was not good at it. After that, the abnormal noise and cavitation symptoms improved.
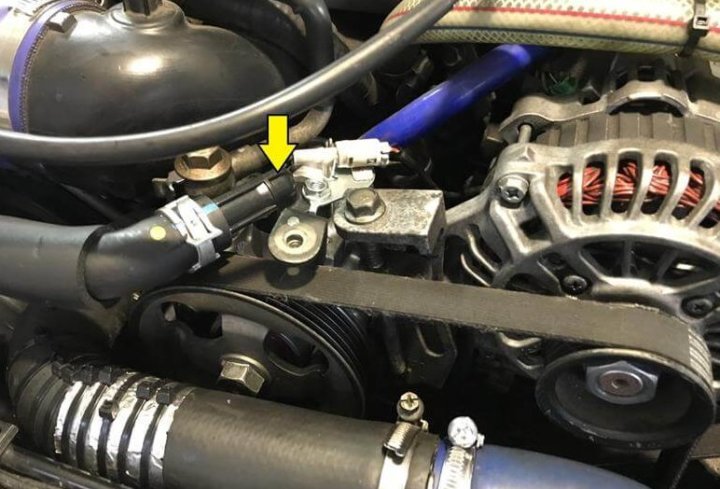
In the case where air bubbles are generated in the power steering tank but there is no oil leakage like this time, I think that it is only sucking air from the negative pressure side, but in the same case, only O-ring replacement (yellow arrow part) ), Some people have improved. If this is the case, only the O-ring fee will be required, so I think it will be very cheap.
Connector part O-ring 34439FG000
- Previous Posts
Supra JZA80 How To Change Transmission Oil 2020.10.04
- Next Post
Mitsubishi Evo VII How To Remove The Front Bumper 2020.10.18