Mitsubishi Evo VII How To Remove The Front Bumper
- 2020.10.18
- Fiddling
- Bumper, Evo VII, Lancer Evolution, Mitsubishi, Remove
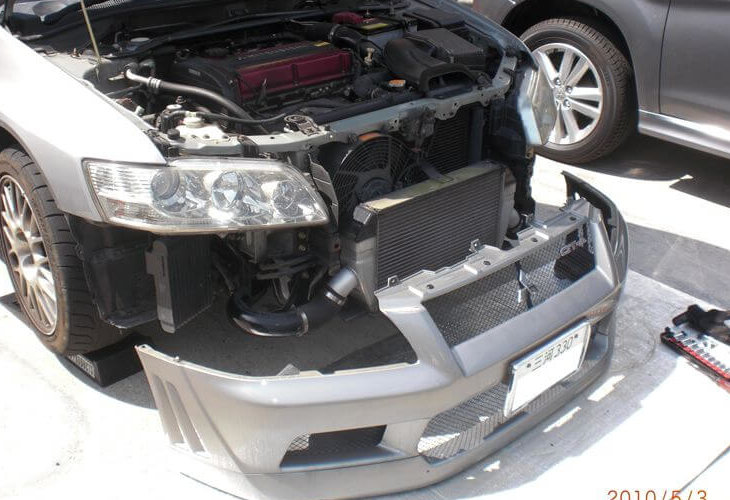
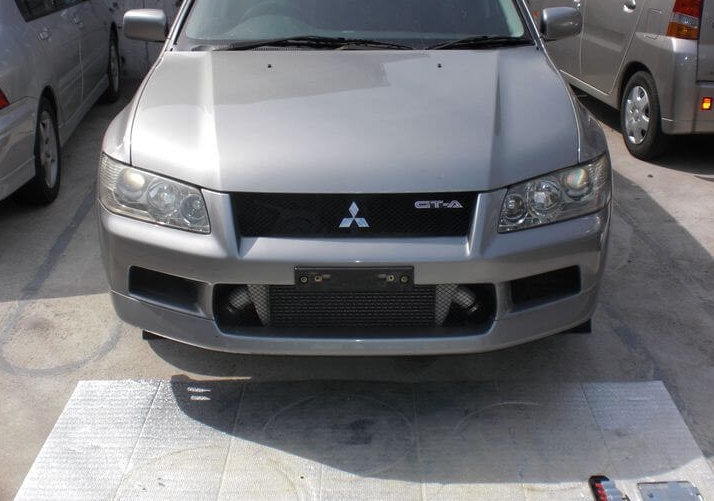
This is an explanation of how to remove the front bumper of Mitsubishi Lancer Evolution VII. It’s pretty easy if you can separate the undercover. The procedure is from the state where the clip of the undercover is removed. The reason why the license plate is removed in the photo is because the photo processing is troublesome. You can remove it with the license plate attached.
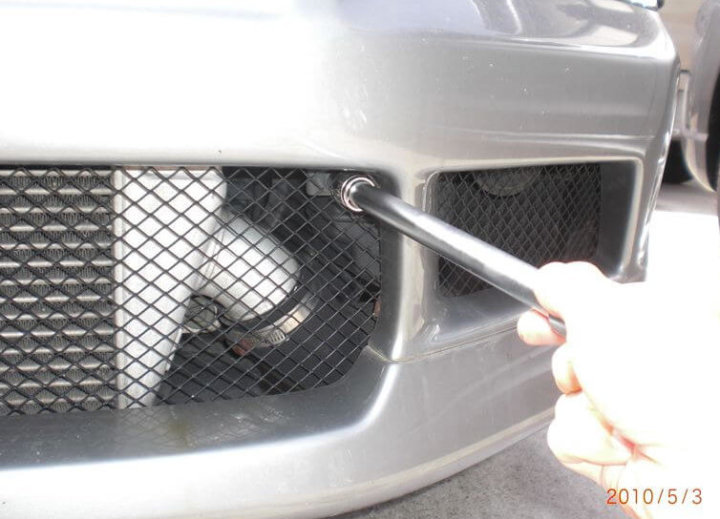
Remove the 10mm bolt in the corner of the intercooler duct. There are two symmetrically opposite sides, so a total of two.
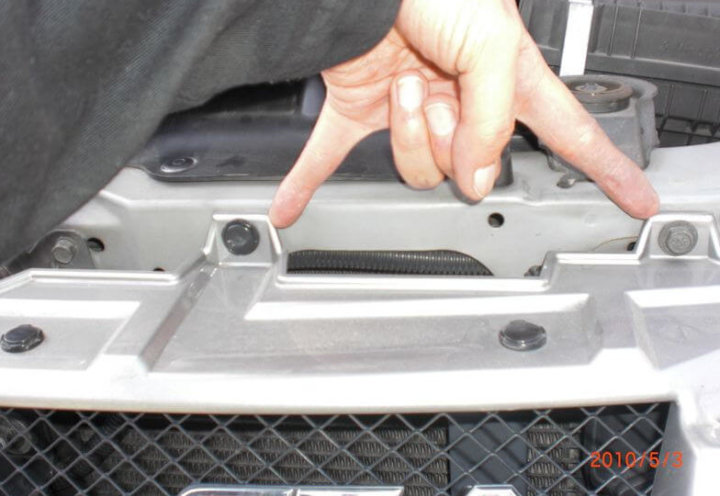
Remove the clip and 10mm bolt on the top of the bumper. This is also symmetrical with 2 clips and 2 bolts.
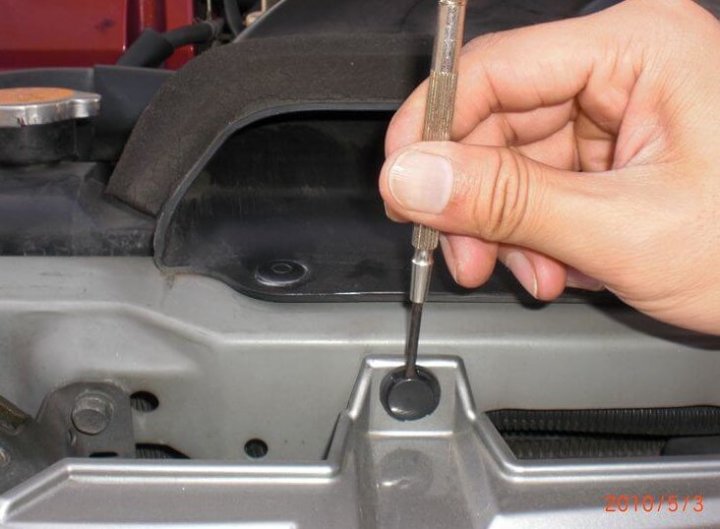
Remove the clip with a small flat-blade screwdriver.
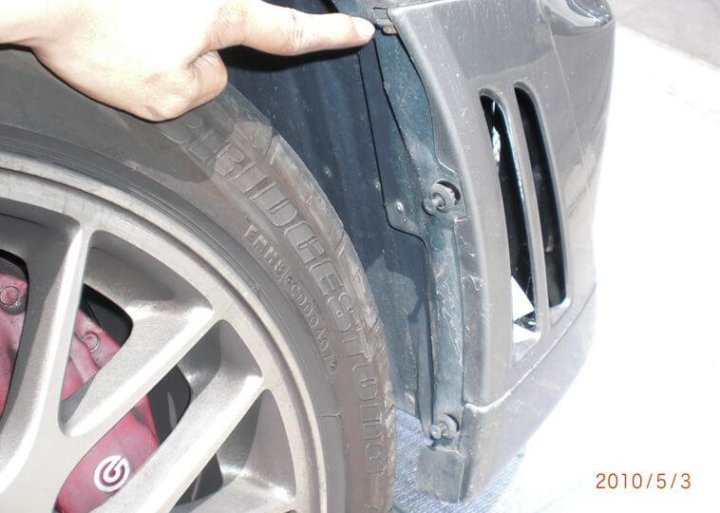
Remove one 10mm bolt and two clips at the bottom inside the wheel hood. The same applies to the inside of the wheel hood on the opposite side. Before removing it, if you turn the steering wheel and let the tires escape before removing it, you can secure space and work faster.
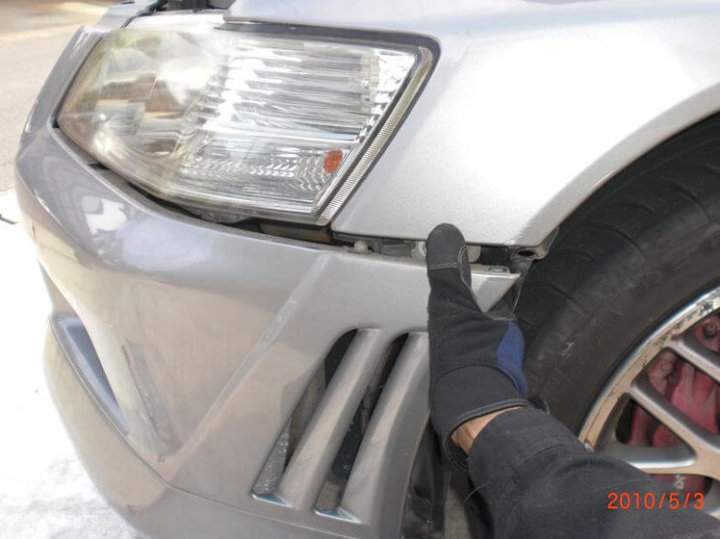
Since there is a part that is inserted in the fender, pull it down a little and separate it.
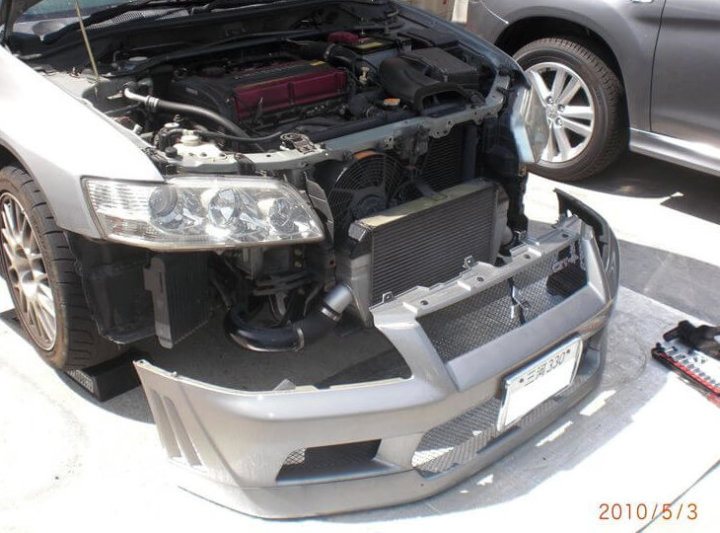
After that, pull it straight out to complete the removal of the bumper. When working on concrete, it is convenient to lay a leisure sheet to prevent scratches. If you get used to it, you can remove it in about 10 minutes.
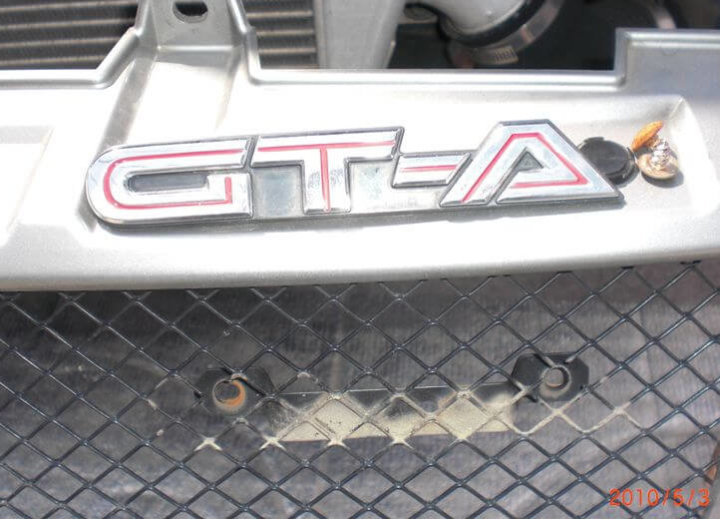
As an aside, I removed the bumper to remove the GT-A logo, but I was disappointed because the mounting stay was fixed.
- Previous Posts
Impreza WRX GD Power Steering Pump Replacement 2020.10.11
- Next Post
Mazda RX-7 FD How To Remove Retractable Headlight 2020.10.25