Suzuki Jimny How to Remove the Front Bumper
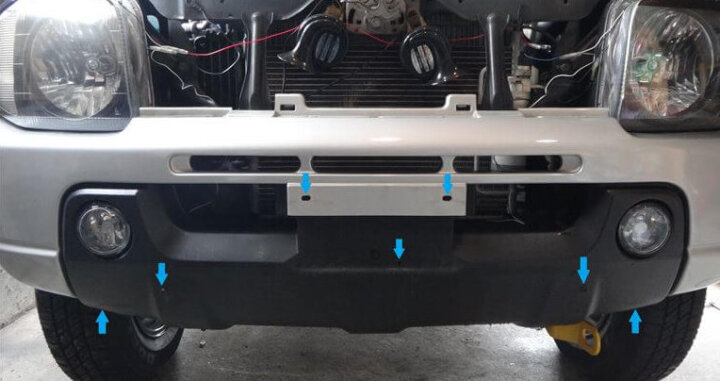
The red arrow in the photo is the clip position, and the blue arrow is the bolt position.
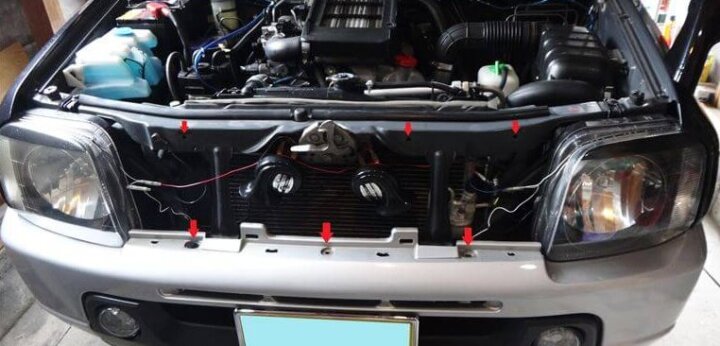
First, open the hood and remove the front grill. There are only three black clips at the arrow on the photo, so pull it out and remove the grill. The photo is already after removing the grill. When you remove the grill, there are three black clips on the upper part of the bumper below it (the part indicated by the arrow below), so remove it.

Remove the number and under garnish attached with the bolt or bolt nut at the position of the blue arrow. For the under garnish, if you do not remove it, you will not be able to see the bolt that holds the bumper at the bottom, so you will not be able to turn the bolt. I don’t think this work is necessary unless the car is equipped with an under garnish. The photo is after removing the number and under garnish.
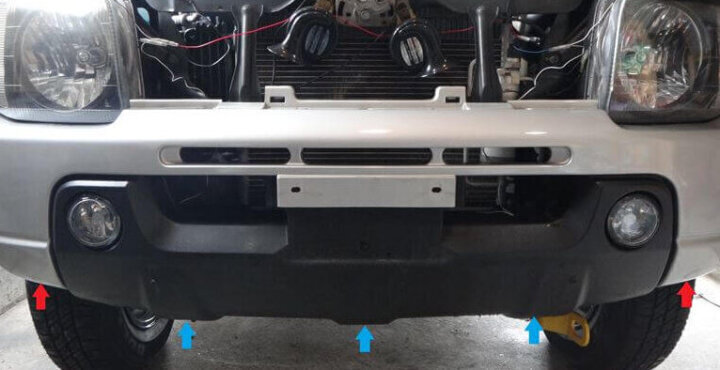
Remove the 3 bolts on the underside of the bumper and the 2 black clips on the outside.
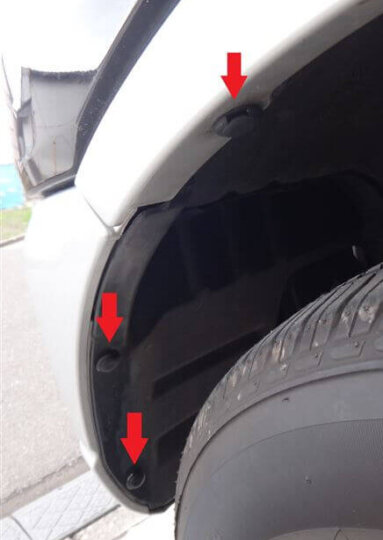
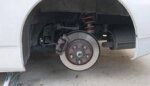
Remove the three black clips that secure the fender liner (black resin plate on the circumference of the tire) inside the fender to the bumper and arch molding.
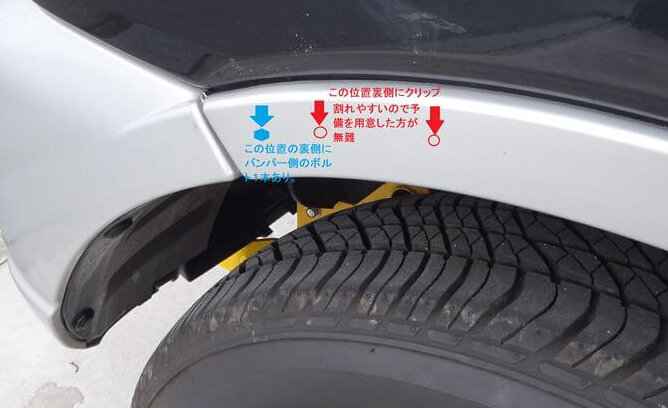
The bumper wraps around to the side, with its end sunk under the fender arch molding and bolted there. To remove this bolt, you need to lift the front end of the fender arch molding and remove the bolt on the back. In order to lift this fender arch molding from the body, it is necessary to remove the white clip that is fixed to the hole in the body on the back side, but this clip does not come off easily. If you pull it forcibly, the clip will break with a high probability, or if you do not pull it well, the plastic of the part where the clip of the arch molding will be fitted will be damaged. When the temperature is low, I think it is necessary to warm this part and blow off the lubricant to make it easier to pull out.
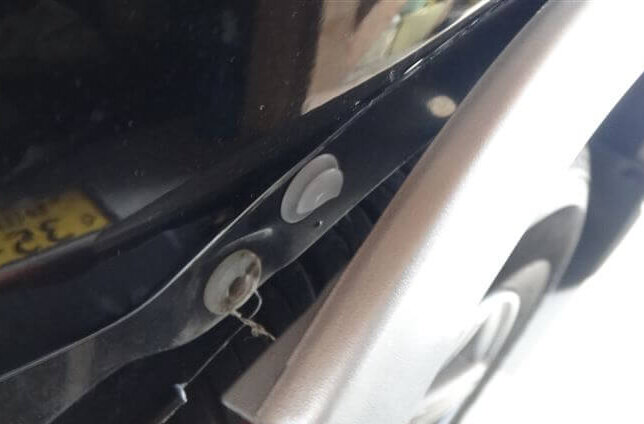
The photo shows the bolt already removed. The front is the hole where the bolt is stopped, and the back is the clip that holds the fender arch molding. The head of the clip is damaged because the clip does not come off and remains attached to the body. Not only that, it broke to the point where the head of the clip on the arch molding side could be inserted. I managed to repair it with an adhesive. Even though I was careful, it looked like a special clip because it was damaged, so I went to the parts section of the dealer during the work and bought about 4 clips including spares.
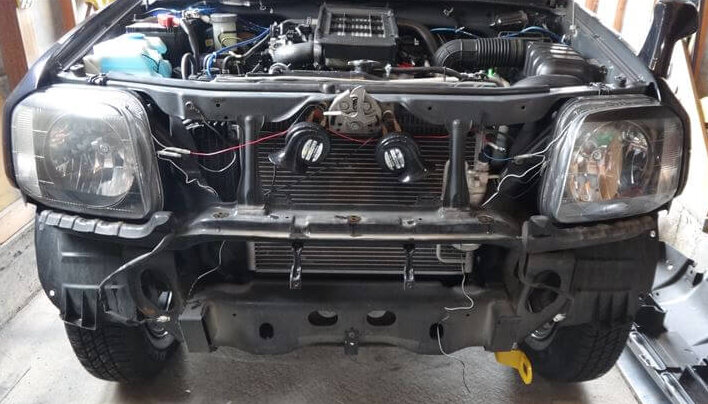
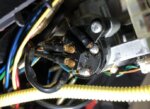
After that, if the fog lamp is attached, simply remove the wiring on the vehicle body side at the wiring coupler fixed to the fog lamp bracket, and then pull out the bumper to remove it. The bumper installation should be done in the exact reverse order.
Clips are easily damaged, so it is safer to prepare them in advance.
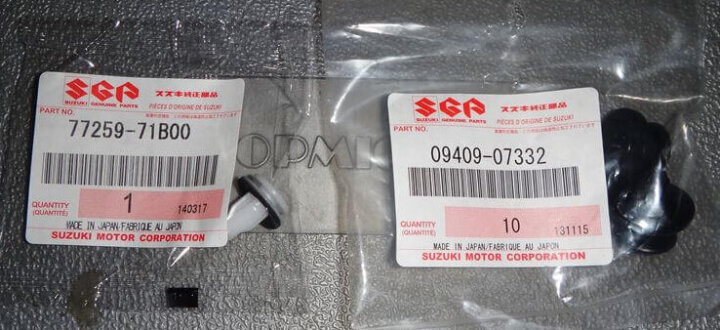
The black clips that hold the front grille and fender liner all seem to have the same shape.
★ Part number 09409-07332
The clip that holds the fender arch molding is a slightly smaller white clip.
★ Part number 77259-71B00
- Previous Posts
Suzuki Jimny Ignition Switch Replacement 2021.07.22
- Next Post
Honda S2000 How to Improve the Parking Brake 2021.08.08