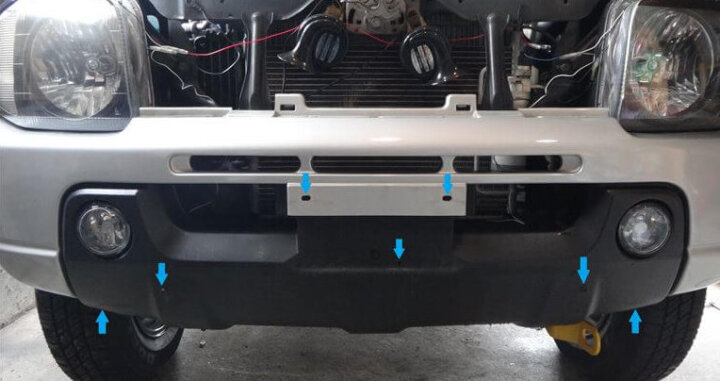
The red arrow in the photo is the clip position, and the blue arrow is the bolt position. First, open the hood and remove the front grill. There are only three black clips at the arrow on the photo, so pull it out and remove the grill. The photo is already after removing the grill. When you remove the grill, there are three black clips on the upper part of the bumper below it (the part indicated by the arrow below), so remove it. Remove the number and under garnish attached with the bolt or bolt nut at the position of the blue arrow. For the under garnish, if you do not remove it, you will not be able to see the bolt that holds the bumper at the bottom, so you will not be able to turn the bolt. I don’t think this work is necessary unless the car is equipped with an under garnish. The photo is after removing the number and under garnish. Remove the 3 bolts on the underside of the bumper and the 2 black clips on the outside. Remove the three black clips that secure the fender liner (black resin plate on the circumference […]
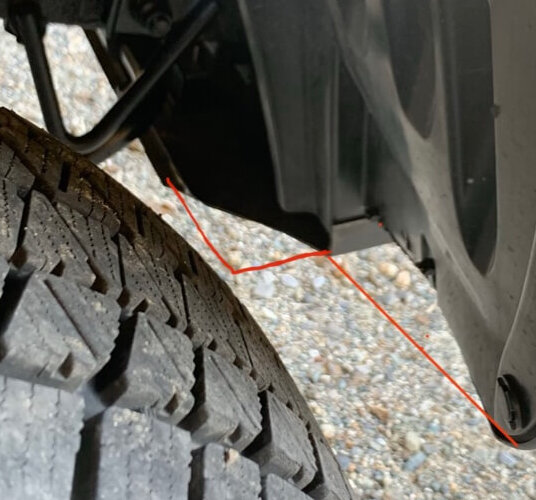
We will cut the front bumper to install this tire. It’s 2 inches up, but with this size it will definitely come in contact with the bumper due to bumps during off-road driving. I’m looking forward to it. Today is a holiday and the weather is nice, so it’s a good day for bumper cuts. Immediately, a rubber windshield? Mudguard? Is in the way. Since it is fixed with 2 rivets and 1 screw, destroy the rivet with a drill and remove it. Also remove the surrounding resin clip. Suddenly, it is a completed photo. This is the position where the former bumper was located up to the red line. I cut the lower part of the bumper over 5 cm with my electric saw, cut the corners diagonally, and then made two holes in the lower part of the bumper. Furthermore, while pushing the inner liner toward the front side of the vehicle, fix the rivet hole, clip hole and lower part of the bumper of the inner liner with a binding band. I didn’t cut the inner liner. And it’s okay because you can’t see it unless you look from below. Unpainted resin is easy to process, isn’t […]
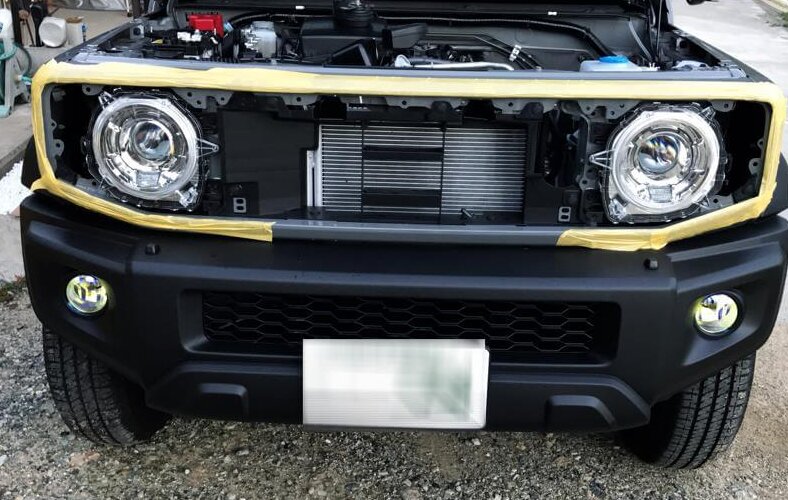
I was interested in the installation of the horn and the structure around the headlights, so I will remove the grill. First of all, protect the body with curing tape so that it will not be scratched. Remove the clips (red circles) on the left and right of the bonnet catch. The upper side of the photo is the front. There are clips like Phillips screws under both ends of the five slot grill, so turn it 90 degrees with a Phillips screwdriver. It doesn’t matter which direction you turn it. The claws in the back will come off, and you will be able to remove the grill. Then pull the grill little by little to remove the clip. There are many clips on the top of the grill, so be careful not to break the grill and remove it little by little. When removing the grill completely, the blinker will remain on the grill side, so disconnect the connector. This completes the removal of the front grill.
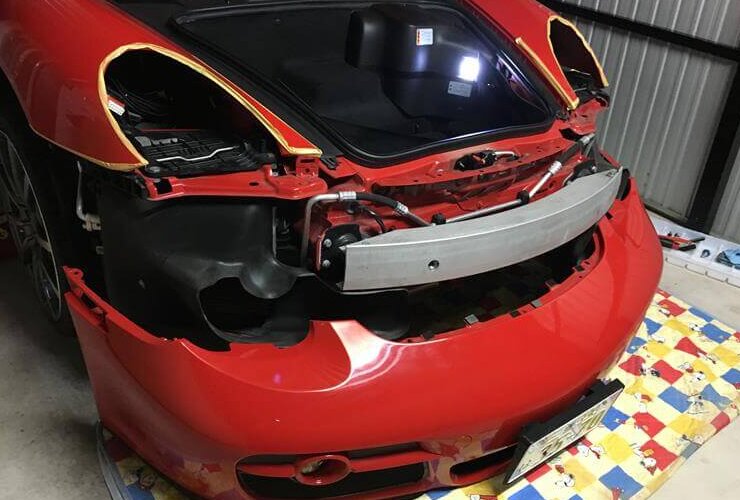
First, remove the headlight with the attached tool. How to remove is written in the instruction manual. After removing the headlights, also remove the connectors that connect the fog lights and the small lamps. Taking a picture of each will help you when you put them back. Remove the 7 Torx screws under the bumper. Remove the side marker. Also remove the lens. Remove the Torx screw on the inner fender. Jacking up creates space and makes it easier to work. The most difficult part this time. Slide the inner fender and remove the Torx screw that is stopped upward on the side marker. (Yellow arrow part) Remove two places on the left and right of the clip. Remove the three Torx screws that are fastened from the top of the trunk. Pull the bumper forward. Put masking tape on the parts that are likely to be scratched. Porsche Cayman bumper removal is complete.