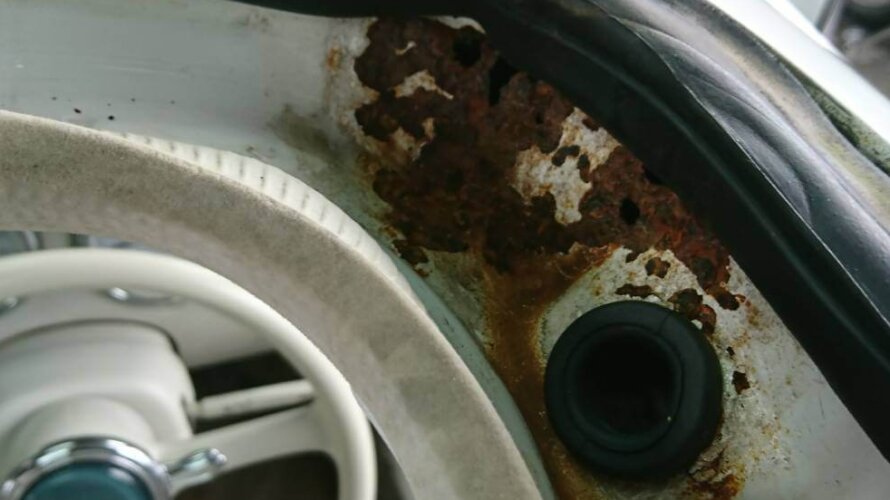
Rust and corrosion of the body You can see the paint floating on the car body. It is due to rust and corrosion. After all there was a hole. That is also left and right. It is recommended to cut the rusted part and work with an iron plate, putty finish & paint, rather than just putty finish & paint. Rust and corrosion on the rear window panel This is a common event in Figaro. Watch out for Figaro, whose rear window panel looks like the image. When it was detached, it was rusted by 30 cm and was tattered and unreproducible. I knew in advance that it couldn’t be repaired, but I didn’t think it was 30 cm. The genuine product is made of iron and no parts are supplied. So I bought a window panel made of resin at the Figaro shop in England. I also bought a hood for replacement. There is also new rust and corrosion on the vehicle body side. There was a hole when I rolled up the rust. I will repair it here as well. The replacement and repair of the rear window and hood has been completed.
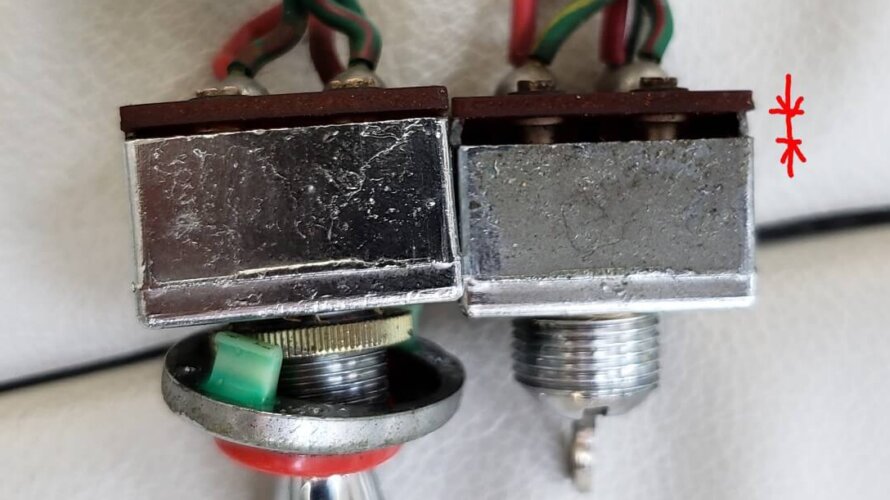
Have you ever experienced that when you cross a step with Figaro or Pao, hazards and blinkers turn on even though you are not operating it? My Figaro is so. Therefore, I am worried that the blinker will turn on every time I cross a step. First of all, pull out the lever of the switch. Next, insert a flat-blade screwdriver from below to remove the decorative panel in the foreground. Yes. After that, remove the ring, remove the connector and pull out the switch from the back to complete the removal. I removed the speedometer to ensure workability. The switch on the right is the switch that was removed, and the switch on the left is the switch that was purchased as a spare. As you can see, there is a gap between the base and the main body at the red line. If there is an impact due to this gap, the contacts will turn on without any operation, and the hazards and blinkers will be on. Seen from the side, it looks like this. The repair method is simple, crush the red circle with a vise. Crush it with a vise like this. There are four corners, […]
See the article below for how to remove the retractable headlight assembly. Remove the two screws and disassemble the switch. There is a black dirt on the contact. Especially, black dirt are attached to the central contact and the inner contact. Clean this with a waste cloth. It has become clean. With this, I connected 12V and confirmed the operation, but it stopped at a certain point on the up side. Further verification. Even if you look at the circuit diagram, it’s a simple circuit, so what’s wrong? There is no problem because the relay clicks. Probably due to poor contact. The operation of the retractable light is like this. A short circuit between the red circle in the middle and a blue circle on the inside is a half-turn up operation, and a short circuit between the red circle in the middle and the yellow circle on the outside is a down operation. How do you control it … The blue circle on the circumference of the inner terminal has no copper plate and is disconnected from the middle terminal. This is the position where the motor should stop working. At that time, the terminal in the middle and […]
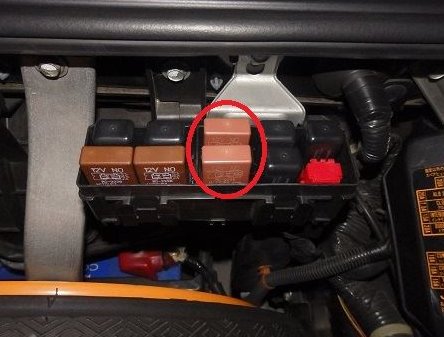
Since the beginning of this year, the air conditioner has become unwell, so I repaired it. First, replace the air conditioner control unit. I ordered one genuine part, “37735-PR7-A01”. The photo is an old one after replacement. The installation location is a black box next to the main relay on the rear of the driver’s seat. It is fastened with two 10mm screws and is a coupler on, so it can be easily replaced. However, although the screw below is not shown in the photo, the gap is so narrow that it is difficult to detach it without removing the interior. It’s easy to get with tools. After replacing this, the air conditioner compressor started to work well and the cool breeze came out. Just in case, I also exchanged these two relays. There are two “39794-SL0-J01” I replaced the two inside the red circle in the innermost case in the bonnet. One in the front is an AC relay, the other in the back is a condenser fan relay. It has claws, so it’s difficult to remove, but when inserting it is easy because you only push it in. It is done!