NSX NA1 How to Replace ABS Part 1 (Unit Edition)
- 2021.07.03
- Fiddling
- ABS, ALB, Anti Lock Brake, Antilock Braking System, Honda, NA1, NSX, Replacement
This article is a continuation of the article on removing ALB (Anti-Lock Brake).
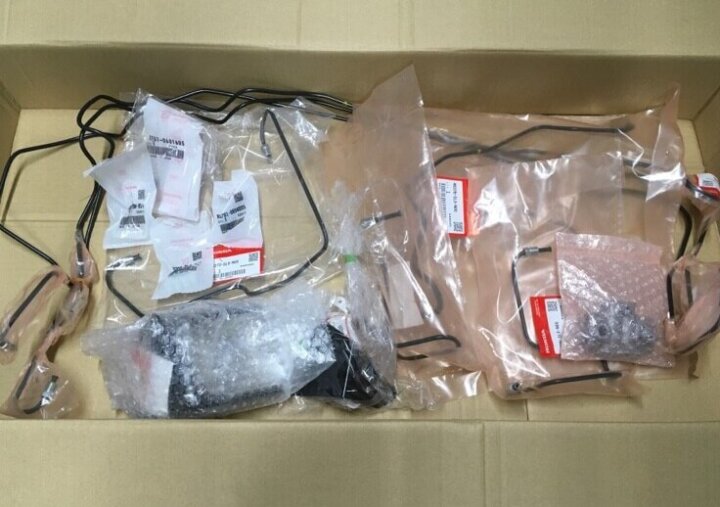
We have prepared in advance the genuine parts required for ABS replacement. Other than those that can be diverted from ALB, mainly brake piping, modulator brackets, proportioning valves, bolts, etc.
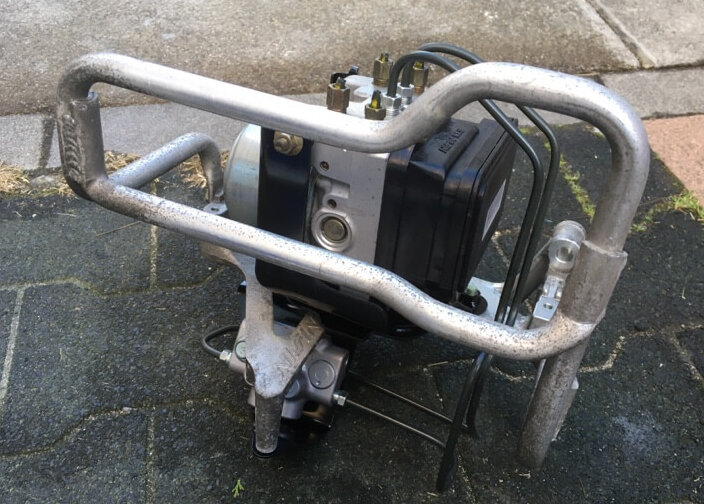
First of all, I assembled around the modulator using the bracket etc. removed from ALB. I polished the things to be reused and got rid of a little dull, but it’s more difficult.
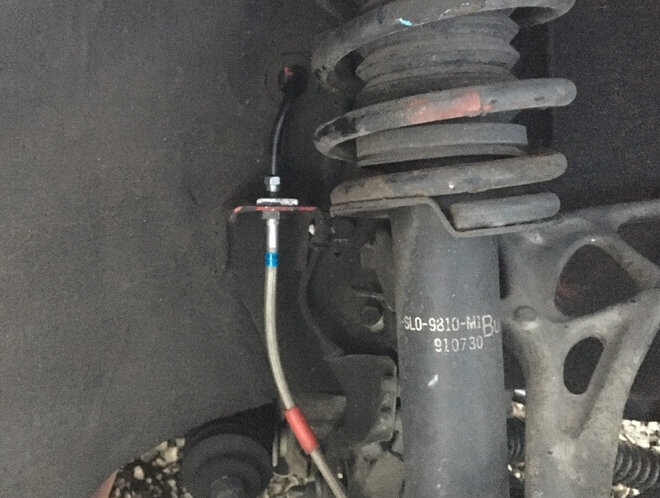
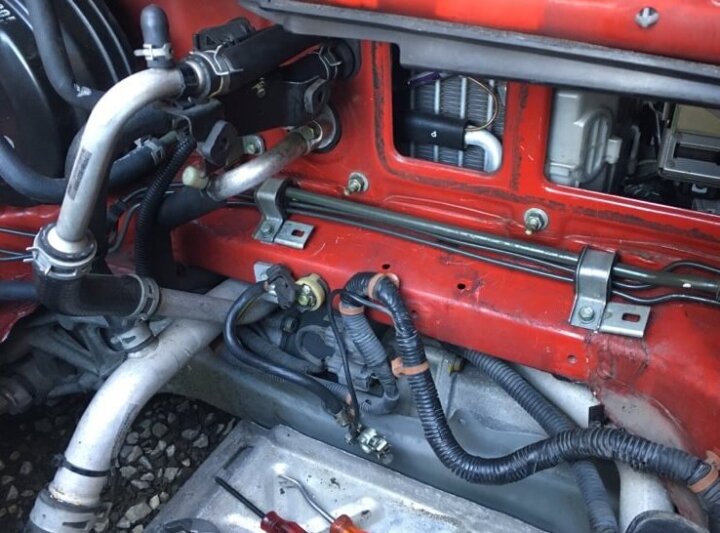
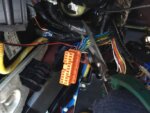
It’s finally plumbing. This is a photo of the front right, but I will insert new piping from here. I could hardly see the tip of the pipe under the master back, and there was a pipe that was quite squeaky, so it was difficult to decide in what direction to put it in, so I had a hard time. After trial and error, it was settled.
It seems that the pipe for the left front will never be attached as it is in terms of layout, so bend the part that enters the tire house, pass it through, and then return it to the original angle.
After that, install two rear pipes and bolt them in two places with the original fixing brackets. Fixing this metal fitting is actually very difficult. I wrap the rubber that holds the pipes together with this metal fitting, but in a narrow space, it does not return in a neat shape and the bolt holes do not fit. I managed to get the hang of it at the end, but it’s not a very expensive part, so it may be easier to fix it if you buy a new one. By the way, for MT cars, the clutch piping will be a plus, so I think it will be a little more difficult.

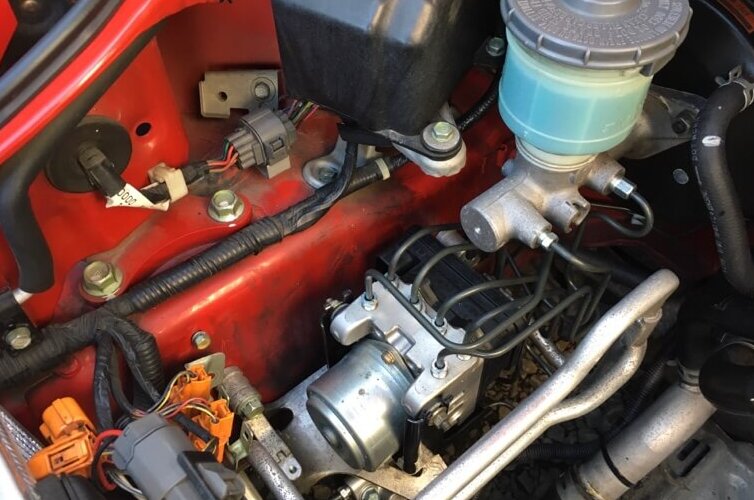
The ABS unit is fixed with three 14mm bolts as when the ALB unit was removed, but for the time being, it is temporarily fixed so that there is some play. Then fix the flare piping around the modulator. Be sure to fully insert it by hand and then fully tighten it with a flare nut wrench. When tightening by hand, if the angle shifts even a little, it will not turn deeply, so I think it is better to adjust the insertion angle while gently shaking the unit and piping and tighten by hand.
Finally, fully tighten the three bolts of the unit. In the photo, I prepared a waste cloth because I thought that the brake fluid would drop when I removed the old pipe of the master cylinder, but it did not drop much unexpectedly.
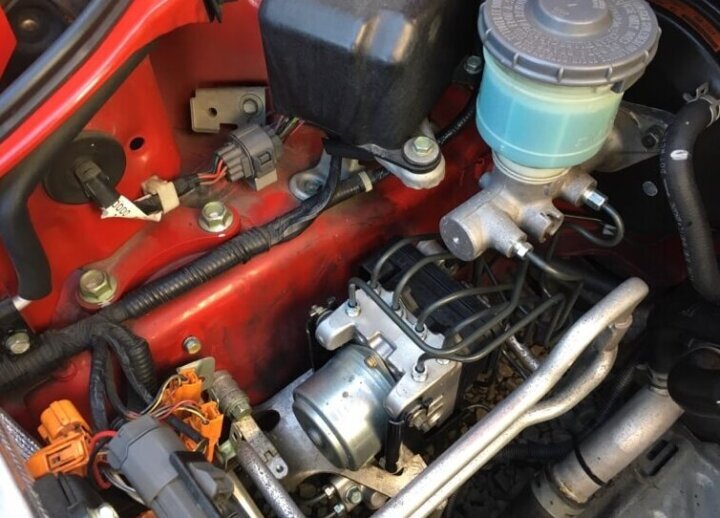
ABS unit installation is complete. But it’s not over yet. The ABS modulator and the coupler where the ALB computer in the room is located must be connected with a harness. This work will be done at a later date.
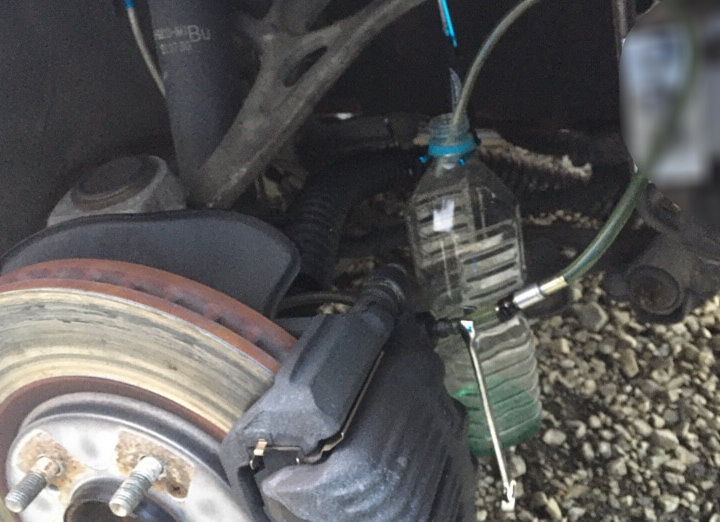
Brake air bleeding work. I’m used to bleeding air by myself using a one-way valve. This time, I will do it patiently because there is a lot of air in it by replacing the piping. On the way, the air came out with a loud noise. As a result, more than 500cc of old fluid came out, so it may have been replaced with almost new fluid. The brake touch returned firmly, and there was no problem with the brake test in the parking lot.
Next time, we will continue to Part 2, harness connection work.
- Previous Posts
NSX NA1 How to Remove ALB (Anti-Lock Brake) 2021.06.10
- Next Post
NSX NA1 How to Replace ABS Part 2 (Harness Edition) 2021.07.09