Considering the model year, I replaced the genuine radiator, which can burst at any time, with an external product. By the way, all the coolant is replaced. First, open the drain cock at the bottom of the radiator and drain the coolant. Jack up left and right, and hang the rigid rack only on the rear side so that the front side goes down. While removing the coolant, remove the bracket on the top of the radiator and the relay-related connector of the electric fan. When the coolant is almost drained, remove the upper hose and lower hose, and pull out the radiator directly above. Completed removal of genuine radiator. The radiator to be installed this time is TYPE-F made by KOYO. The capacity is increased to 48 mm compared to the genuine thickness of 32 mm. Dry weight is about 4.25 kg. It ’s all aluminum, so it ’s very light. The weight of the genuine radiator is about 4.02kg, so it is a little heavier. I’m moving the electric fan to a new radiator, but the fan shroud and the hose attachment part interfere a little, so I cut out that amount. After assembling the electric fan, install […]
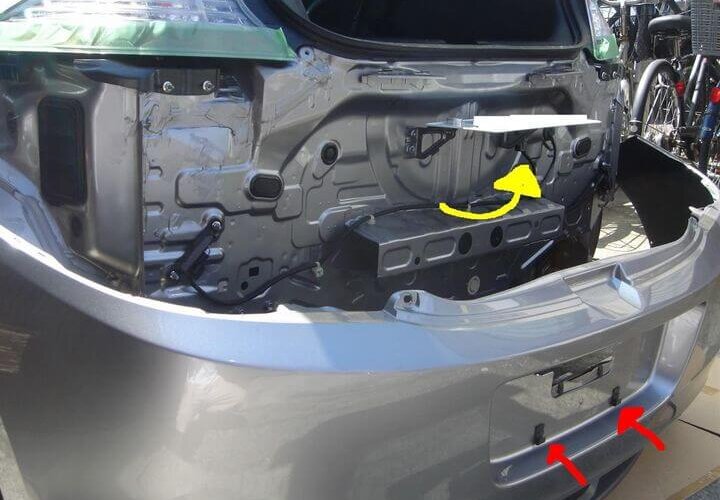
First, put a protective covering on the body. Remove the two screws from the tire house. There are a total of 4 on the left and right. Remove the hexagonal screw where the hatch was opened. There are a total of 2 on the left and right. Remove the screw underneath and remove the clip that stays on the body. There are a total of 2 screws on the left and right, and 4 clips. Now that there is nothing to hold the bumper in, pull it out. However, the license plate was caught and could not be removed. The license plate pops up when you remove the hook (red arrow) that holds the bottom side. Then, dodge the gap in the bumper and remove it. And don’t forget to remove the coupler of the license plate light. The removal is completed successfully.
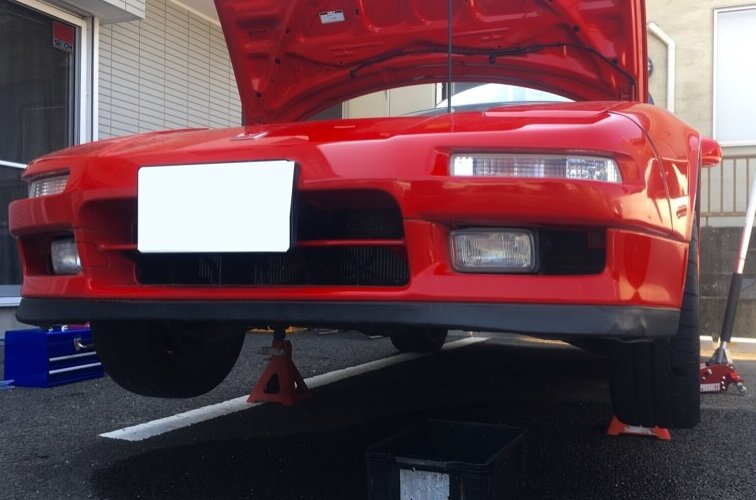
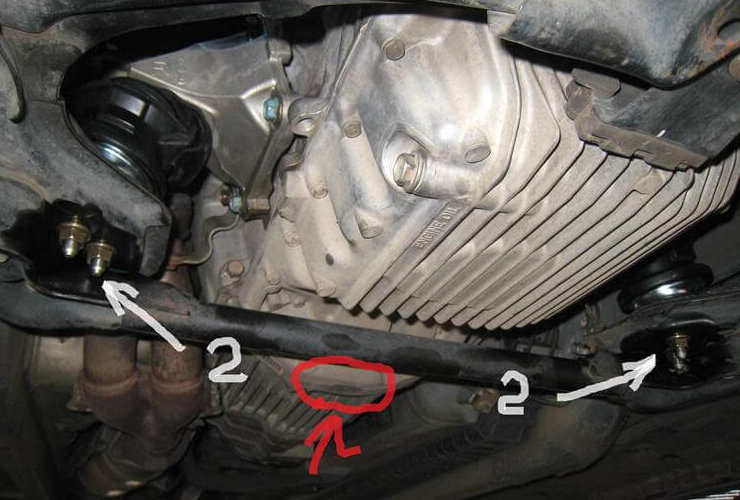
Replacing the engine mount is a little difficult. Anyone with motivation and patience can do it. The tools are a box wrench and a socket wrench. The smaller the socket, the better. Rigid racks and garage jacks are a must. The rest is a genuine scissors jack. Perform normal jack up. Raise it enough for people to enter. Next, remove the two nuts on the underside of the mount. There are a total of 4 on both the left and right. Then use a scissors jack to raise the engine at the joint between the engine and the mission. It is around the red circle. Raise the engine until the screw heads in this photo come out a little. If you have an engine damper, don’t forget to remove it before raising the engine! In addition, it may be better to remove the intake of the aftermarket product for safety. Remove the four bolts on the driver’s side and engine side shown in this photo. I think that you can take a lot of space by lowering the coupler of the air conditioner cord from the air conditioner compressor and removing it, and by removing the ground wire from the […]
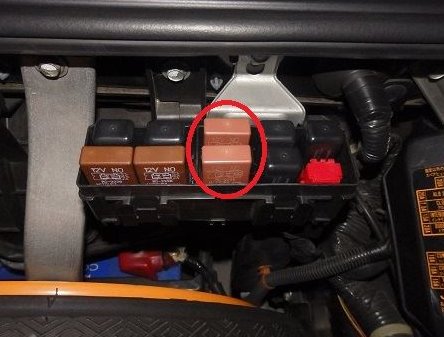
Since the beginning of this year, the air conditioner has become unwell, so I repaired it. First, replace the air conditioner control unit. I ordered one genuine part, “37735-PR7-A01”. The photo is an old one after replacement. The installation location is a black box next to the main relay on the rear of the driver’s seat. It is fastened with two 10mm screws and is a coupler on, so it can be easily replaced. However, although the screw below is not shown in the photo, the gap is so narrow that it is difficult to detach it without removing the interior. It’s easy to get with tools. After replacing this, the air conditioner compressor started to work well and the cool breeze came out. Just in case, I also exchanged these two relays. There are two “39794-SL0-J01” I replaced the two inside the red circle in the innermost case in the bonnet. One in the front is an AC relay, the other in the back is a condenser fan relay. It has claws, so it’s difficult to remove, but when inserting it is easy because you only push it in. It is done!
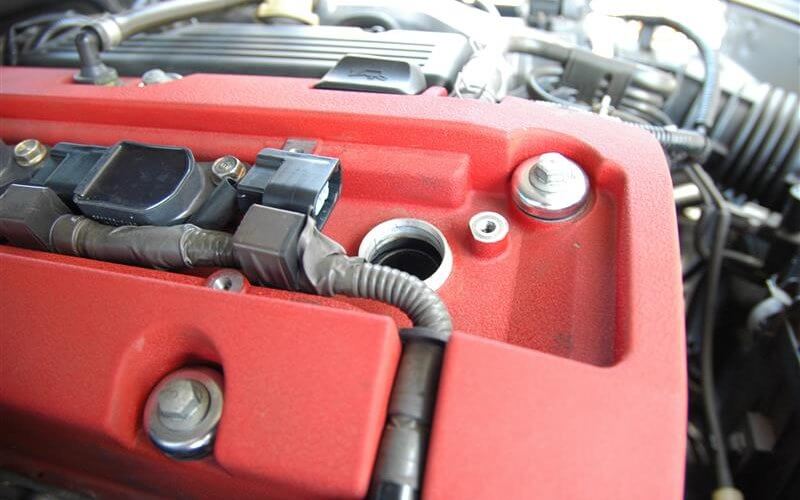
Recently, the check engine lamp flashed several times while driving S2000. The auto dealer’s mechanic confirmed that the engine was misfiring. The cause of the misfire has not been identified, but decided to replace the spark plug and ignition coil to eliminate the possible causes. First, remove the plug cover and remove the ignition coil and plug in this order. Check the removed spark plug. The condition of the plug is better than I expected. However, the gap was about 1.3mm compared to the new 1.1mm. It was almost limit value. Comparison of old and new plugs. An old one is the NGK Iridium MAX. It is a long-life plug, but it seems that it has reached the end of life at 30,000 km. A new one is DENSO iridium power. The new plug is not a long-life type, so I think that I have to replace it within 10,000 km. This is a new ignition coil. The genuine product is expensive, so I choose compatible product. Made by HITACHI. For F20C, you should choice “U14H01-COIL”. Comparison of old and new ignition coils. The genuine ignition coil is made by Denso. The plug entry is brown and dirty. Install the […]