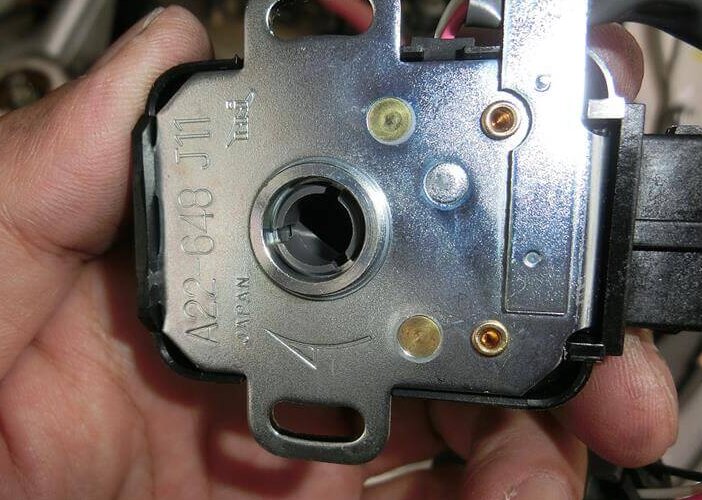
Recently, intermittent fuel injection during engine braking has recurred. I thought it might be because I had fixed it when I turned off O2 feedback before, but it seems different. There is also a flutter when the accelerator is suddenly stepped on, and it seems that the deterioration of the sensor is the cause when examining various things. Part number: 22620-05U01It’s a reasonable price of $ 50. Is it because it is also used in other models? This sensor has the following two functions, and the coupler on the main body side is the throttle valve switch. ・ Throttle sensor (voltage change due to throttle amount)・ Throttle valve switch (ON / OFF switch for idle judgment) First of all, the hose is an obstacle to turning the bolt, so pull it out. Remove the bolt by turning it with a 7 mm spanner or a + screwdriver. Remove the coupler on the main unit and the coupler with the cable. The coupler on the main unit has a pin to prevent it from coming off, so remove it. You can see the shaft by removing the sensor. There is a notch so you can see it when installing. There is […]
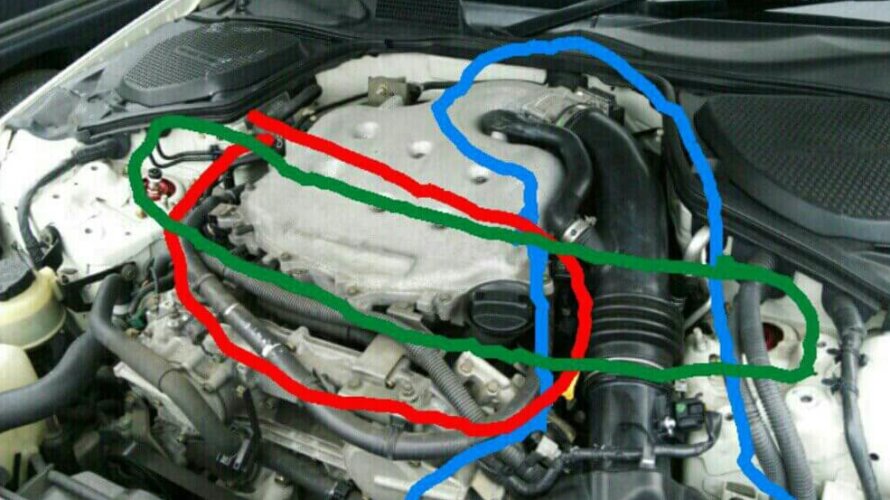
Preparation for cleaning the throttle chamber There is a problem that tends to occur with the 350Z that is more than 10 years old.“The accumulation of dirt and debris in the throttle chamber causes idling problems and stalls at startup.” The tools needed for the work are listed below. 10mm & 14mm ratchet wrench (It’s easy to have an extension of about 150 mm) flathead screwdriver carb cleaner lubricant Waste cloth The parts you need to remove are as follows. Engine cover Strut tower bar Suction pipe Air cleaner system The part that is color-coded in the image is that part. Red is the engine cover, green is the tower bar, and blue is the intake system. Removing the engine cover and tower bar in advance will make the work a little easier. How to clean the throttle chamber First, remove the tower bar. Because you cannot access the bolts on the engine cover unless you remove them. Remove a total of 8 bolts and nuts with a 14mm ratchet. At this time, if it seems to be stuck, apply lubricant. Next, the engine cover. This is a 10mm ratchet that can be easily removed by removing a total of […]
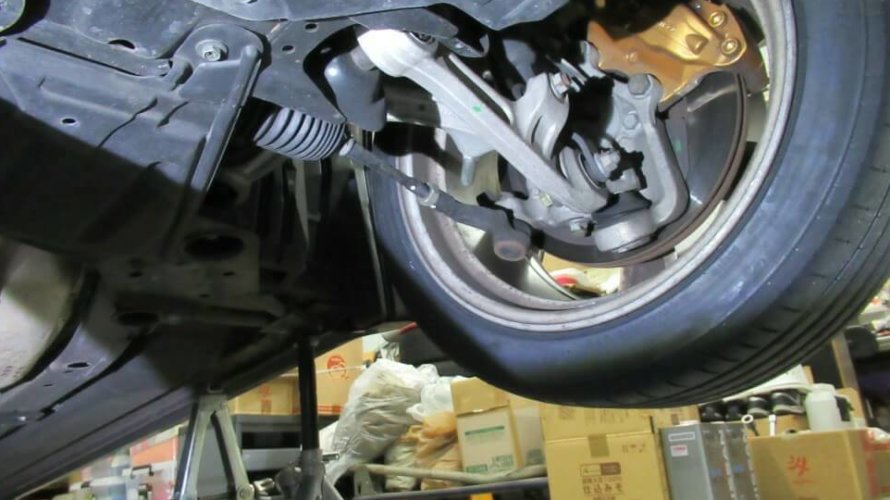
When going straight, I felt that the steering was slightly off to the right. However, most roads are built with a slope to the left. Considering that, I thought this was fine. However, compared to the other two cars in my home, the Prius and the Wagon R, the 350Z still has a strong sense of rightward orientation. So I made fine adjustments with a tie rod. First, the current toe-in measurement. Measure the groove pitch between the left and right tires with a tape measure. I’m worried that this will be not so helpful because the measurement accuracy is low, but I measured it for the time being. As a result of measuring several times, the toe-in was about 0 to 1 mm. In this case, if only the tie rod on the left side is slightly lengthened, it may good. This will increase toe-in, but it is generally said that the larger the toe-in, the better the straightness. My 350Z seems to have a slightly poor straightness, so I’m lucky if this improves even a little. Jack up. Lift the car body so that you can work. I think you can also work by raising it with a […]
Nissan Figaro hasn’t been able to raise the water temperature for a while. I thought that the thermostat was stuck open and replaced it. First, prepare the tools. Prepare a 10mm box wrench and ratchet wrench, a flat-blade screwdriver and water pump pliers. First, remove the turbo intake pipe. Remove the drain bolt of the radiator and remove the coolant. You can access the thermostat by removing the cooling water pipe to the thermostat. For the time being, the intake port of the turbo is packed with waste cloth to prevent foreign matter from entering. Thermostat appears if you remove three 10mm bolts. The thermostat is oriented and the TOP stamp is on top. Just in case, apply liquid packing and install it, and then assemble in the reverse order. Put new coolant in the radiator, turn the engine for a while, check that the thermostat opens, check the amount of coolant, and finish! It took about 40 minutes.
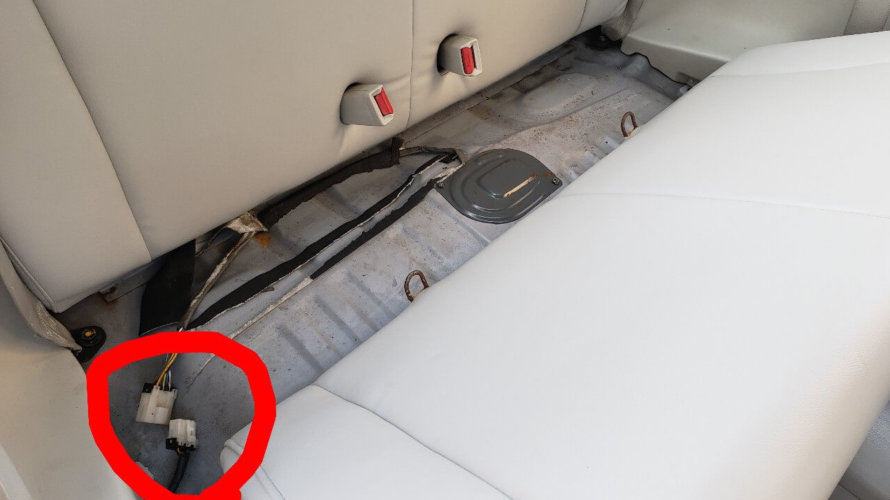
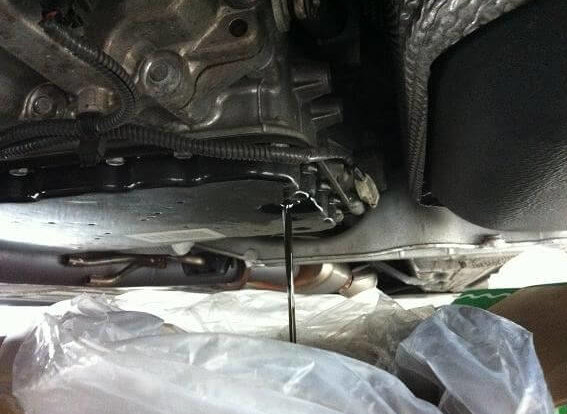
Let’s replace consumables as much as possible for preventive maintenance. This is a new fuel filter. First, release the fuel pressure. Let’s remove the fuel cap. You should hear a “psss” sound when you remove it. If you don’t hear it, may have leaked pressure between the fill port and the tank. Next, release the fuel pressure from the fuel pump to the injector. The most common method is as follows.1. Pull out the fuel pump fuse.2. Remove the fuel pump relay.Then the pump will not turn, so if you start the engine in that state the fuel will not go to the injector and it will stall in a few seconds and the fuel pressure will release. But Figaro doesn’t work this way. About step 1,there is a fuse, but it also serves as a power supply for the engine ECU, so it is no good. As you can see, step 2 is troublesome because you have to remove the air cleaner, and there is a possibility that the outside coupler will crack due to aging. So there is the easiest way. Unplug the fuel pump coupler. The place is the coupler shown in the image that appears after […]
Let’s change the transmission oil of Nissan R35 GT-R. It is convenient to work with a drill pump. About 8L of transmission oil for R35 GT-R. It is hard to inject all of them with a shampoo bottle. Anyway, to change the mission oil,have to remove two under panels. This is quite troublesome. Nissan genuine oil is expensive even though it is a semi-synthetic oil,so I chose fully-synthetic oil made by HKS. This one is cheaper and the oil film stability also seemed to be better than the genuine one. It is a female hexagon, which is unusual for a drain bolt. The mission is in the middle rear so it’s narrow. If possible, it’s easier to raise the front too. Although it looks black in the photo, it was green with little turbidity. Since it has exchanged at 8100 miles, it may be usable a little more if you do not go to the circuit frequently. Hexagon screw in drain bolt. It contains a straw-like thing. Used to measure oil level. If you do not remove this, the oil will not come out forever. The oil inlet is located at the base of the drive shaft. Since this heat […]
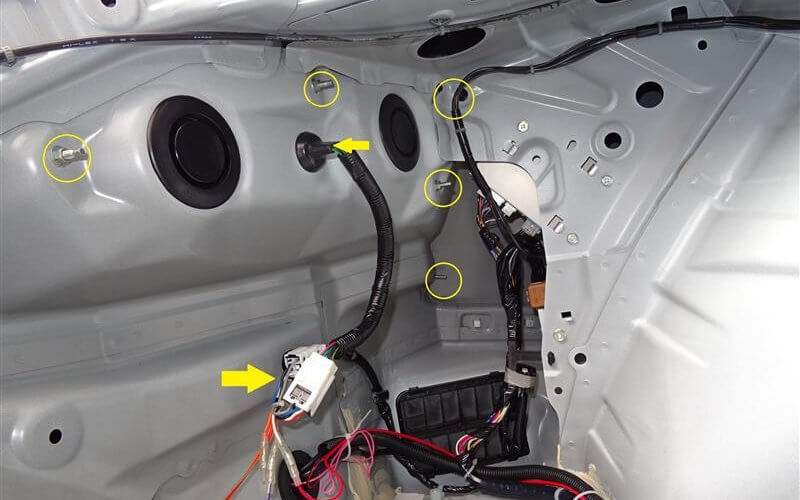
First of all, don’t forget to protect the mating place with curing tape. And recommend working with two people. Remove the 5 clips (all are not shown) indicated by the yellow circles and remove the panel. Remove the clip indicated by the yellow circle and remove the interior of the trunk. Do this for both sides. Also remove the floor mat. It is not fixed. Remove the nut indicated by the yellow circle. Remove the coupler indicated by the right arrow. Push the grommet indicated by the left arrow to the outside (bumper side). Do this for both sides. Remove the clip indicated by the circle on the rear tire house. Do this for both sides. Remove the cover of the tire house,and remove the nut that secures the rear under and bumper. The bolt fits into the hole in the rear under, so remove it. Do this for both sides. Remove the clips and nuts indicated by the circles on the left and right, and remove the diffusers on the both side. Although it is not shown in the photo, remove the clip that holds the center diffuser and rear under, and remove the rear under. The side can […]
It has been 13 years since the Nissan R35 GT-R was released. Since the initial model (2007–2009) has a large number of sales, the price of used cars has decreased. There will be more and more people who purchase second-hand cars and become new owners, or purchase as a base vehicle for tuning. So, for those who will be the owners of the future, as one of the 2008 model owners, I have summarized the problems that have occurred in my GT-R so far. The LED lamp behind the meter went out About 28,000 miles (about 3 years) later, the LED on the fuel gauge gradually began to blink, and at the end it completely disappeared. I had no problems in driving, but I replaced it because other lamps may go out in the future. I was lucky enough to be able to fix it with the manufacturer’s warranty. By the way, it is said that there is no report of trouble after it became the blue color meter of the current model. Looseness of the flywheel housing Familiar defects in 2007–2009 models, loose flywheel housing. When the mileage was about 57,000 km, it started rattling at high speeds, so […]
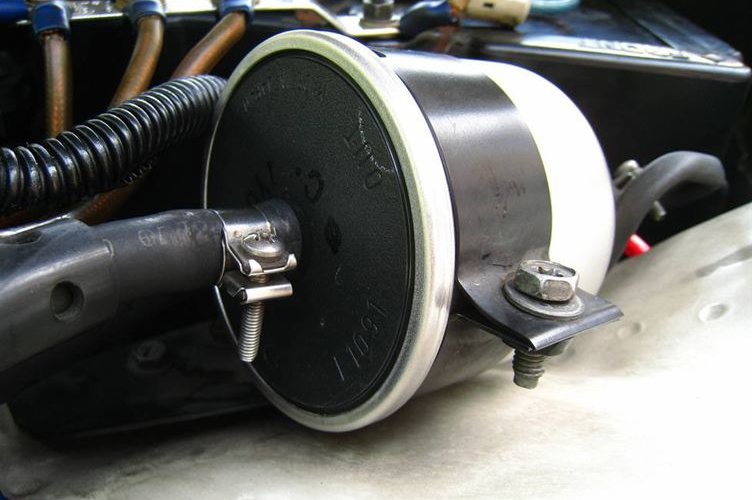
Replace 300ZX fuel filter to improve idling malfunction. Since it’s work on the fuel line, of course fire is strictly prohibited. This is the genuine fuel filter we were preparing. I also wanted to replace the hoses, but I couldn’t make it in time. First, work to reduce fuel pressure. Check the position of “FUEL PUMP” in the fuse box. Start the engine and remove the “FUEL PUMP” fuse that you just checked. It should stall after a while, if for some reason it didn’t stall, you must stop the engine. Remove the fuel cap. Then crank it several times. OK if the engine does not start. Remove the negative of the battery. Prepare a towel and aluminum vat and remove the filter. Fortunately, there was no struggle such as the hose not being pulled out as heard in the rumor, and it was not tough. The fuel was a little spilled, but it was okay. By the way, the fuel that came out of the filter. I could not disassemble the filter because there were no tools, but it may have been quite dirty. Installation complete. The material on the out side was different from the one that was […]
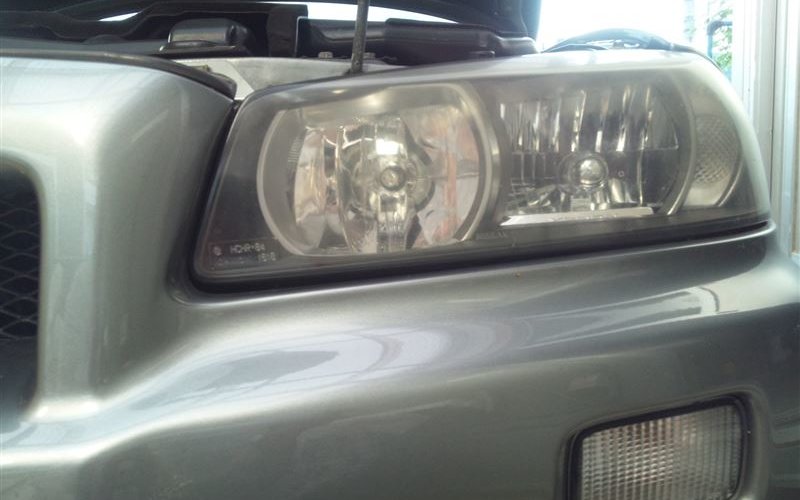
I’ve always been concerned the gap of front bumper. So I decided to fix it cheaply. There is quite a gap between the headlight and the bumper. This bothers me. This is the parts I will use here. – bolt(M6×120㎜)– high nut(M6×30㎜)Both are made of iron. You can get them for about $5 at home improvement center. Then carrying out. Attach the previous one to the bolt at the red circle. It comes out from the car body side and is fixed with a nut. First of all, take the stay fixing the bumper. You cannot install the bolt without removing this. Let’s install the bolt. I don’t think there is a problem without it, but it would be good to have a spring washer to prevent it from loosening. I think there are various ways to adjust it, but I adjusted it while lifting the bumper. I think that there is no problem if you adjust with your own method. Adjustment is complete. The gap of the bumper has disappeared successfully. As a precaution, keep in mind that if you raise it too much, the hood will not close. By the way, this time I dropped the bonnet from […]